Butterick 6250: Whimsical Vintage Cotton Pyjamas

2021-03-04_18-36-40.jpg

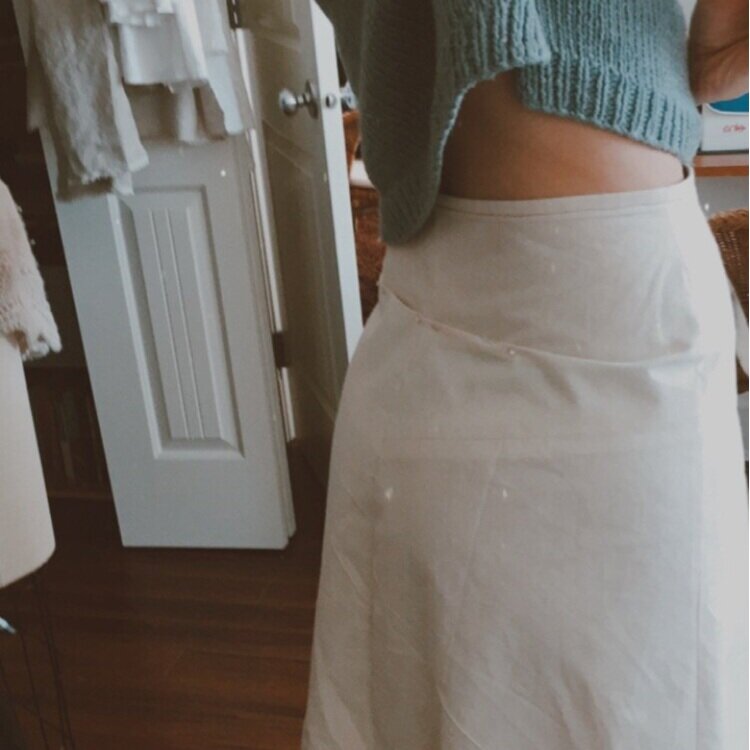
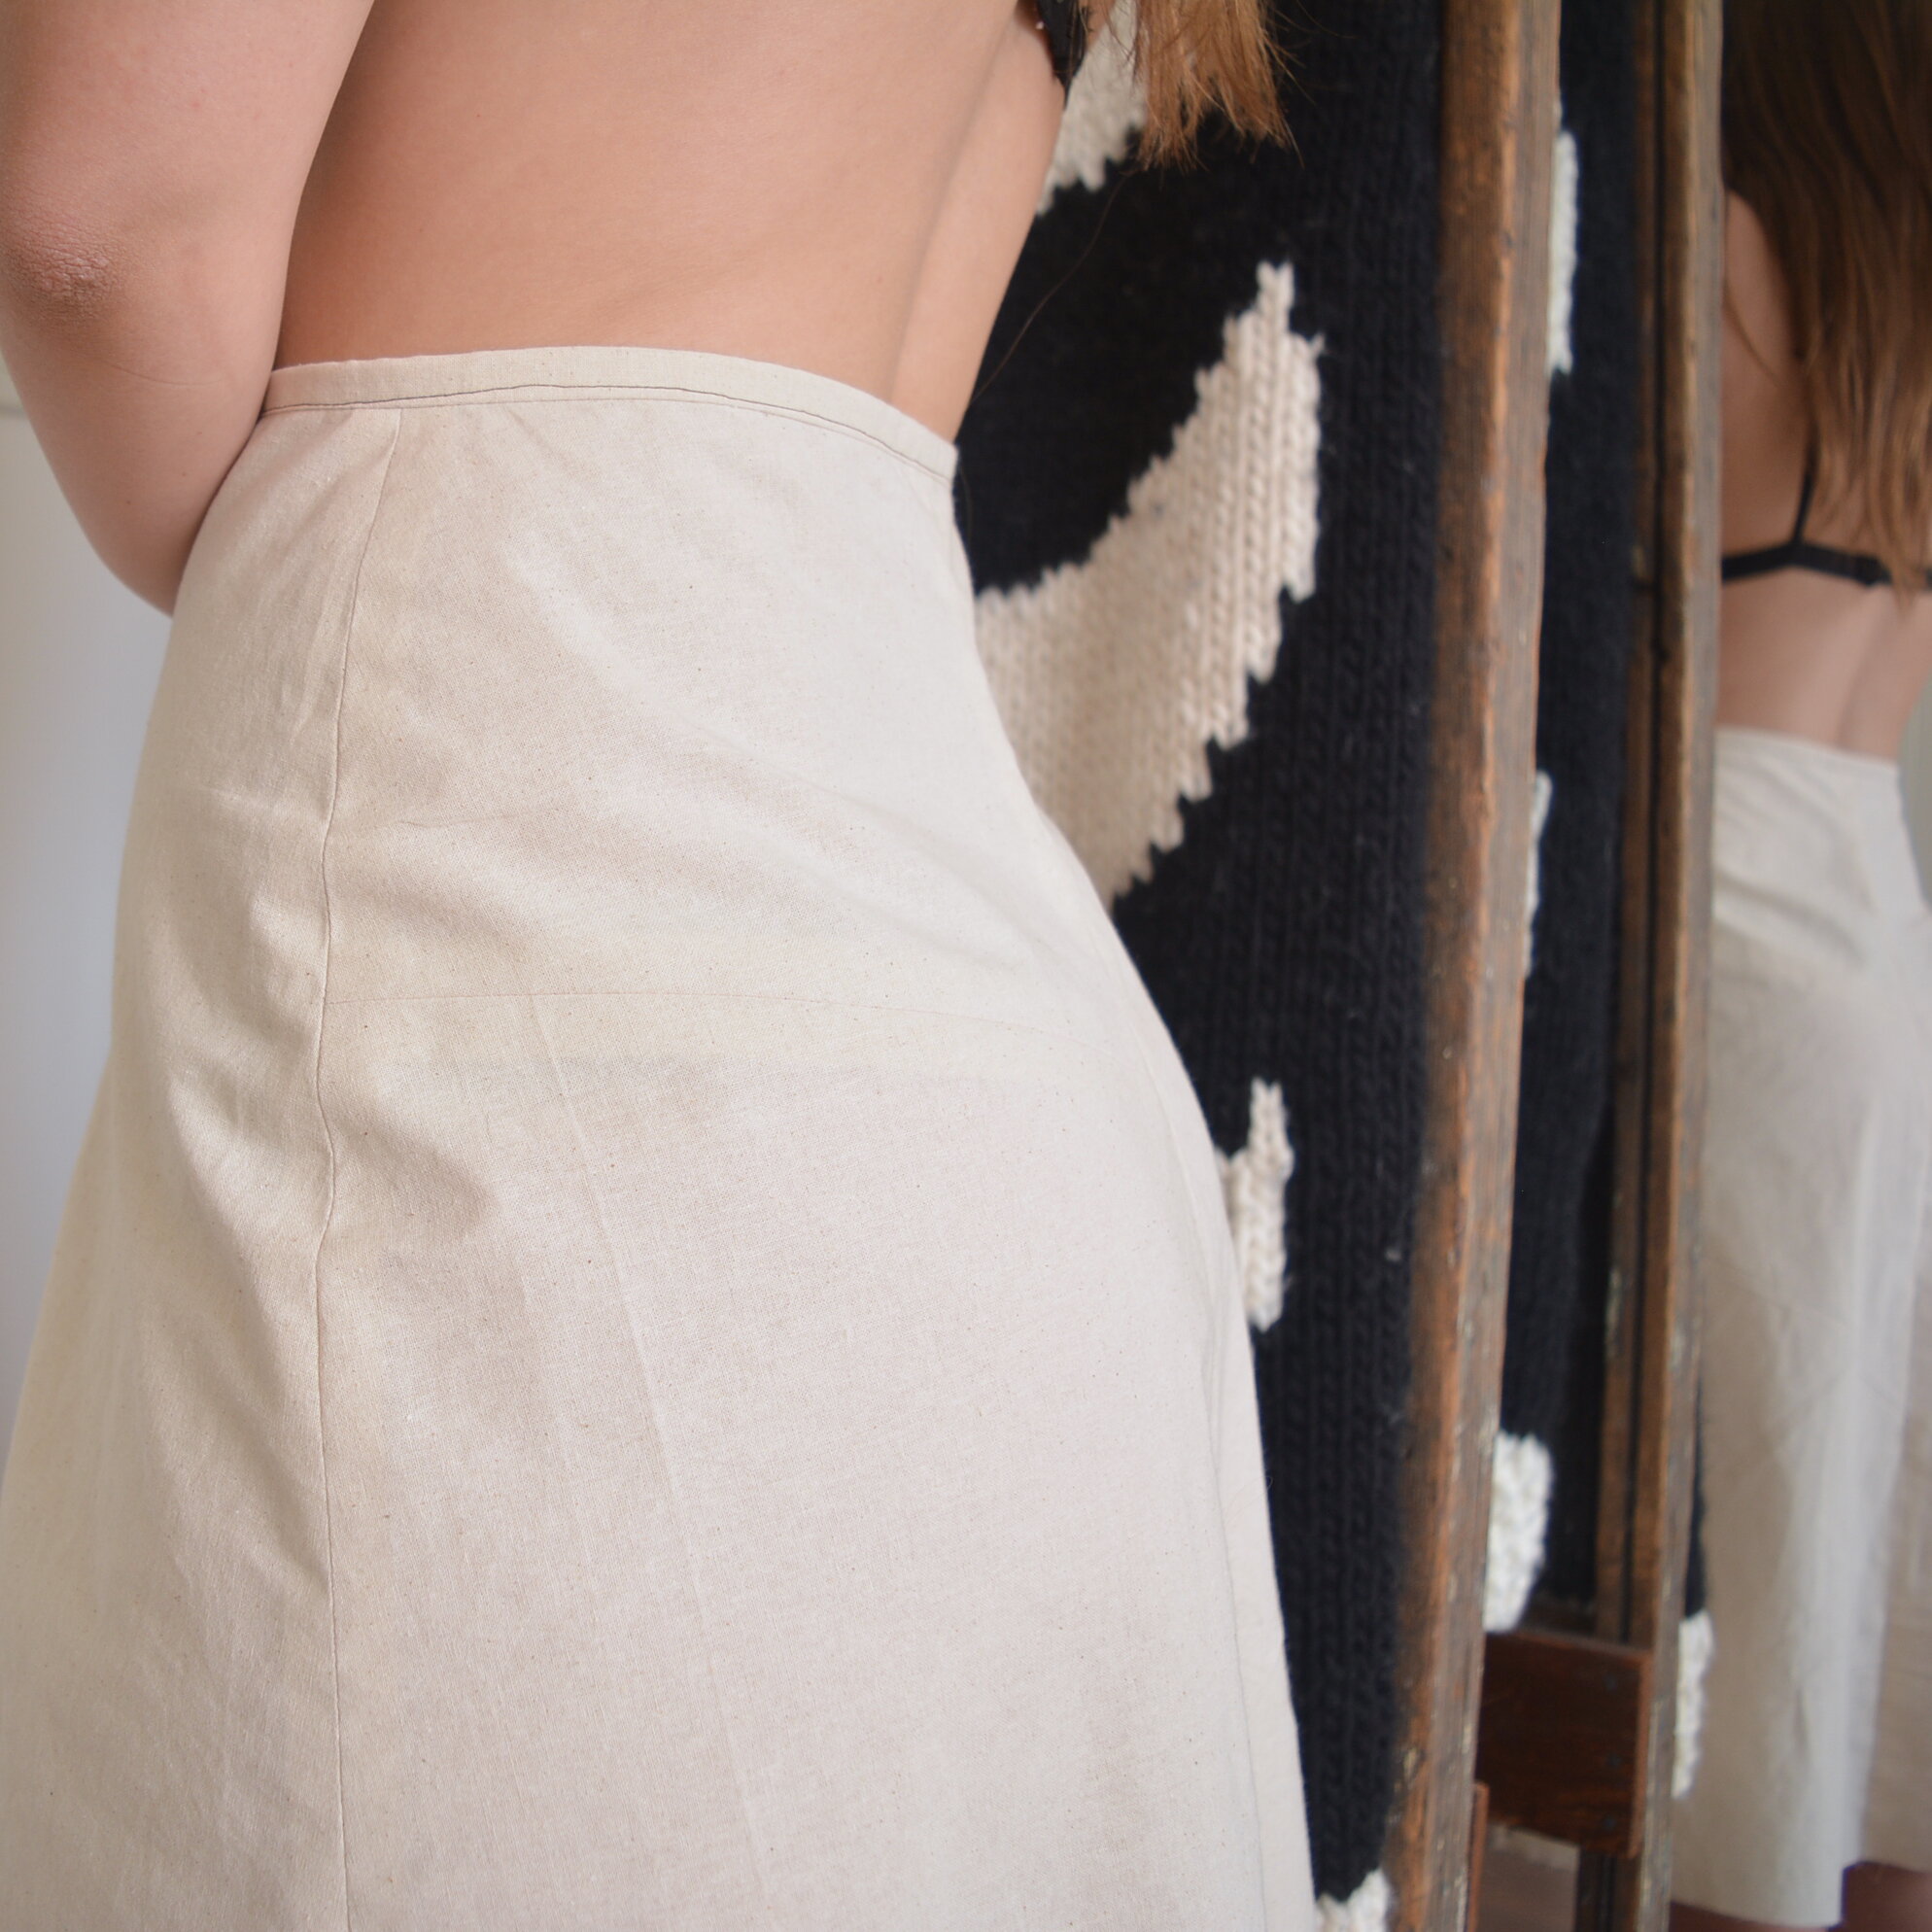
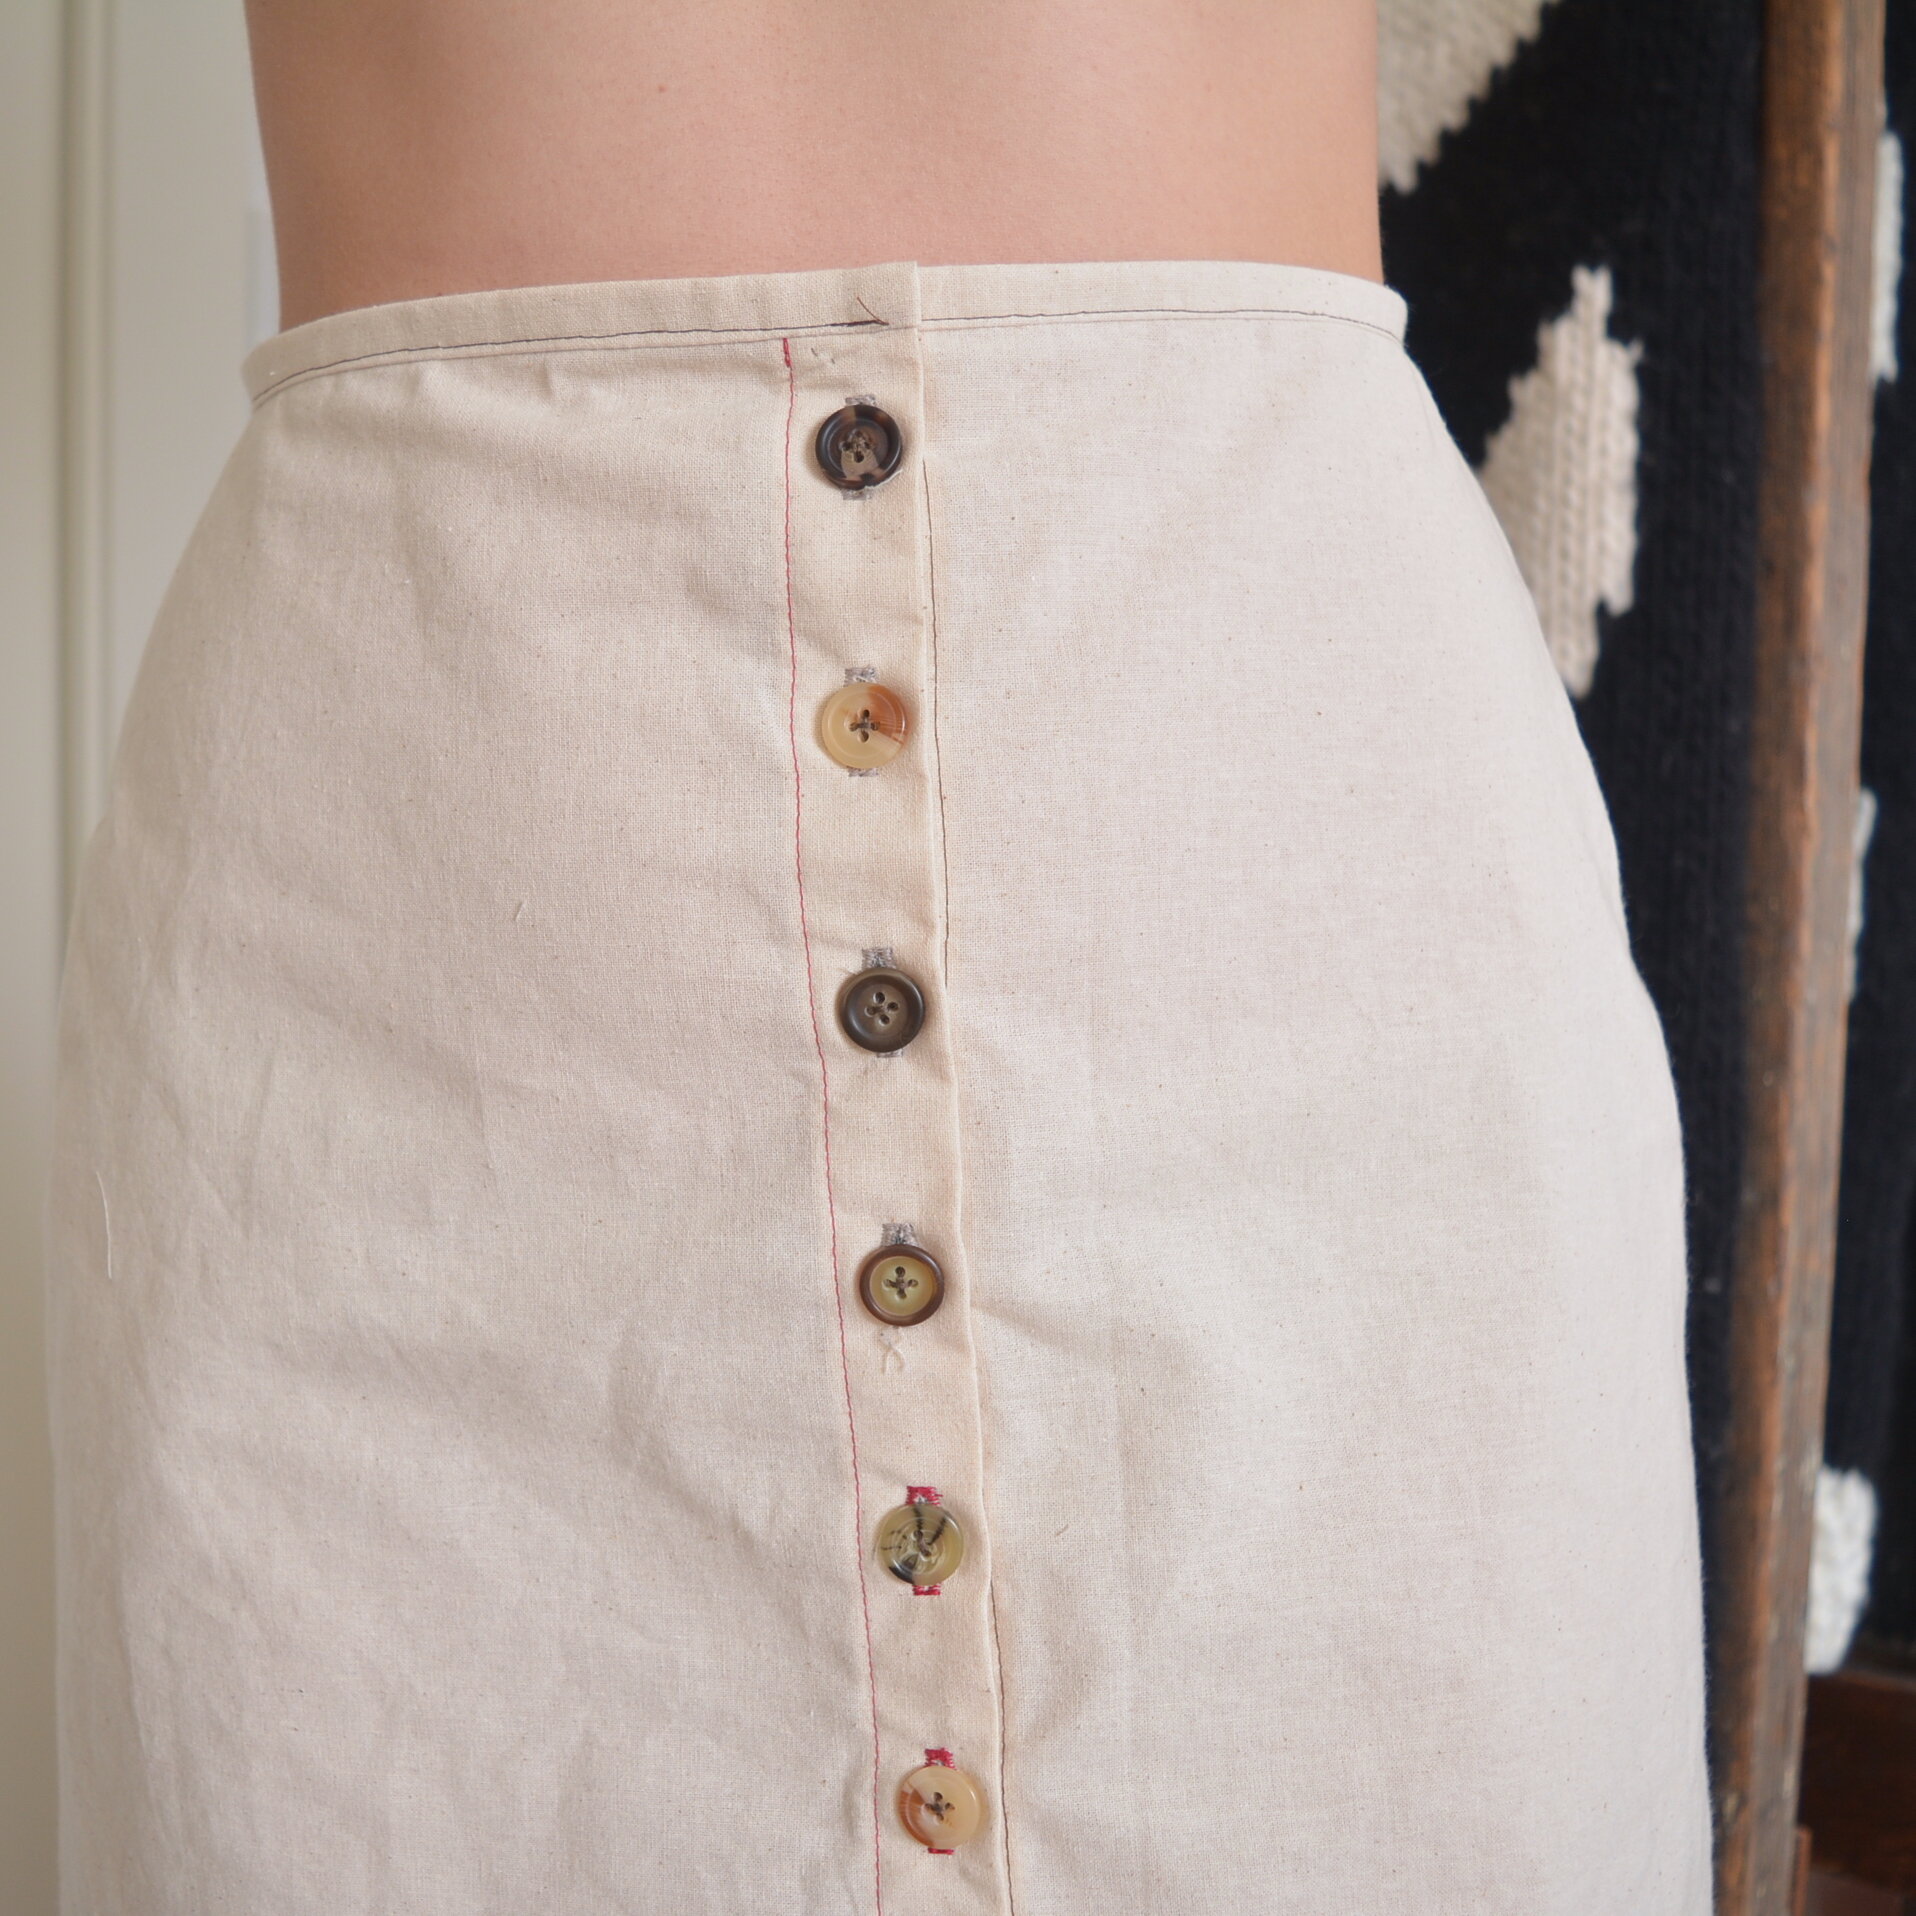
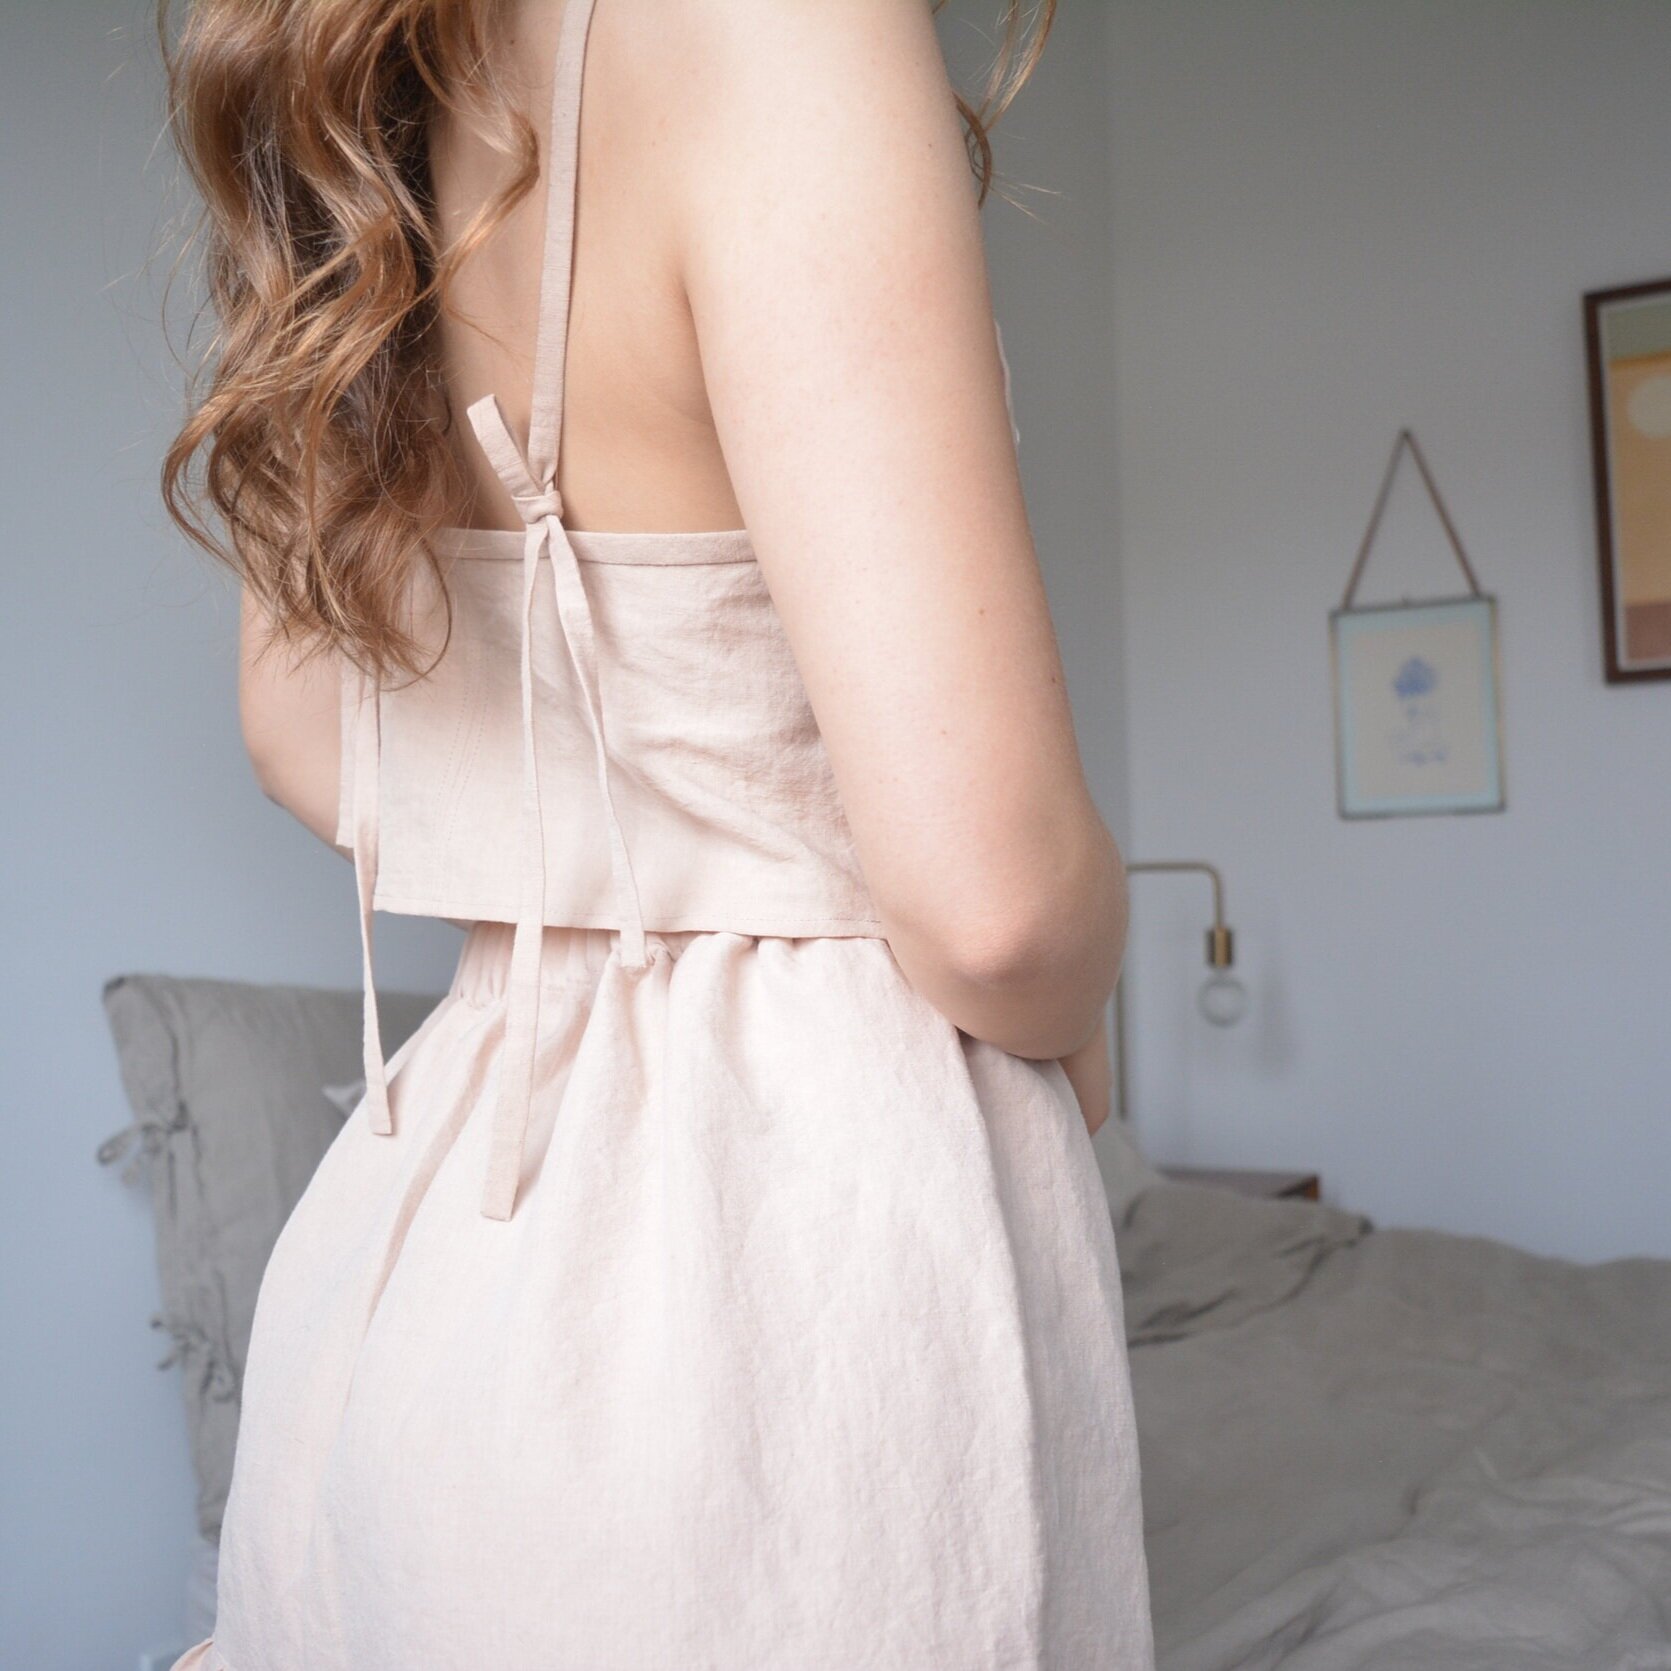
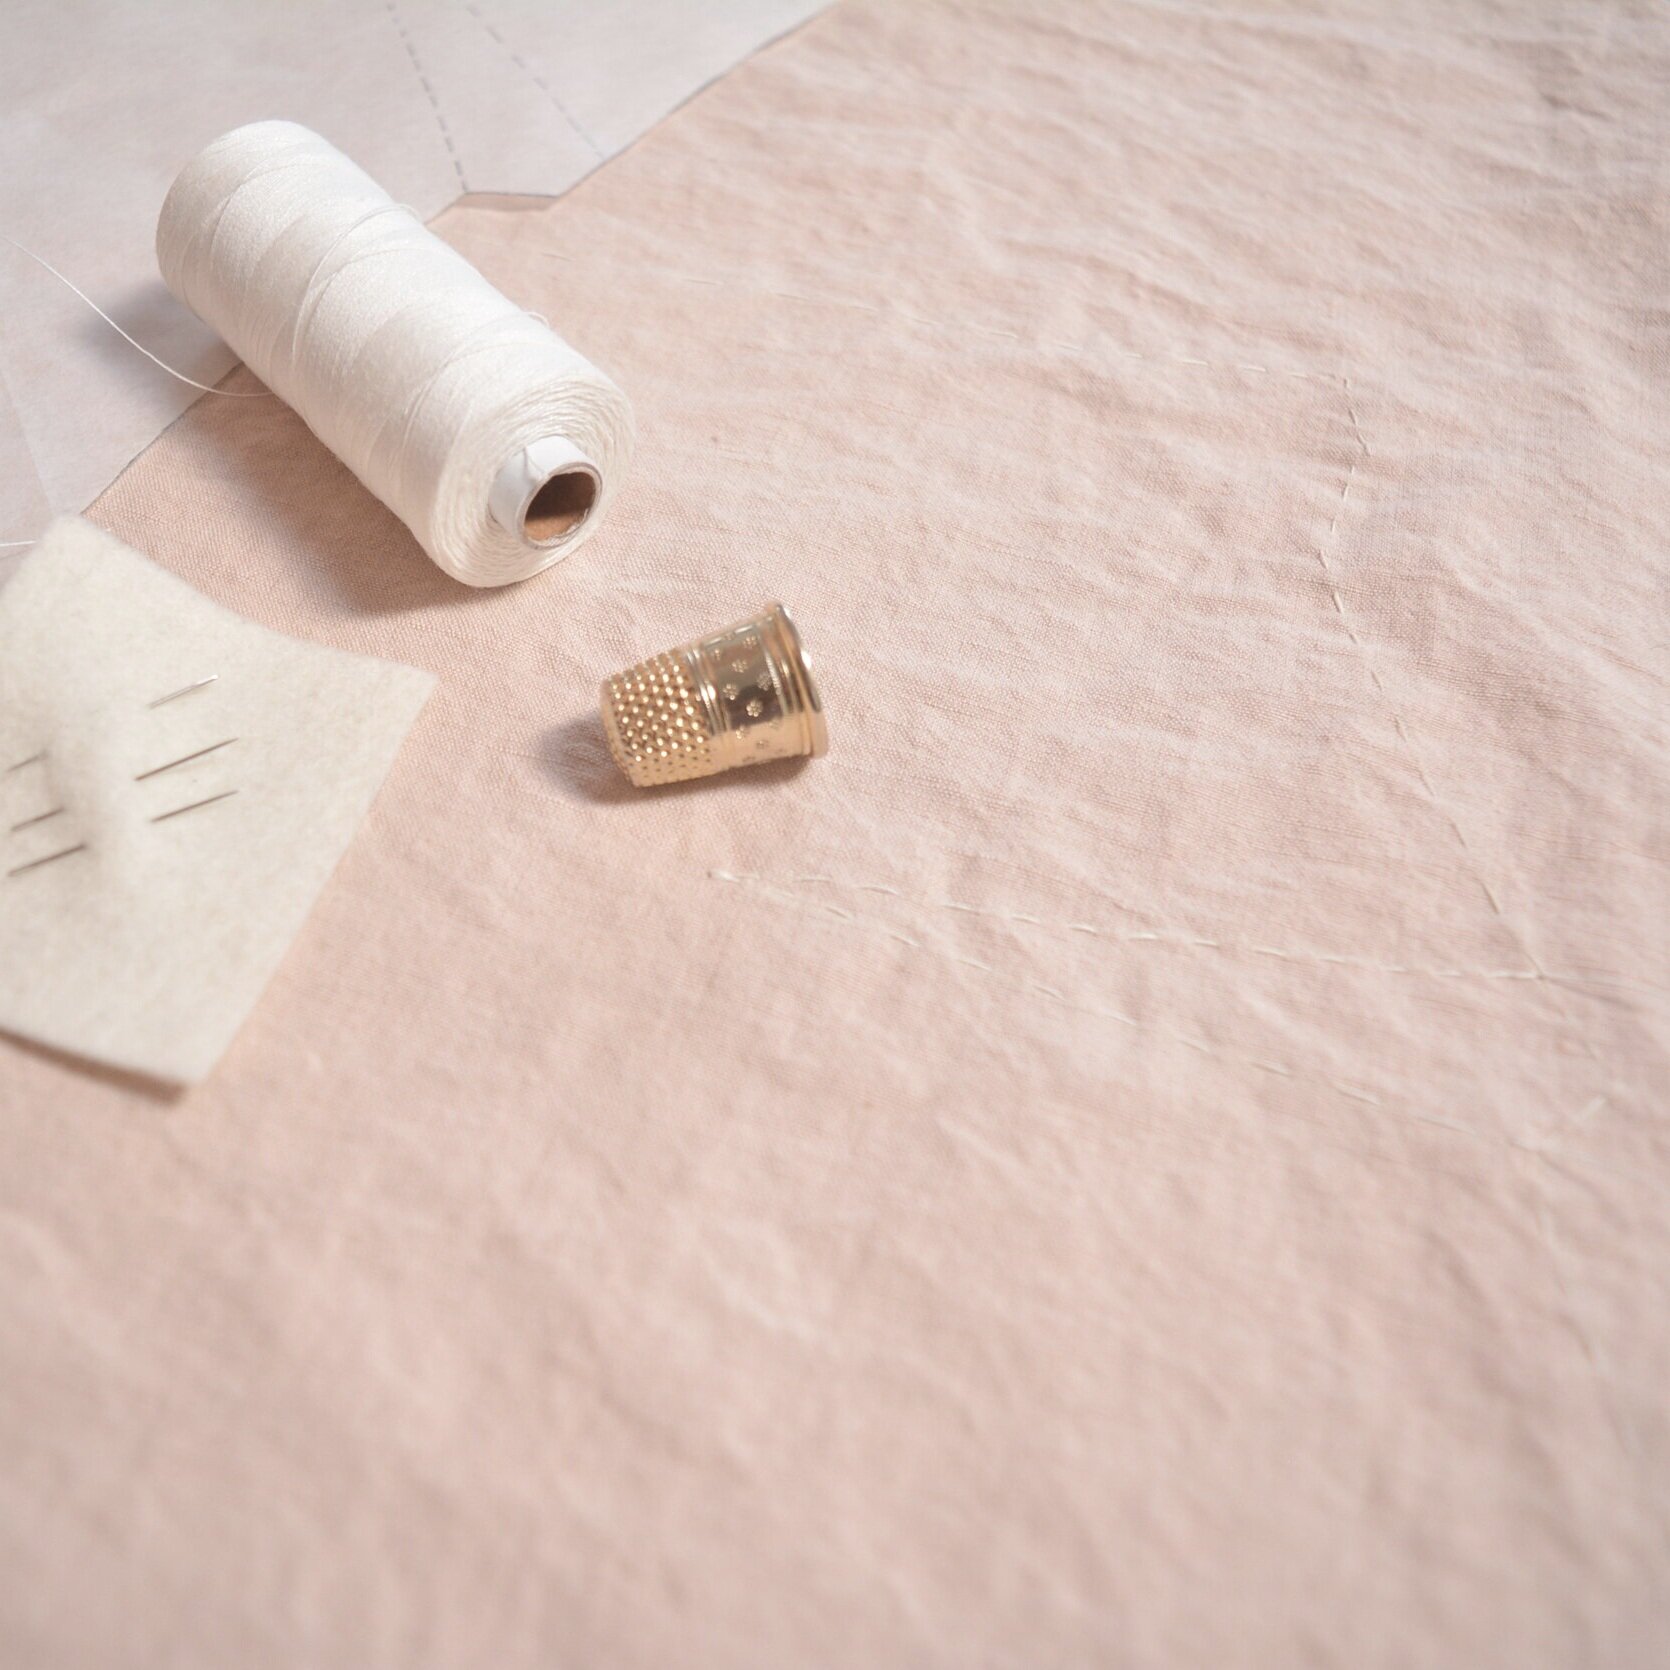
The plan was that these pyjamas were going to be a mock-up. Sewn up in an inexpensive lightweight white cotton this first time, as my final vision for these includes tediously hand embroidered fabric, naturally dyed silk or cotton lawn, and potentially some handmade lace trim. Considering how time consuming all that will be I decided to use this mock-up to practice as much as I could: hand stitched silk buttonholes, hand-felled seams, and very careful stitching on the hems and pin tucks. I'm so happy I did all this. This mock-up turned out to be such a lovely, whimsical set of pyjamas. I probably cut a size too big for the shorts but they work in this lightweight cotton and they just are so floof-y and wonderful to prance around the house in. I also feel like I always learn so much from hand stitching, and I never regret using every excuse to practice.

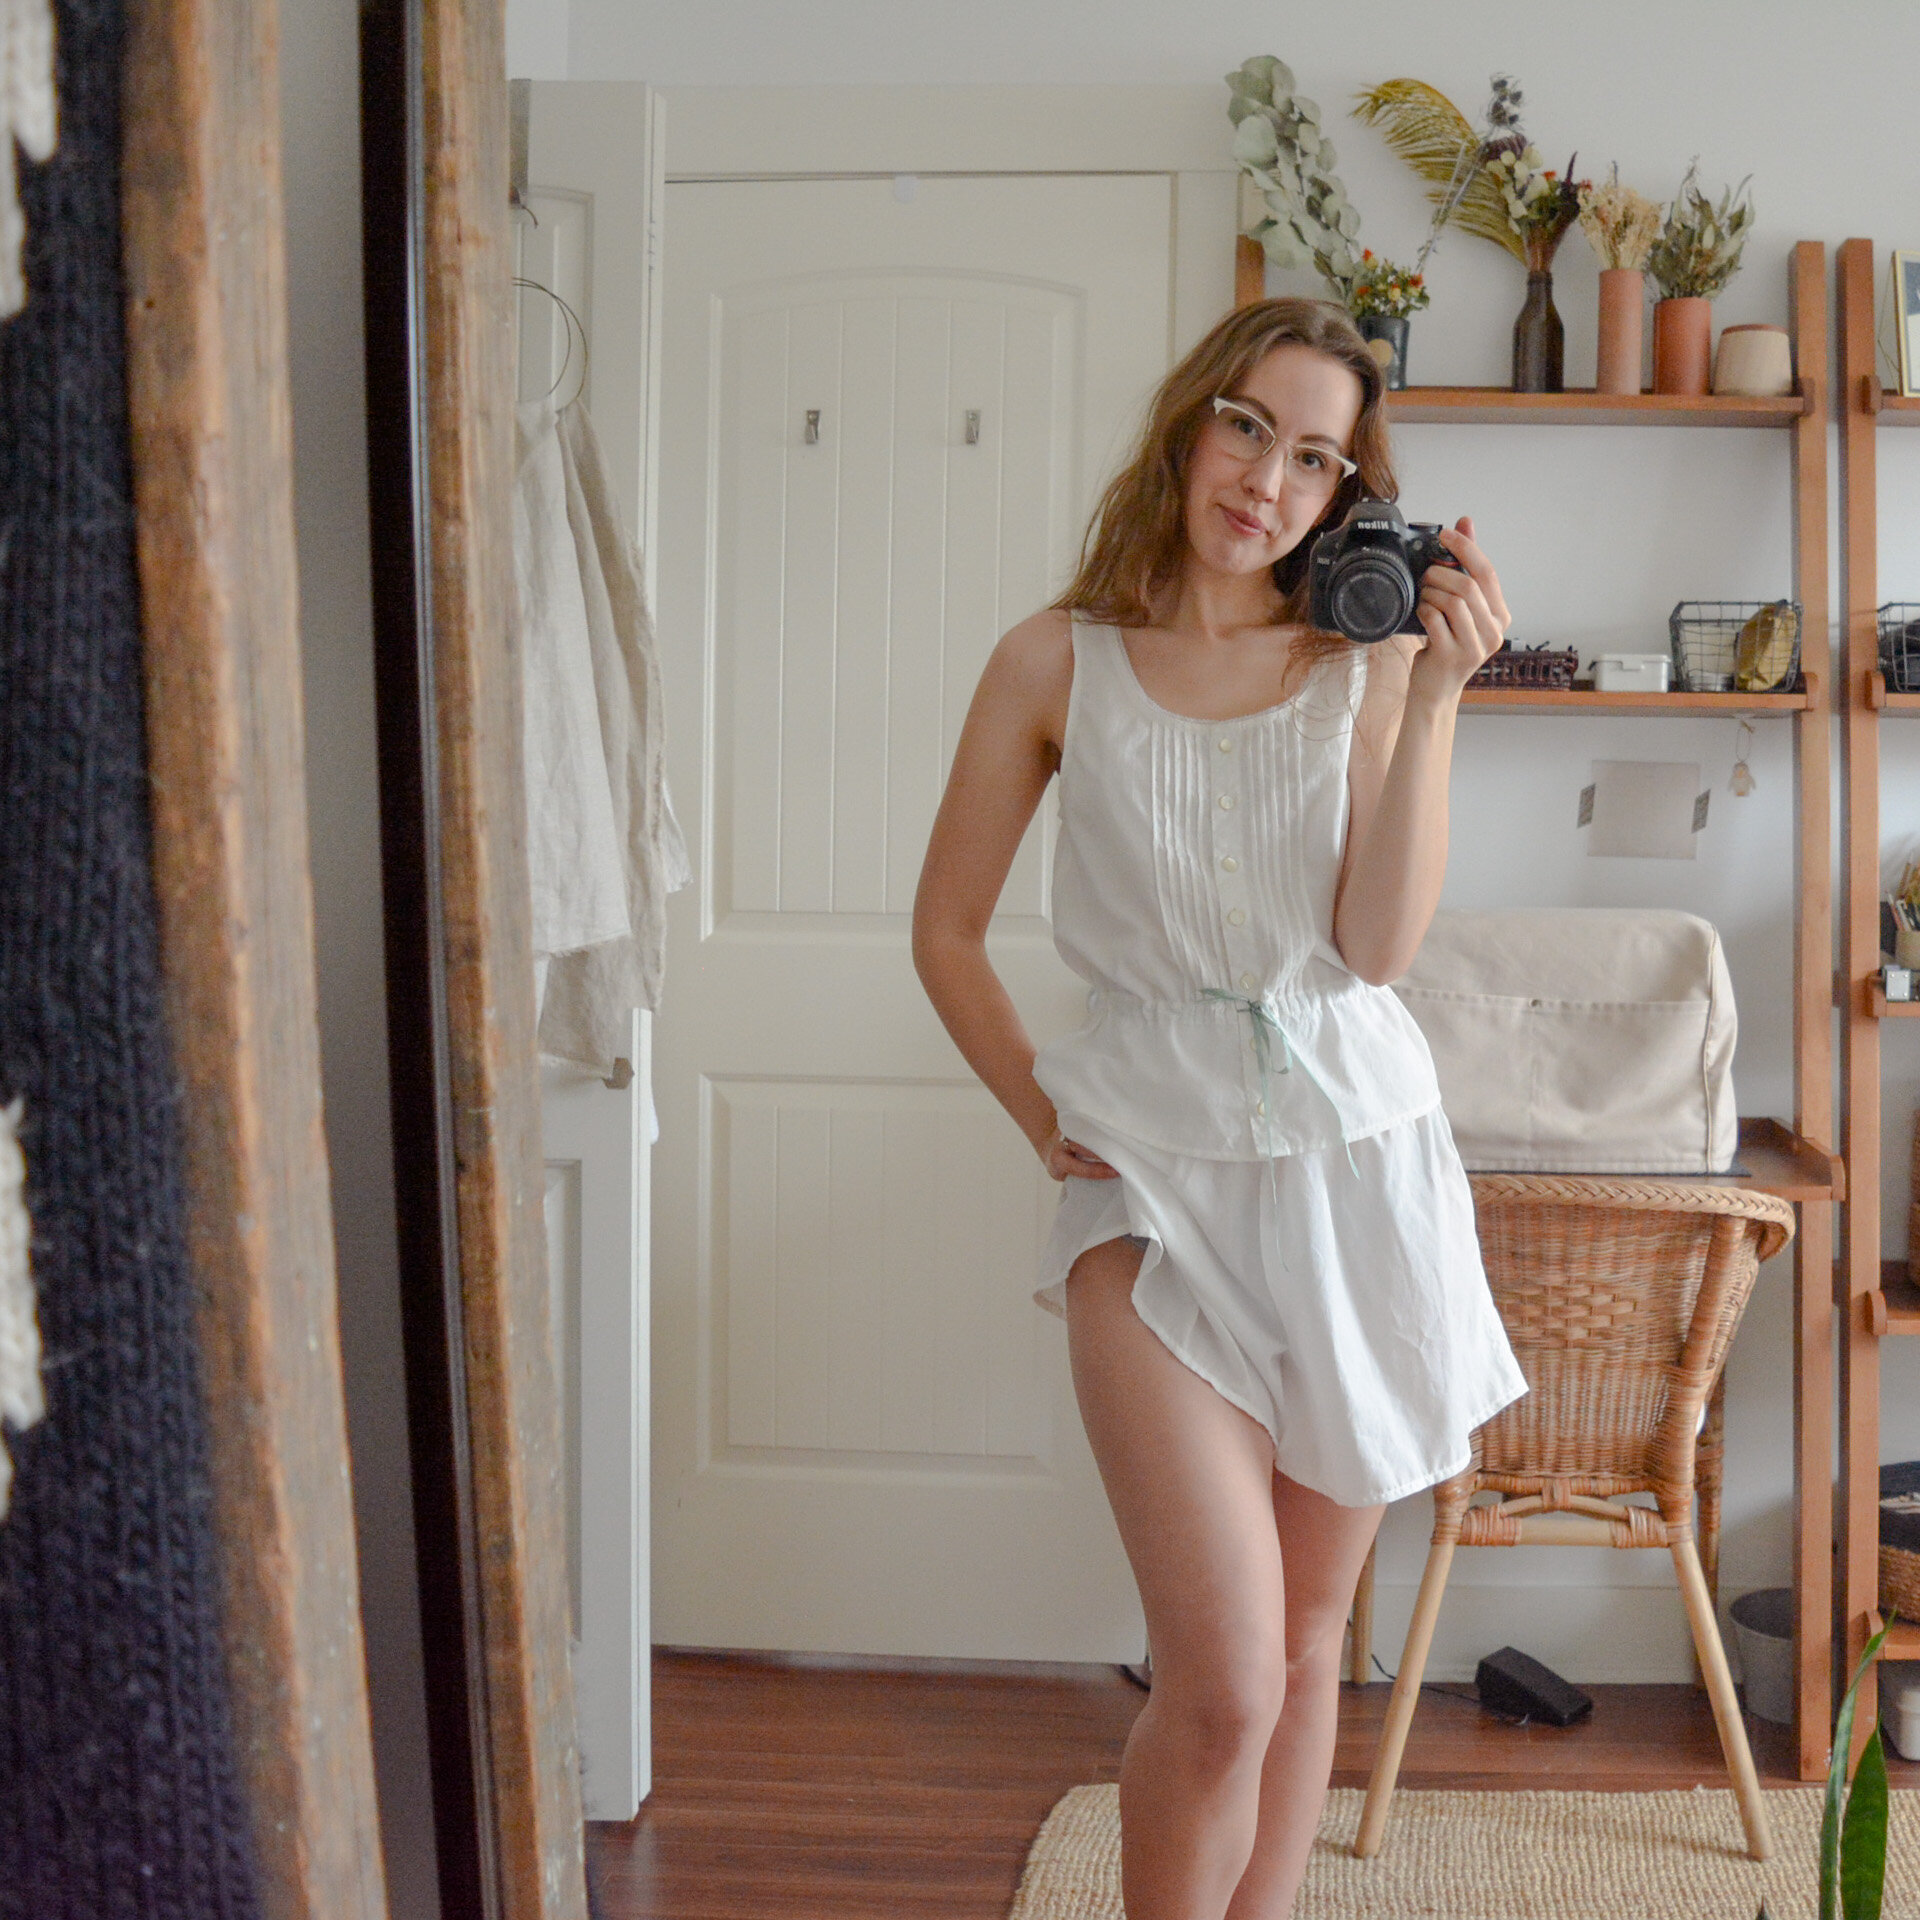
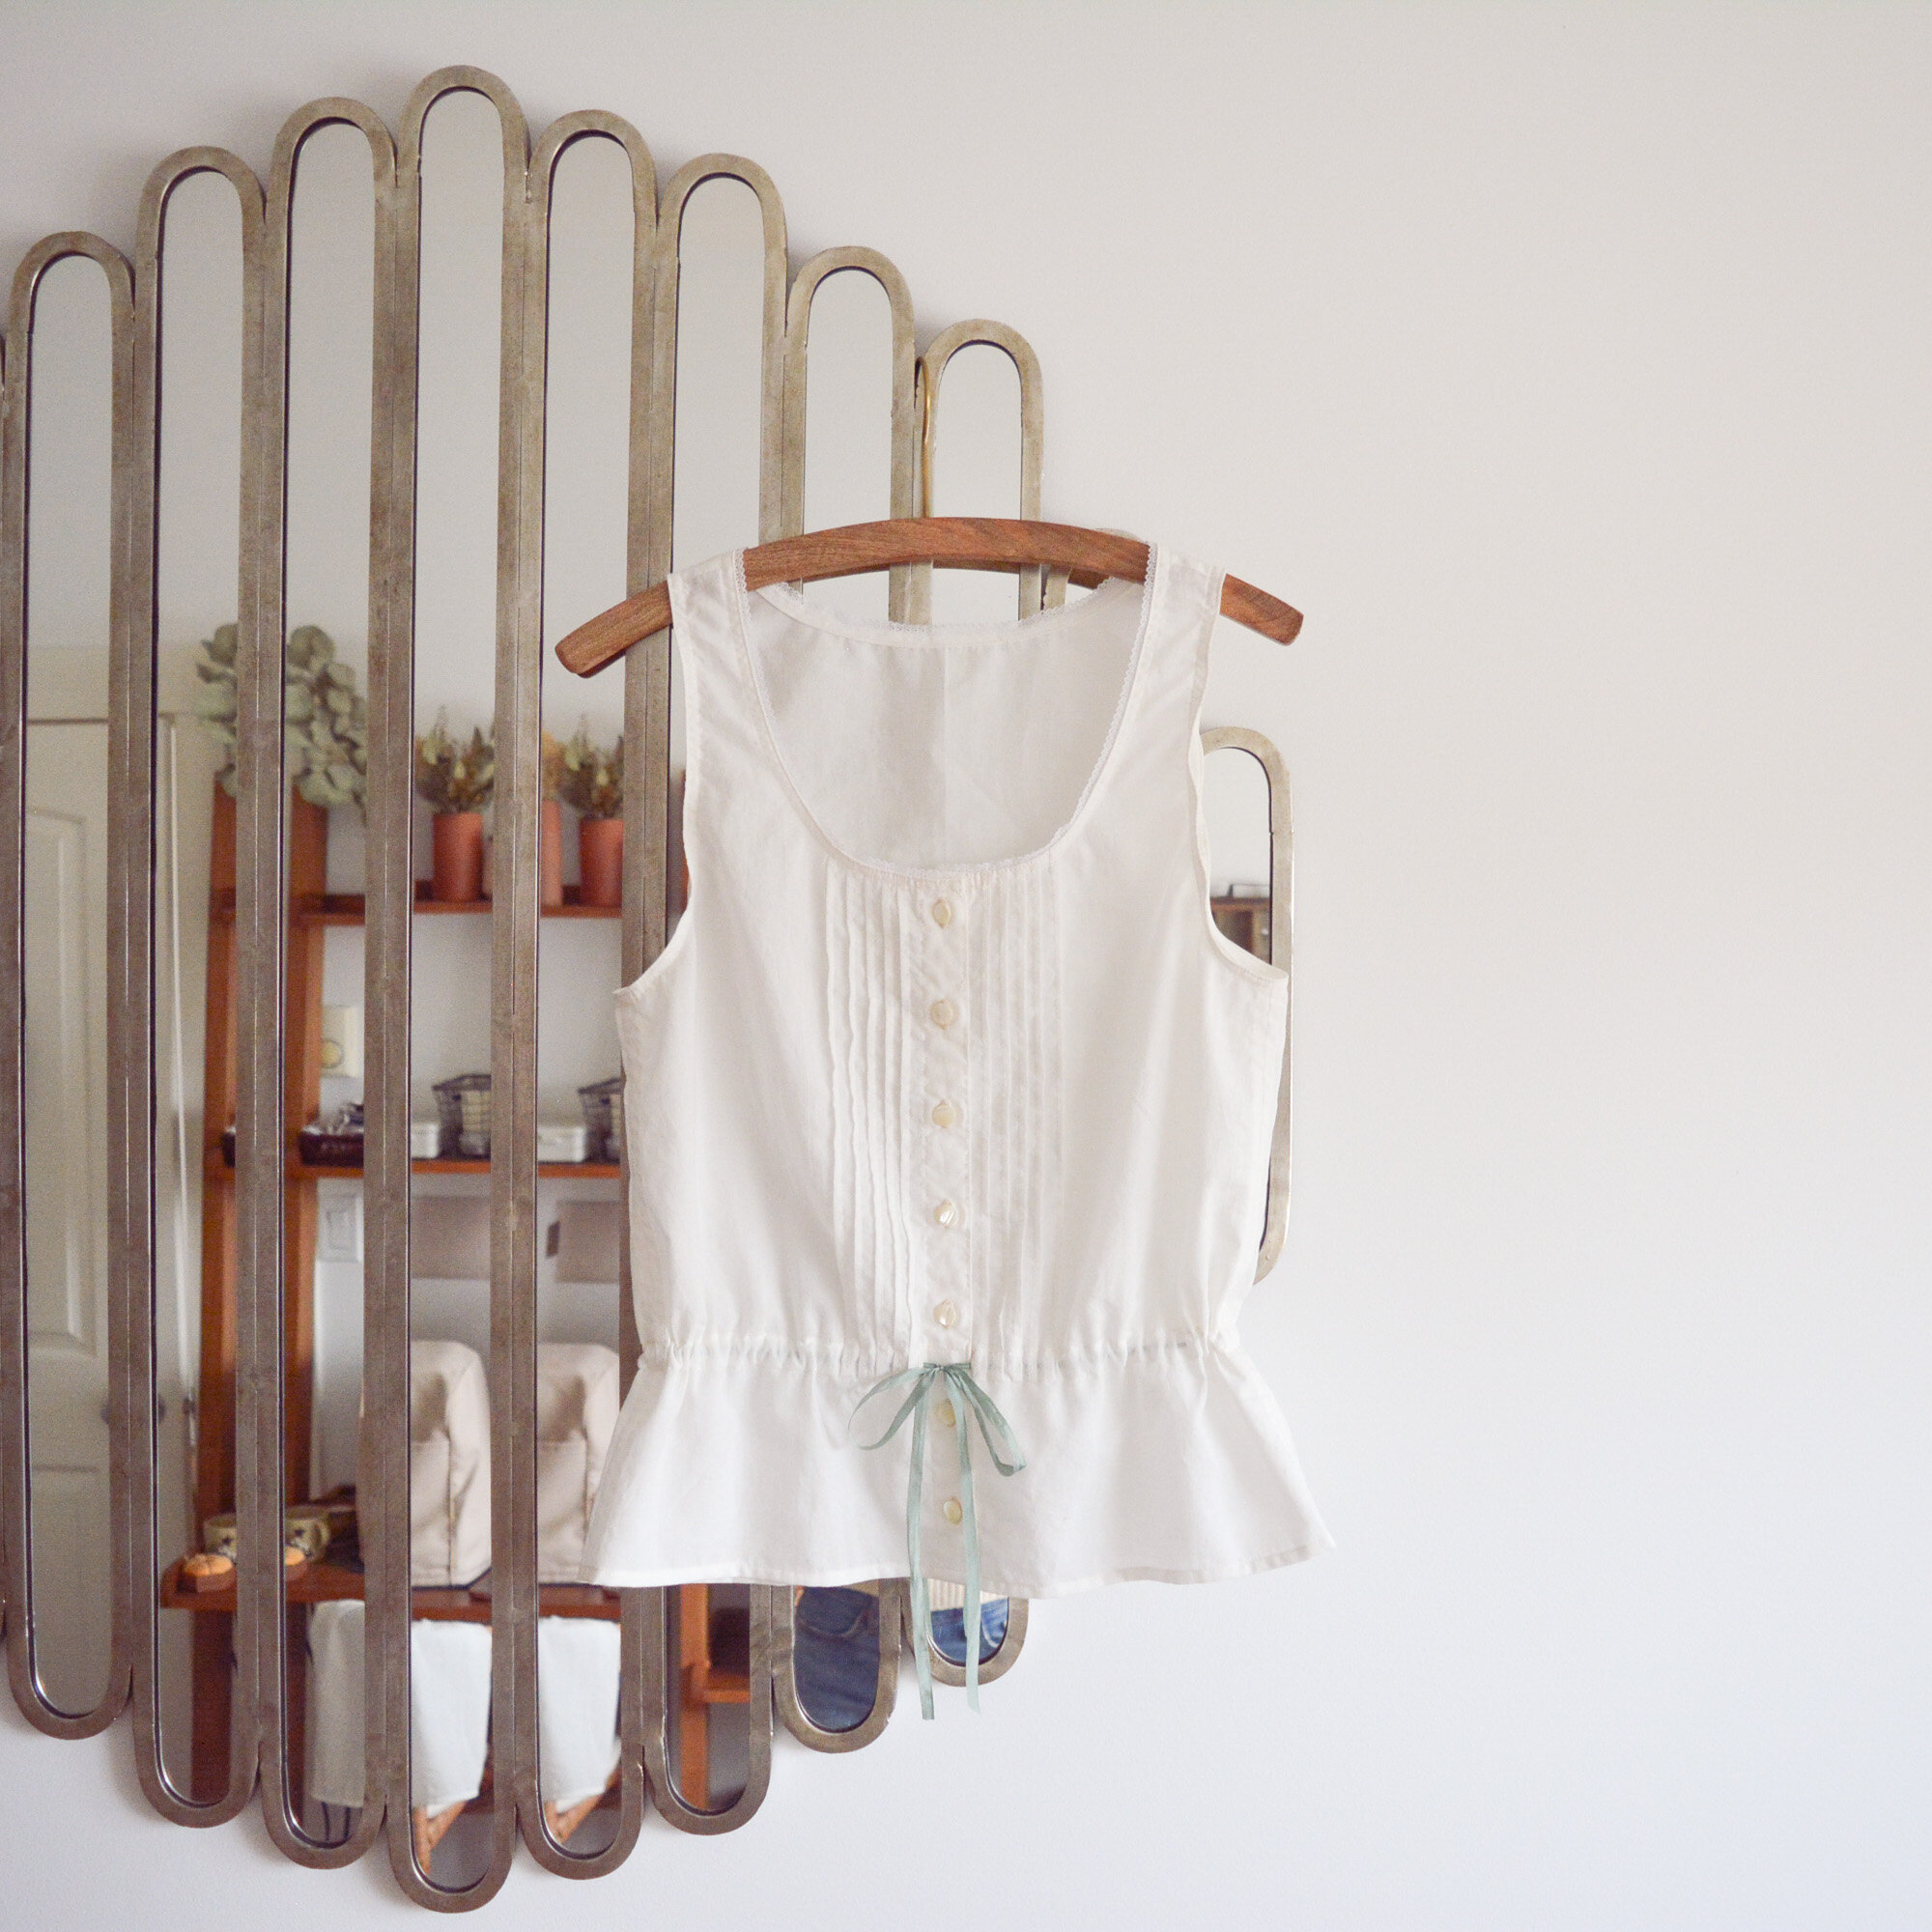
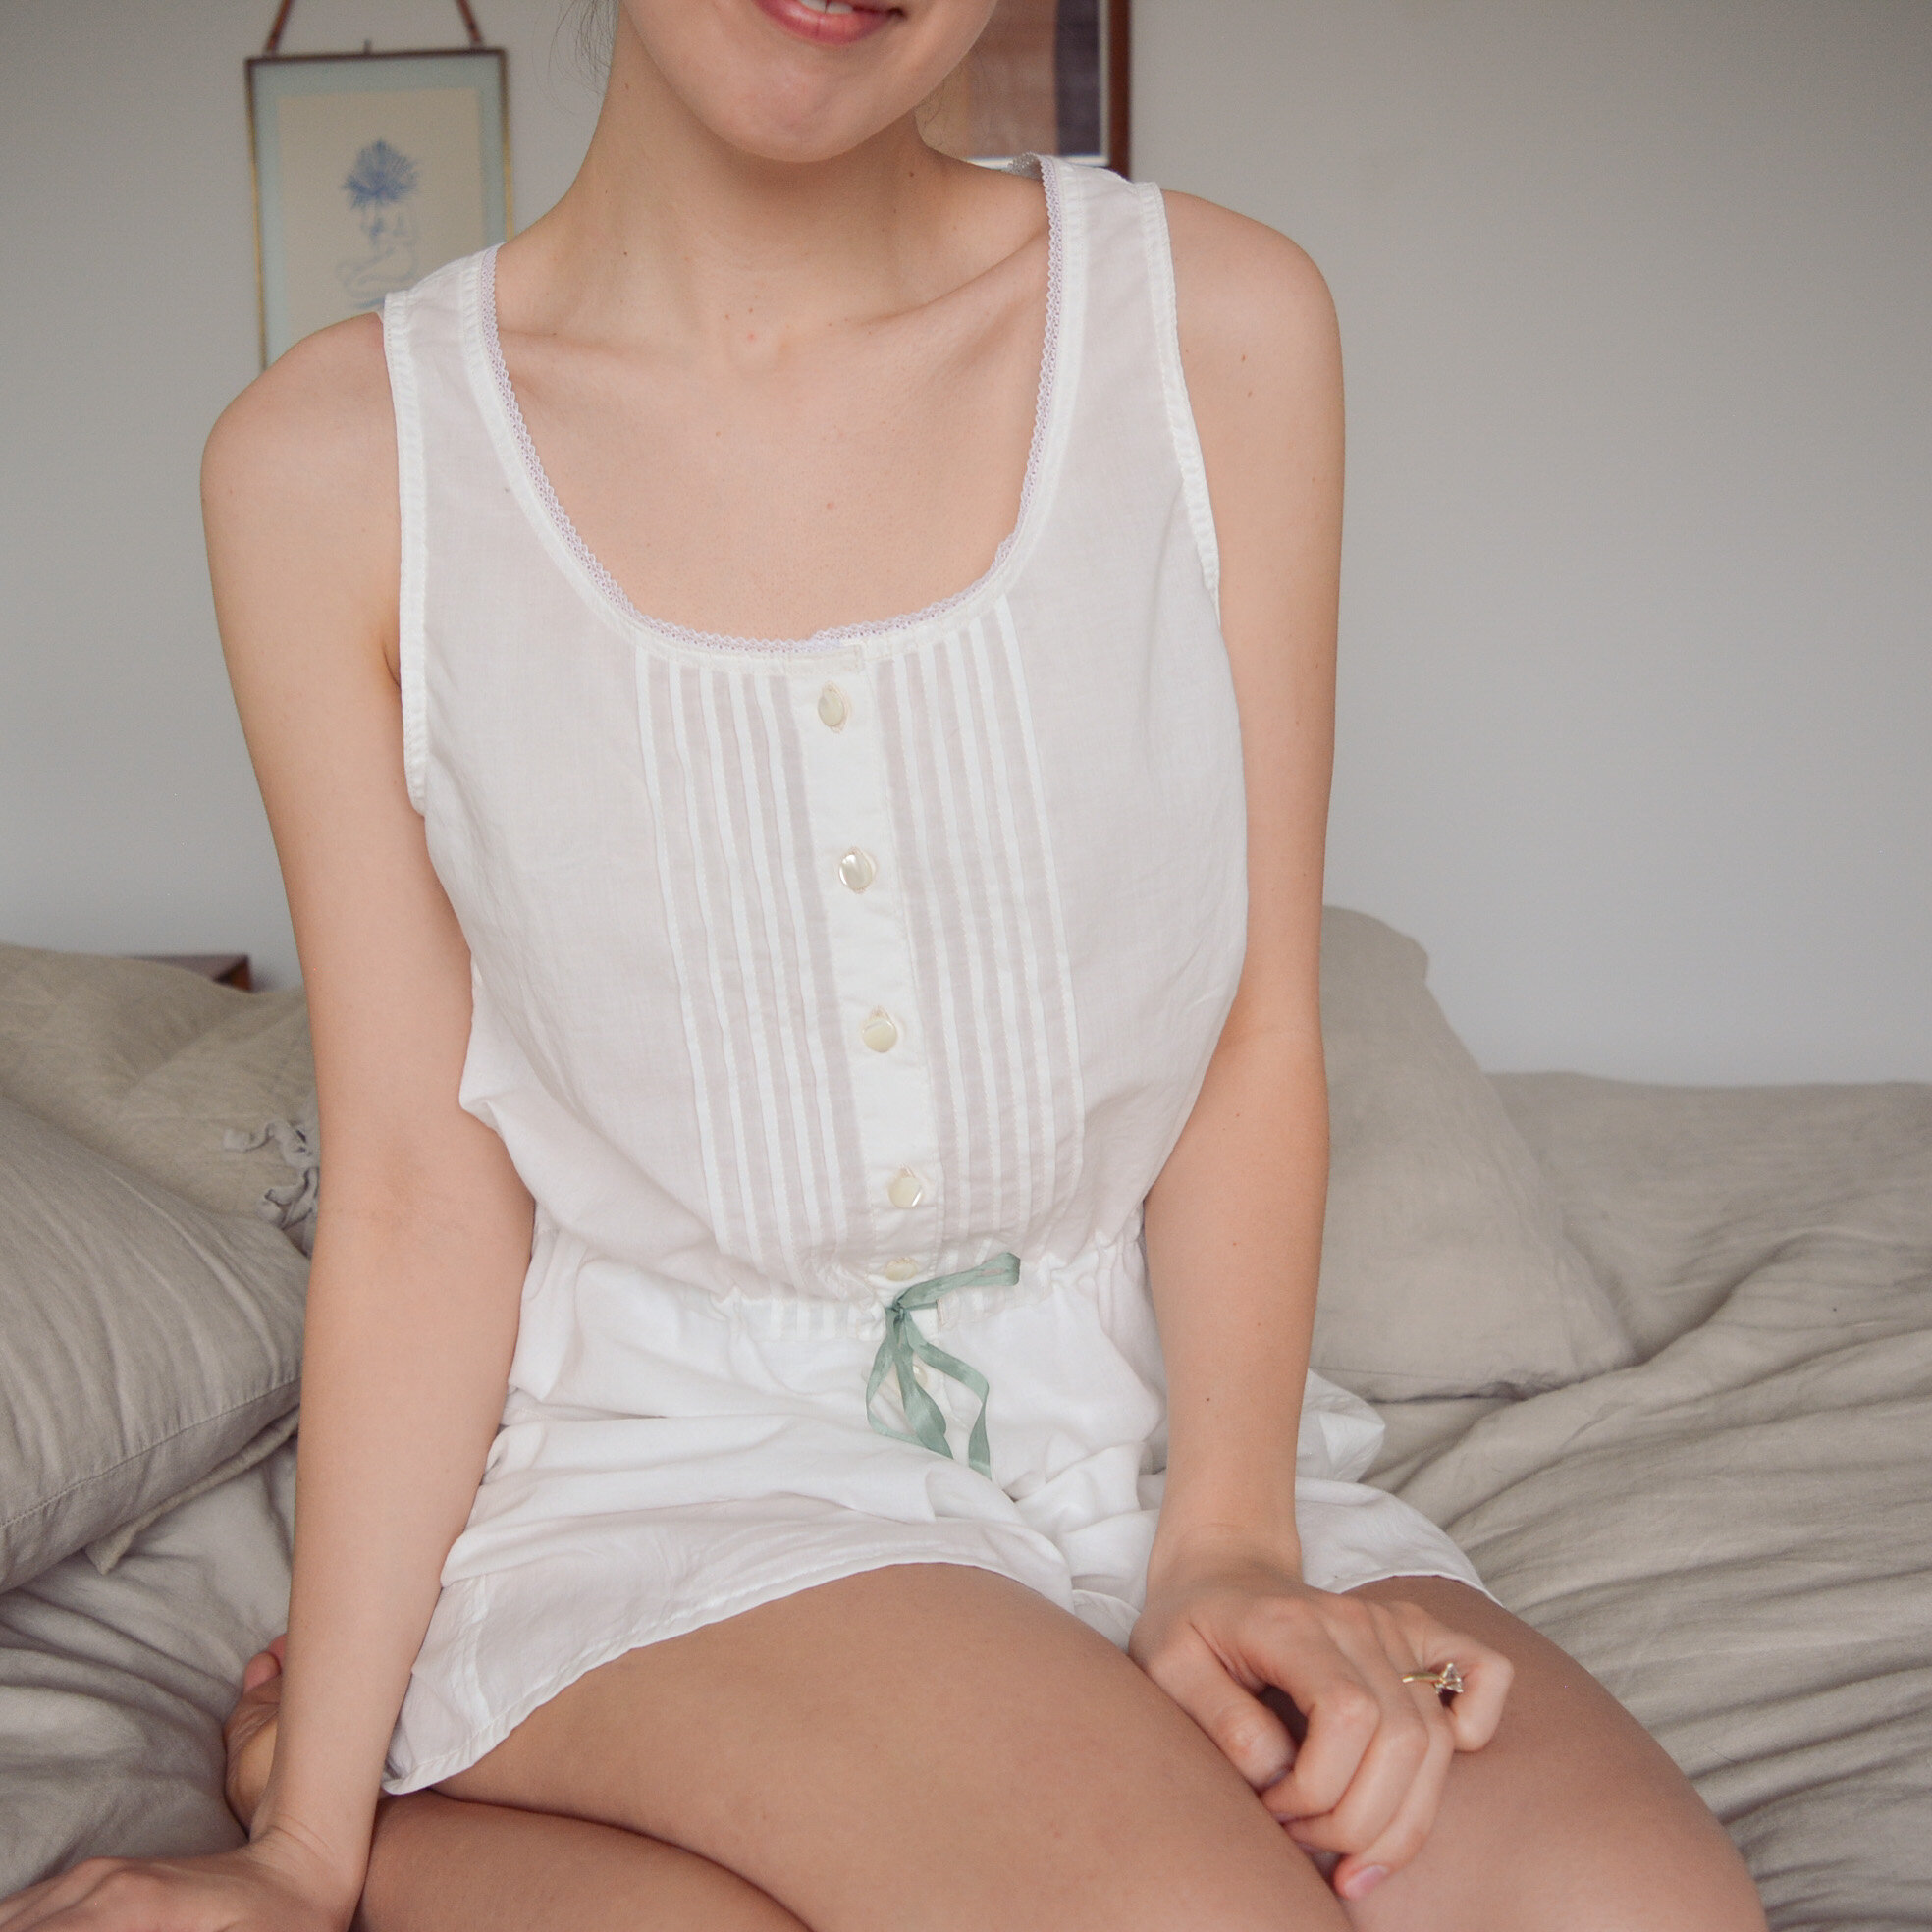
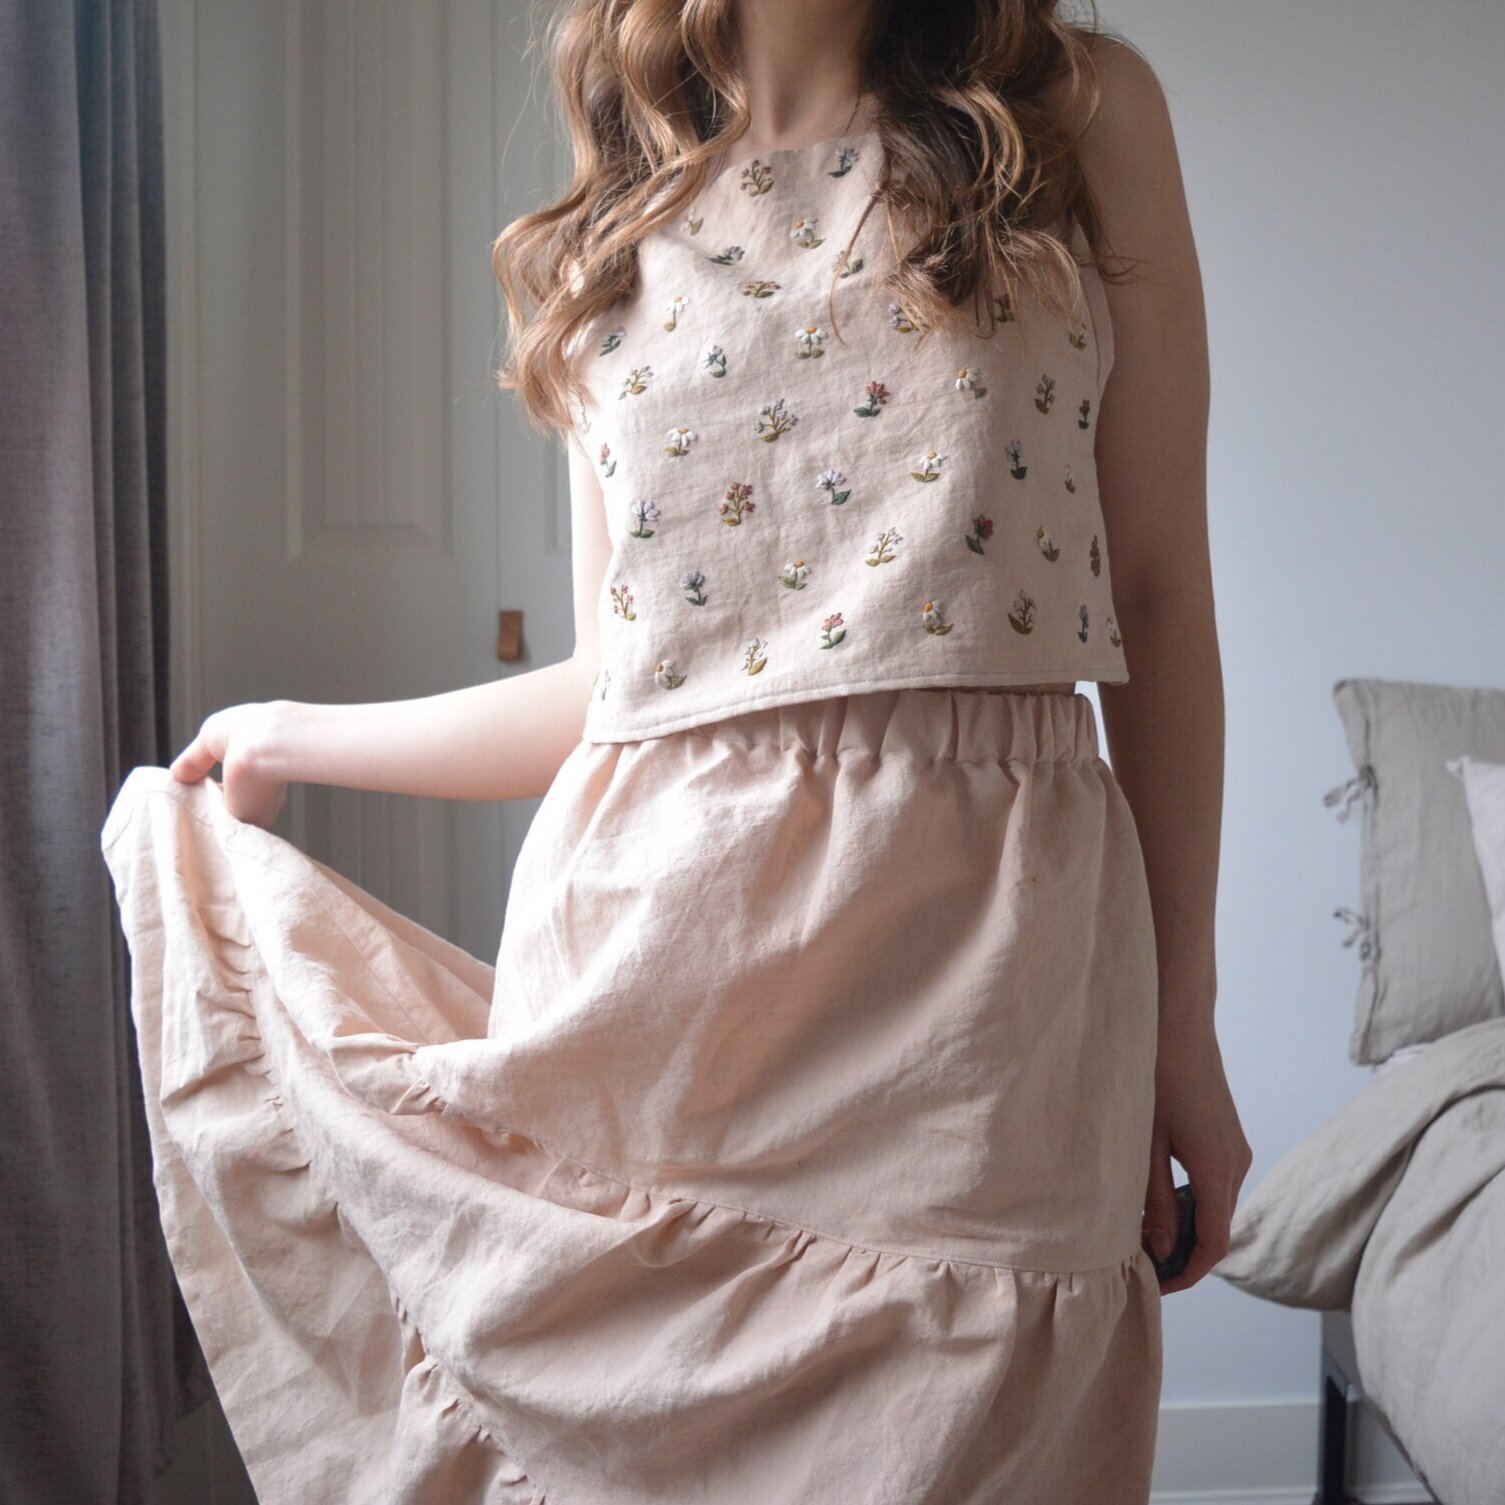
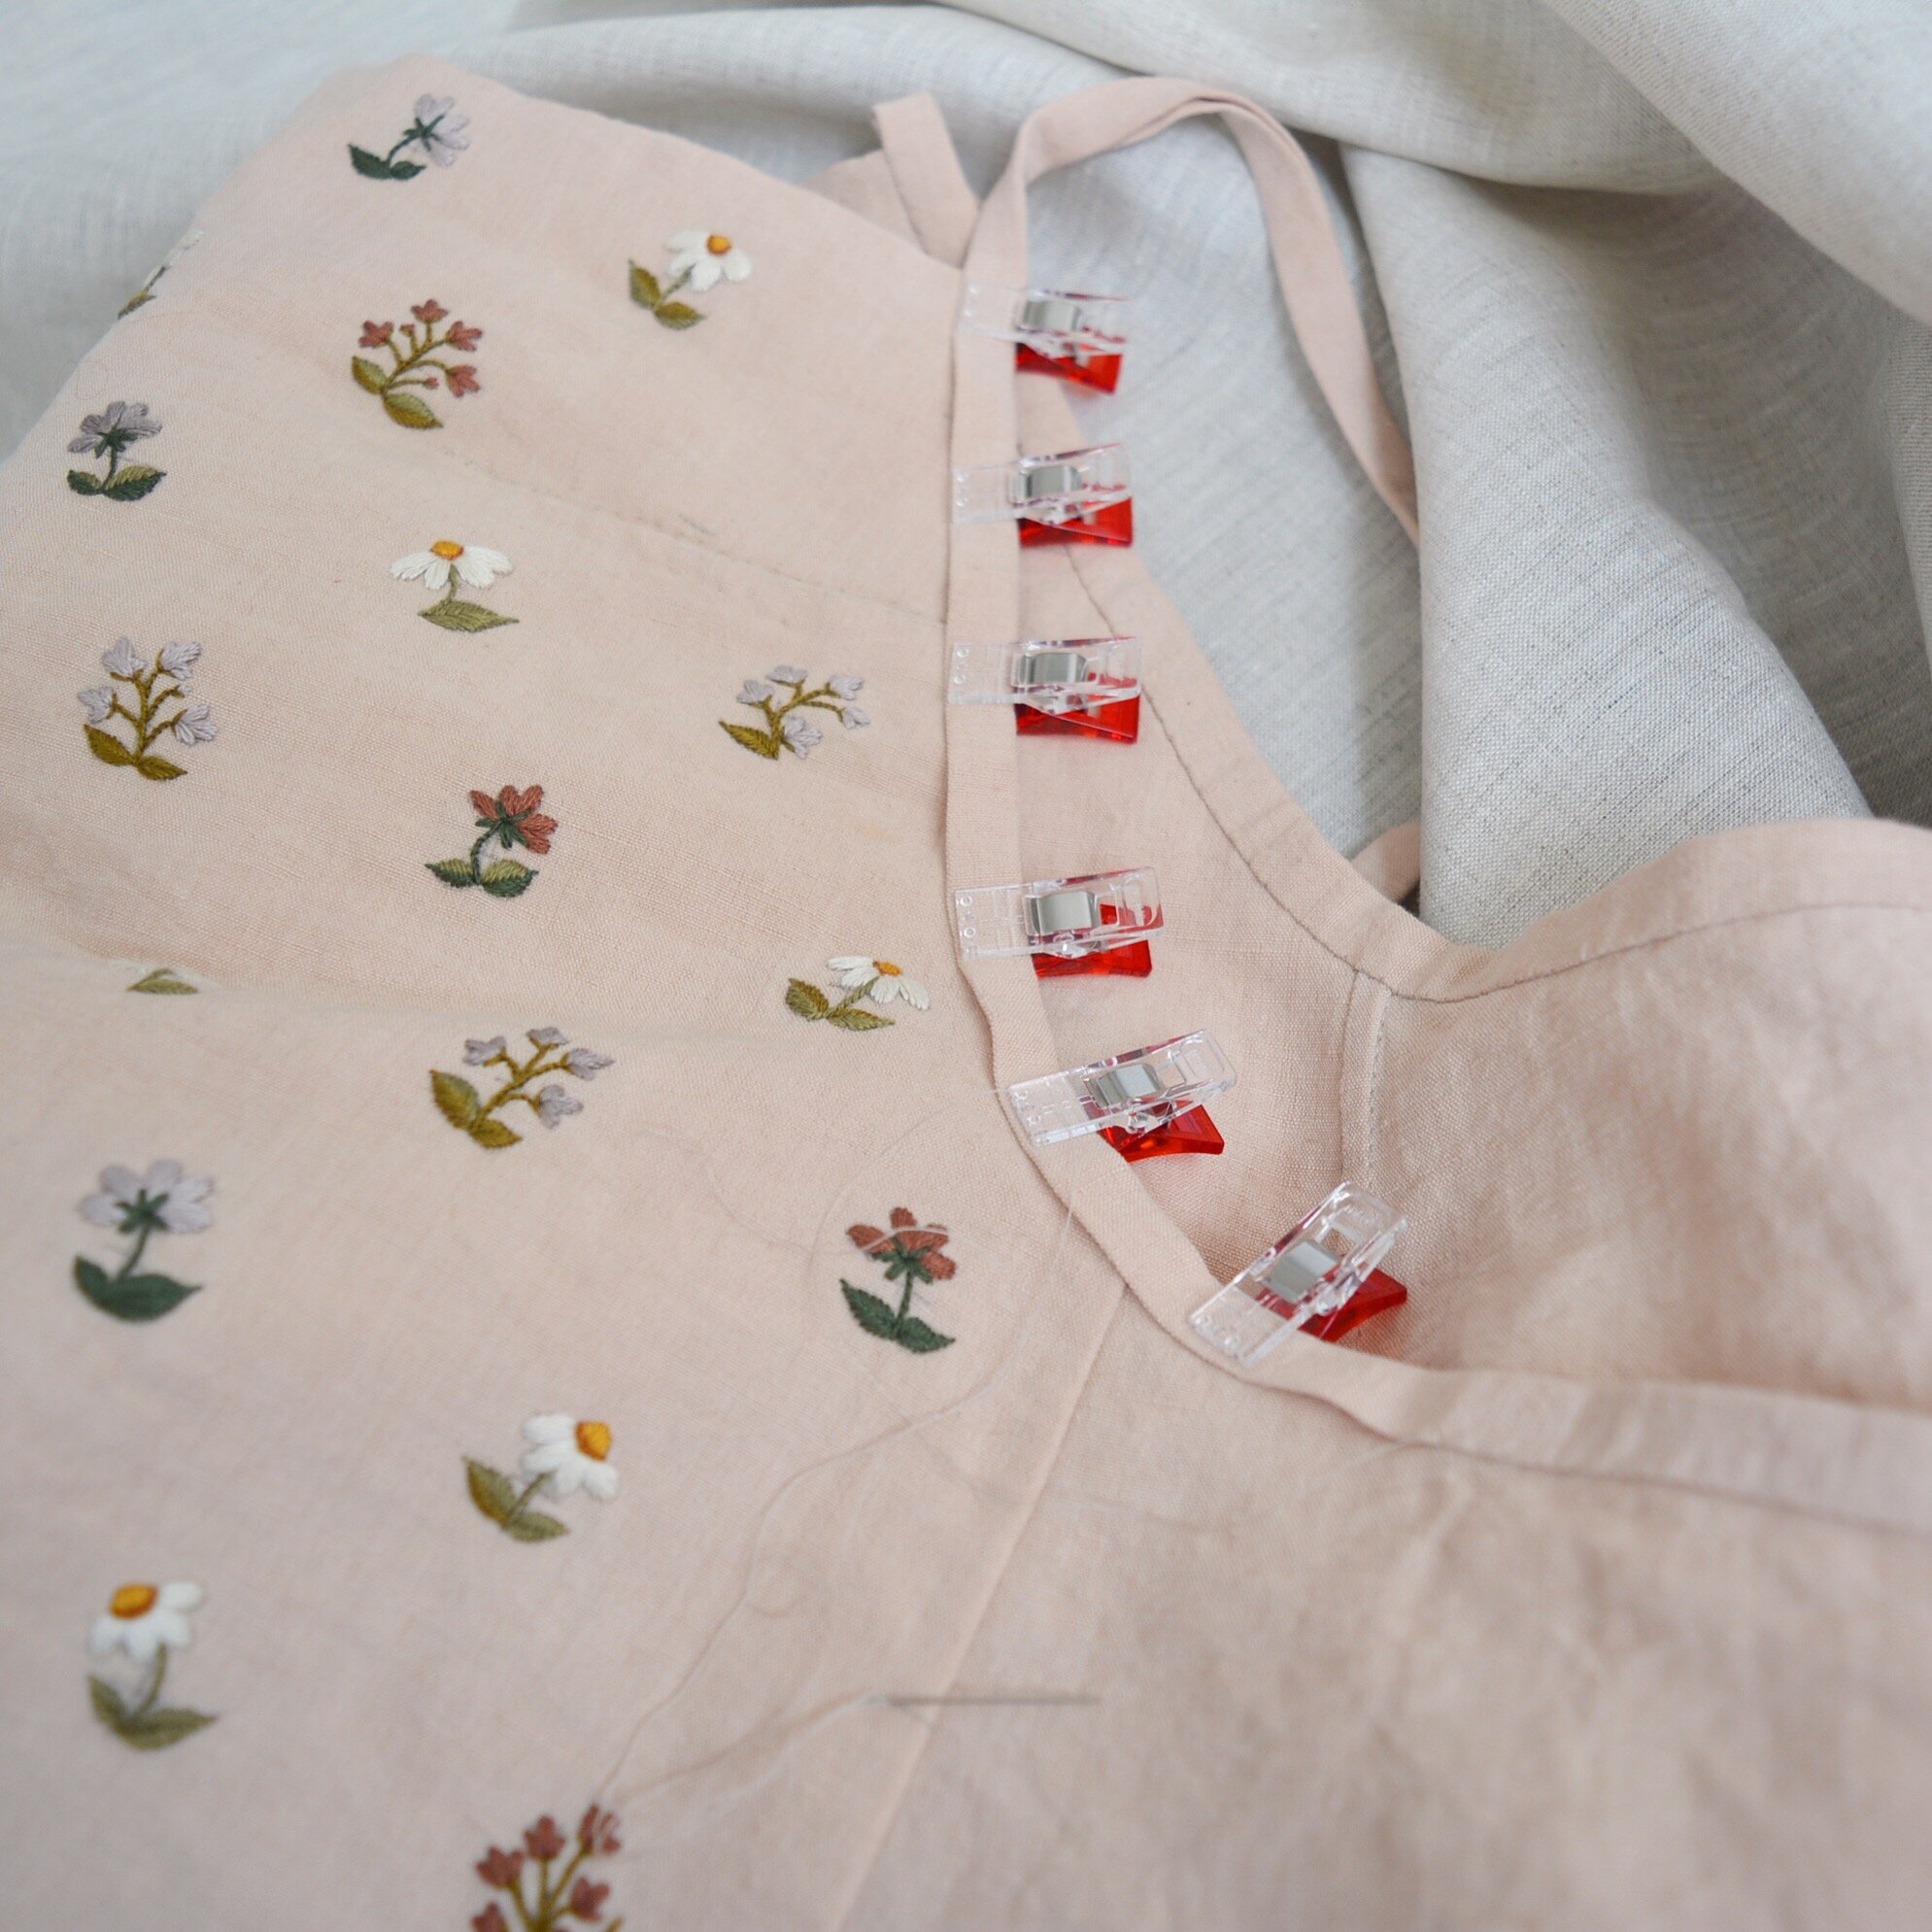
The cami is much more involved than the shorts, which are just done with an elastic waist. Pin tucks always make me a little nervous (if you aren't precise with them you can really alter the fit of the garment), but ultimately sewing from a pattern is just working your way through each step. So what looks daunting is always simple once you break it down. I added a silk ribbon to the casing which makes these pyjamas so feminine, I always love when a garment defines my waist. This mock-up turned out to be such a romantic set, and I'm eager to make it up again with even more special material.

2021-03-04_18-21-26.jpg

Some links that might be helpful:

lightweight organic cotton: Maiwa

delicate cotton lace: Cotton Lace

vintage sewing pattern: Butterick 6250

A Vintage Pattern and the Three Day Cardigan

2020-10-24_17-56-46.jpg

Drawing sketches of my garment plans and then bringing them to life is still new to me but I love how it turns the process of making my clothes into what feels like a purposeful story. Each project starts to take on its own narrative in my head and finishing becomes so exciting as all the elements start to come together. I first did a sketch for my Wattlebird Cami + Fawn Skirt combo and I'm hoping this habit will become the prevailing practice for me.

The Three Day Cardigan by Plystre Knitwear has been on my mind for some time now because I thought if I loved the fit, it could become a pattern I knit up in multiple colours. I also really thought I might be able to knit an entire cardigan in three days (we may as well note here that was absolutely not the case). I ordered some yellow yarn from Knitting for Olive and while I waited for that to come in the mail I did the quick watercolour sketch of the cardigan paired with a wool skirt that I just started sewing.

2020-10-01_15-12-53.jpg

I've been getting some sewing inspiration from browsing Etsy for vintage patterns and then starting to plan from there. This wool skirt is from a 1940's pattern which is so simple but still has some beautiful details. It did take me 2 mock-ups to fit before I could cut into the wool and make the real skirt, but that's also because I'm still fairly new to altering patterns to fit me, so the adjustments I make to patterns don't always work perfectly the first time. Anyways this skirt became such a special project to me because I put so much care and attention into the details. The lining is a pomegranate dyed silk habotai fabric, the linen yoke facing is from that same dye, the wood buttons up the back were very carefully considered, and the linen bias tape as a hem facing looks so professionally finished to me. This skirt had so many tiny little hand finishing stitches put into it to make it look polished on both the outside and the inside.

Eventually my intention is to add some floral wool embroidery to the cardigan but I'm holding off because I'm still undecided on the colour. The cardigan is knit up using Knitting for Olive Pure Silk in Quince and their Soft Silk Mohair in Marshmallow Yellow, and I think these two colours together create a tone that just doesn't complement my skin. So while I love the idea of a soft butter yellow fitted cardigan, this particular one might get a dip in a dye bath before I add the embroidery. Still undecided, but for now I will try to wear these pieces as often as I can before spring arrives and wool skirts and fuzzy cardigans become impractical.

Links for cardigan resources:

Pattern: Three Day Cardigan by Warunee Bolstad

Yarn: Knitting for Olive Pure Silk in Quince

Yarn: Knitting for Olive Soft Silk Mohair in Marshmallow Yellow

Links for wool skirt resources:

Pattern: A lucky find from Etsy

Wool: Atex Designer Fabrics

Lining: 8mm silk habotai from Maiwa

Dye: ground pomegranate rind from Maiwa

Read about my experience dying with pomegranate here.

Drafting a Button-up Skirt Pattern

If you read my previous post you'll know how excited I've been about natural dyes this year. I just dyed a meter of lightweight linen a beautiful mottled olive green colour (read about that here), and I'm going to be sewing a skirt out of it. This is going to be a pretty big and consuming project, the dying itself takes lots of time and patience, and I'm also going to be doing an all-over embroidery design on the skirt. I'm thinking embroidered olive branches on an olive coloured skirt. So before I start on weeks, months, maybe years of embroidery, I want to have the perfect pattern.

2020-05-09_16-55-15.jpg

I'll be thread basting these pattern pieces onto my meter of fabric, and then only embroidering within the thread basted lines. There will be no wasted embroidery and nothing will get cut off by seams this way.

I've been really inspired by vintage clothing lately, and I love the look of buttons running up the front of a garment. I decided I want this skirt to be a button-up skirt that hits just below my knees, and something high waisted that I can tuck a light blouse into will work really well with my wardrobe. I considered buying a sewing pattern as I usually do, but since I knew I would be making a mock-up of that pattern anyways (I want the fit of this to be perfect!) I thought that this would be a good time to try drafting my own pattern. Plus I'm currently in isolation so I have plenty of time to make mistakes and do things over and over until I'm happy with the pattern.

skirt-design-final.png

There are many different ways to draft a pattern and because the skirt I'll be making is so simple I decided to use the method of tracing something that fits you well to get the basic shapes. I also have to keep in mind that I only have 1 meter of the olive green fabric. To make this skirt fit on the final fabric I'm going to have to cut the skirt on the cross grain (instead of the straight). Usually patterns are cut on the straight grain because it is the strongest, but I don't mind this skirt having some extra drape (maybe it will give it the slight feel of a bias cut skirt? We will see). I also can't cut the back of this skirt in one large piece. I'm breaking it up into 4 pieces by adding a seam down centre back and adding a triangle yoke to just the back of the skirt. So to start I traced the shape of a skirt that fits me well in the waist. I then traced the bottom half of another skirt that I like the drape and length of and I put those two shapes together, added a 1/2" seam allowance, et voila! A mediocre fitting skirt.

These drawings are just a rough visual of what I was doing, they are not a pattern!

These drawings are just a rough visual of what I was doing, they are not a pattern!

But in all honesty I was pretty happy at this point. I hadn't made a perfect thing but I had made a thing, and I could see where I needed to go to improve. The main things I noticed here is that the skirt does not drape as much as I want (it holds it's a-line shape), but the lightweight linen I'll be using has so much more drape than the cotton that I'm making the mock-up out of so that's a problem that will solve itself.

The second thing is all the extra fabric at my lower back! I've heard that many people have a "swayback", which is basically described as a dip at your lower back, and looking at this fabric I'm thinking that that's what I have. So I pinched the extra fabric horizontally, and pinned it down. Then I traced the fabric that I wanted removed onto the pattern piece, cut that slit out, and taped the piece back together. This was such a simple fix and I'm looking forward to using it in the future to alter patterns and store-bought clothes.

The last thing that needed to be fixed was that the skirt felt tight around my lower hips and upper thighs. Again a simple fix, I used a pencil to mark lines on the side seams where the skirt started feeling tight (I double checked this sitting down in the skirt), and then I transferred that line to the paper pattern piece. I didn't need too much more ease so I only extended the seam out 1/4" from where it was, which gives me a total of 1" extra room (because I made this adjustment to both the front and back pieces on both side seams).

Again, this is picture is not to scale, just an idea of what I did.

Again, this is picture is not to scale, just an idea of what I did.

I made nice new copies of all my pattern pieces and then used these to cut out a second mock-up to check my fit. I feel that this one is perfect! I've never had a skirt fit the shape of my hips so well, and this is going to be the pattern I go with fo my olive skirt project. I finished the mock-up with buttons and buttonholes, and a snap closure at the waistband, which is what I’ll be using on the final skirt. I’ll keep this mock-up around for reference while I embroider and sew the olive skirt, and then the hardware will be harvested for future mock-ups. The fabric will be re-used for more mock-ups until the pieces are so small that they become stuffing (I’m thinking of doing a set of bolster pillows once I have enough fabric scraps).

Read about my last all-over embroidered project here.

Wattlebird Cami and Fawn Skirt Pattern Review

wattlebird-cami.jpg

If I've ever poured all my love and energy into making something it was this project right here. My avocado dyed, hand-embroidered, hand-finished Wattlebird Cami & Fawn Skirt set. I started this project with the intention to make the Wattle-Fawn Dress hack, but it evolved into separates that can be worn together to look like a dress. This is the most involved I've ever been in the process of making a garment, and that makes me so proud of the finished pieces.

The Wattle-Fawn dress is a mash-up of two patterns by Common Stitch: the Wattlebird Cami and the Fawn Skirt. I bought the PDF version and had the pattern printed at my local copy shop so I wouldn't have to do any paper piecing. It was an investment to buy this pattern (which Common Stitch sells as a package including both individual patterns), but I really think I'll get a lot of use out of it. I love both the cami and skirt on their own, and I think I'll be doing plenty of future sewing from these patterns.

The fabric I used for this project is a handwoven 100% linen from Maiwa Supply. I dyed the fabric naturally using avocado skins and pits to get the peachy pink colour (you can read more about that here). I cut all my pieces like usual, except for the front cami piece. Because I knew that I would be embroidering that one I thread basted where I would be cutting later, and then left myself plenty of fabric all around that thread basted line so that the piece would comfortably fit into my embroidery hoop. I decided not to sew a mock-up for this dress, mainly because I'm not usually too picky about how garments like this fit. The Wattle-Fawn dress is designed to be a loose fitting flow-y dress without too much structure (and also no sleeves to fit!) so I figured I wouldn't have a problem just jumping straight into it, and making small adjustments later if necessary. Of course this bit me in the butt later when I realized that the dress was a little too shapeless for my preference, but turning it into a set of separates was a quick fix for that.

I wanted an all over embroidered floral print for the cami piece, so I tested a couple flower ideas on some scrap avocado dyed fabric, and once I had my plan I sketched it all out on my thread basted piece with pencil, measuring to make sure the flowers were equally spaced. Pencil doesn't wash out as nicely as a marker made for this purpose, but it's what I had on hand and I would be covering it all up with embroidery anyways. I went about embroidering, and 38 hours of stitching later (spread out over a couple weeks of course) I was ready to start assembling.

I wanted to cover the back side of the embroidery because I thought it might irritate my skin, so I lined just the front cami piece with another piece of the same pink linen. I used the flat-lining method, essentially cutting a double of the piece I wanted to line, laying them on top of one another, and from that point treating it as one single piece. Flat-lining gives you a chance to finish things really beautifully by hand, hiding stitches and seams in the lining. One of Bernadette Banner's videos explains the flat-lining process really well: linked here. I also hand finished all of the binding and straps because every time I try top-stitching fiddly bits like this on my machine it never turns out as straight or neat as I prefer.

I pieced together the skirt, getting mildly frustrated by all the gathering, but it came together fairly quickly. I basted the cami to the assembled skirt because I though I might want to shorten it, and it was here when I tried it on to fit that I realized it was not quite the look I wanted. The lack of a defined waist coupled with all the volume in the skirt was just making me feel shapeless. I decided to take them apart and just hem the cami and keep it as a classic Wattlebird cami, and finish the skirt as a separate at well. The Fawn Skirt is finished with an elastic waist, which gave me the waist definition I wanted. I'm pretty happy with this solution because I feel like I will get a lot of wear out of the cami on it's own, making the garments a lot more versatile than if I just had the dress.

If I do decide to try the dress hack again it would be with a much more drape-y and flow-y fabric, and I would probably insert ties in at the waist seams so that I could cinch the waist in and tie a bow at the back. But for now I'm smitten with my outcome from this first try and looking forward to a summer in avocado pink!

Summer FO's

2017-09-04_15-17-48.jpg

FO #1: Miette Wrap Skirt in Robert Kauffman black Essex linen-cotton blend (top left)

FO #2: Short Sleeve button up shirt (Burda 6527) in a grey cotton chambray with fancy copper buttons from Button Button in Vancouver, BC (middle right)

FO #3: Indigo dyed scarf made at the Indigo Social event in Vancouver, dyed using the scrunchie method (bottom right)

FO #4: Salt marsh skirt made using hand-woven cotton from Maiwa Handprints (woven in India) and the Sat marsh Skirt pattern from the Merchant and Mills Workbook (middle left and bottom middle)

FO #5: Striped Beach Tank modified to have a low back and knit in Bernat Handicraft cotton yarn (top right)

FO #6: Palmer Cardigan knit in Brooklyn Tweed Loft (middle and bottom left)

FO #7: Indigo dyed bed sheets and pillow cases (top middle)

2017-09-06_00-02-29.jpg