DIY Quilted Baby Playmat

Some links in this blog post may be affiliate links. This means if you click through and purchase the product, I earn a small commission at no additional cost to you. Thank-you.

I sewed up this easy baby playmat over the last couple days and I want to tell you about how I made it. Such a practical project, I throw this mat down in whatever room I’m in and let baby kick around on in. You can make it as thick or thin as you like, and I even made one side of mine using a water resistant material so I can use it outside in the grass as well.

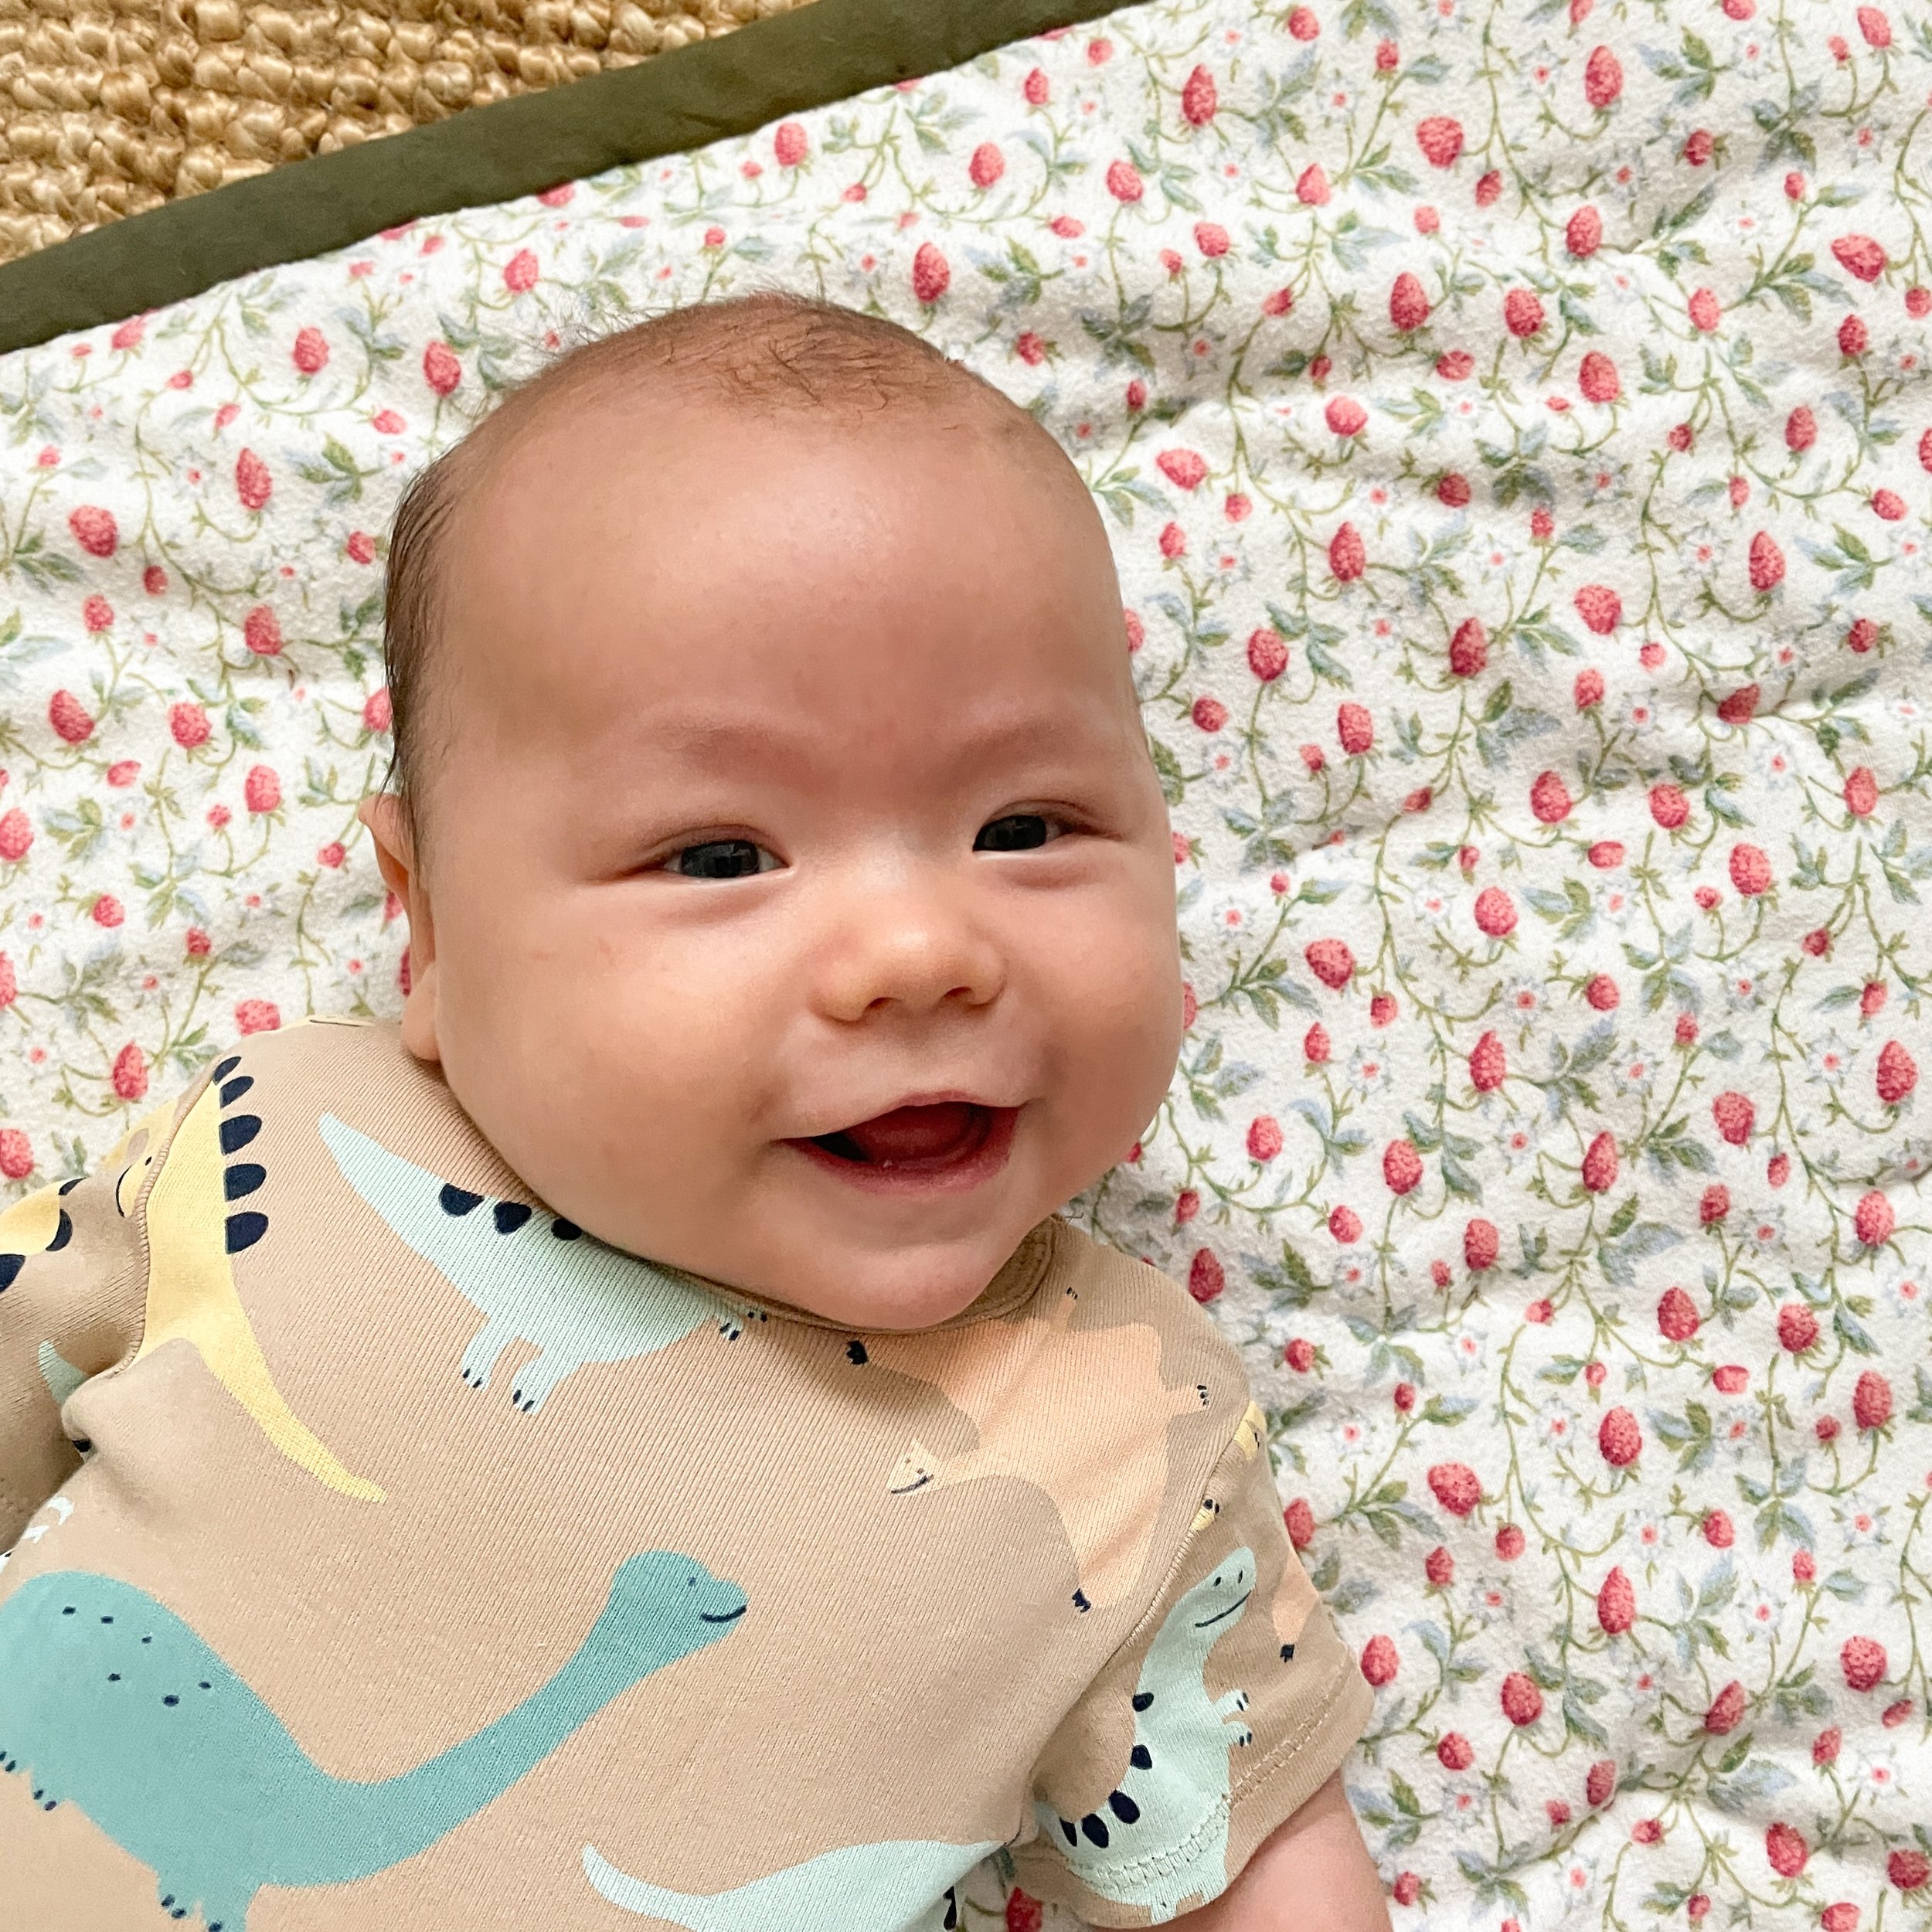
I wanted to make this project using things I already had around the house, and besides the thread it is completely made out of recycled materials! The raspberry printed flannel is actually cut from an old sheet, and the ‘batting’ is two layers of a throw blanket that I’ve owned for over a decade and I was about to get rid of. The green checkerboard side is pieced together using a rain coat I cut up. I bought the rain coat last year from the thrift store and when I wore it in the rain last week I quickly learned it was not very waterproof! I felt bad even donating it back to the thrift store because I didn’t want anyone else spending their money on it and getting tricked. So I cut it up into as many 3.5” squares as I could and pieced those squares into a big rectangle. This way I could use as much of the coat as possible, cutting squares from the sleeves, pockets, and hood. I even harvested the zipper to use in another project in the future. The way I was able to make the checkerboard design was by flipping half of the squares upside down. The backside of the fabric was slightly darker then the front side and I wanted to make use of that in the design.

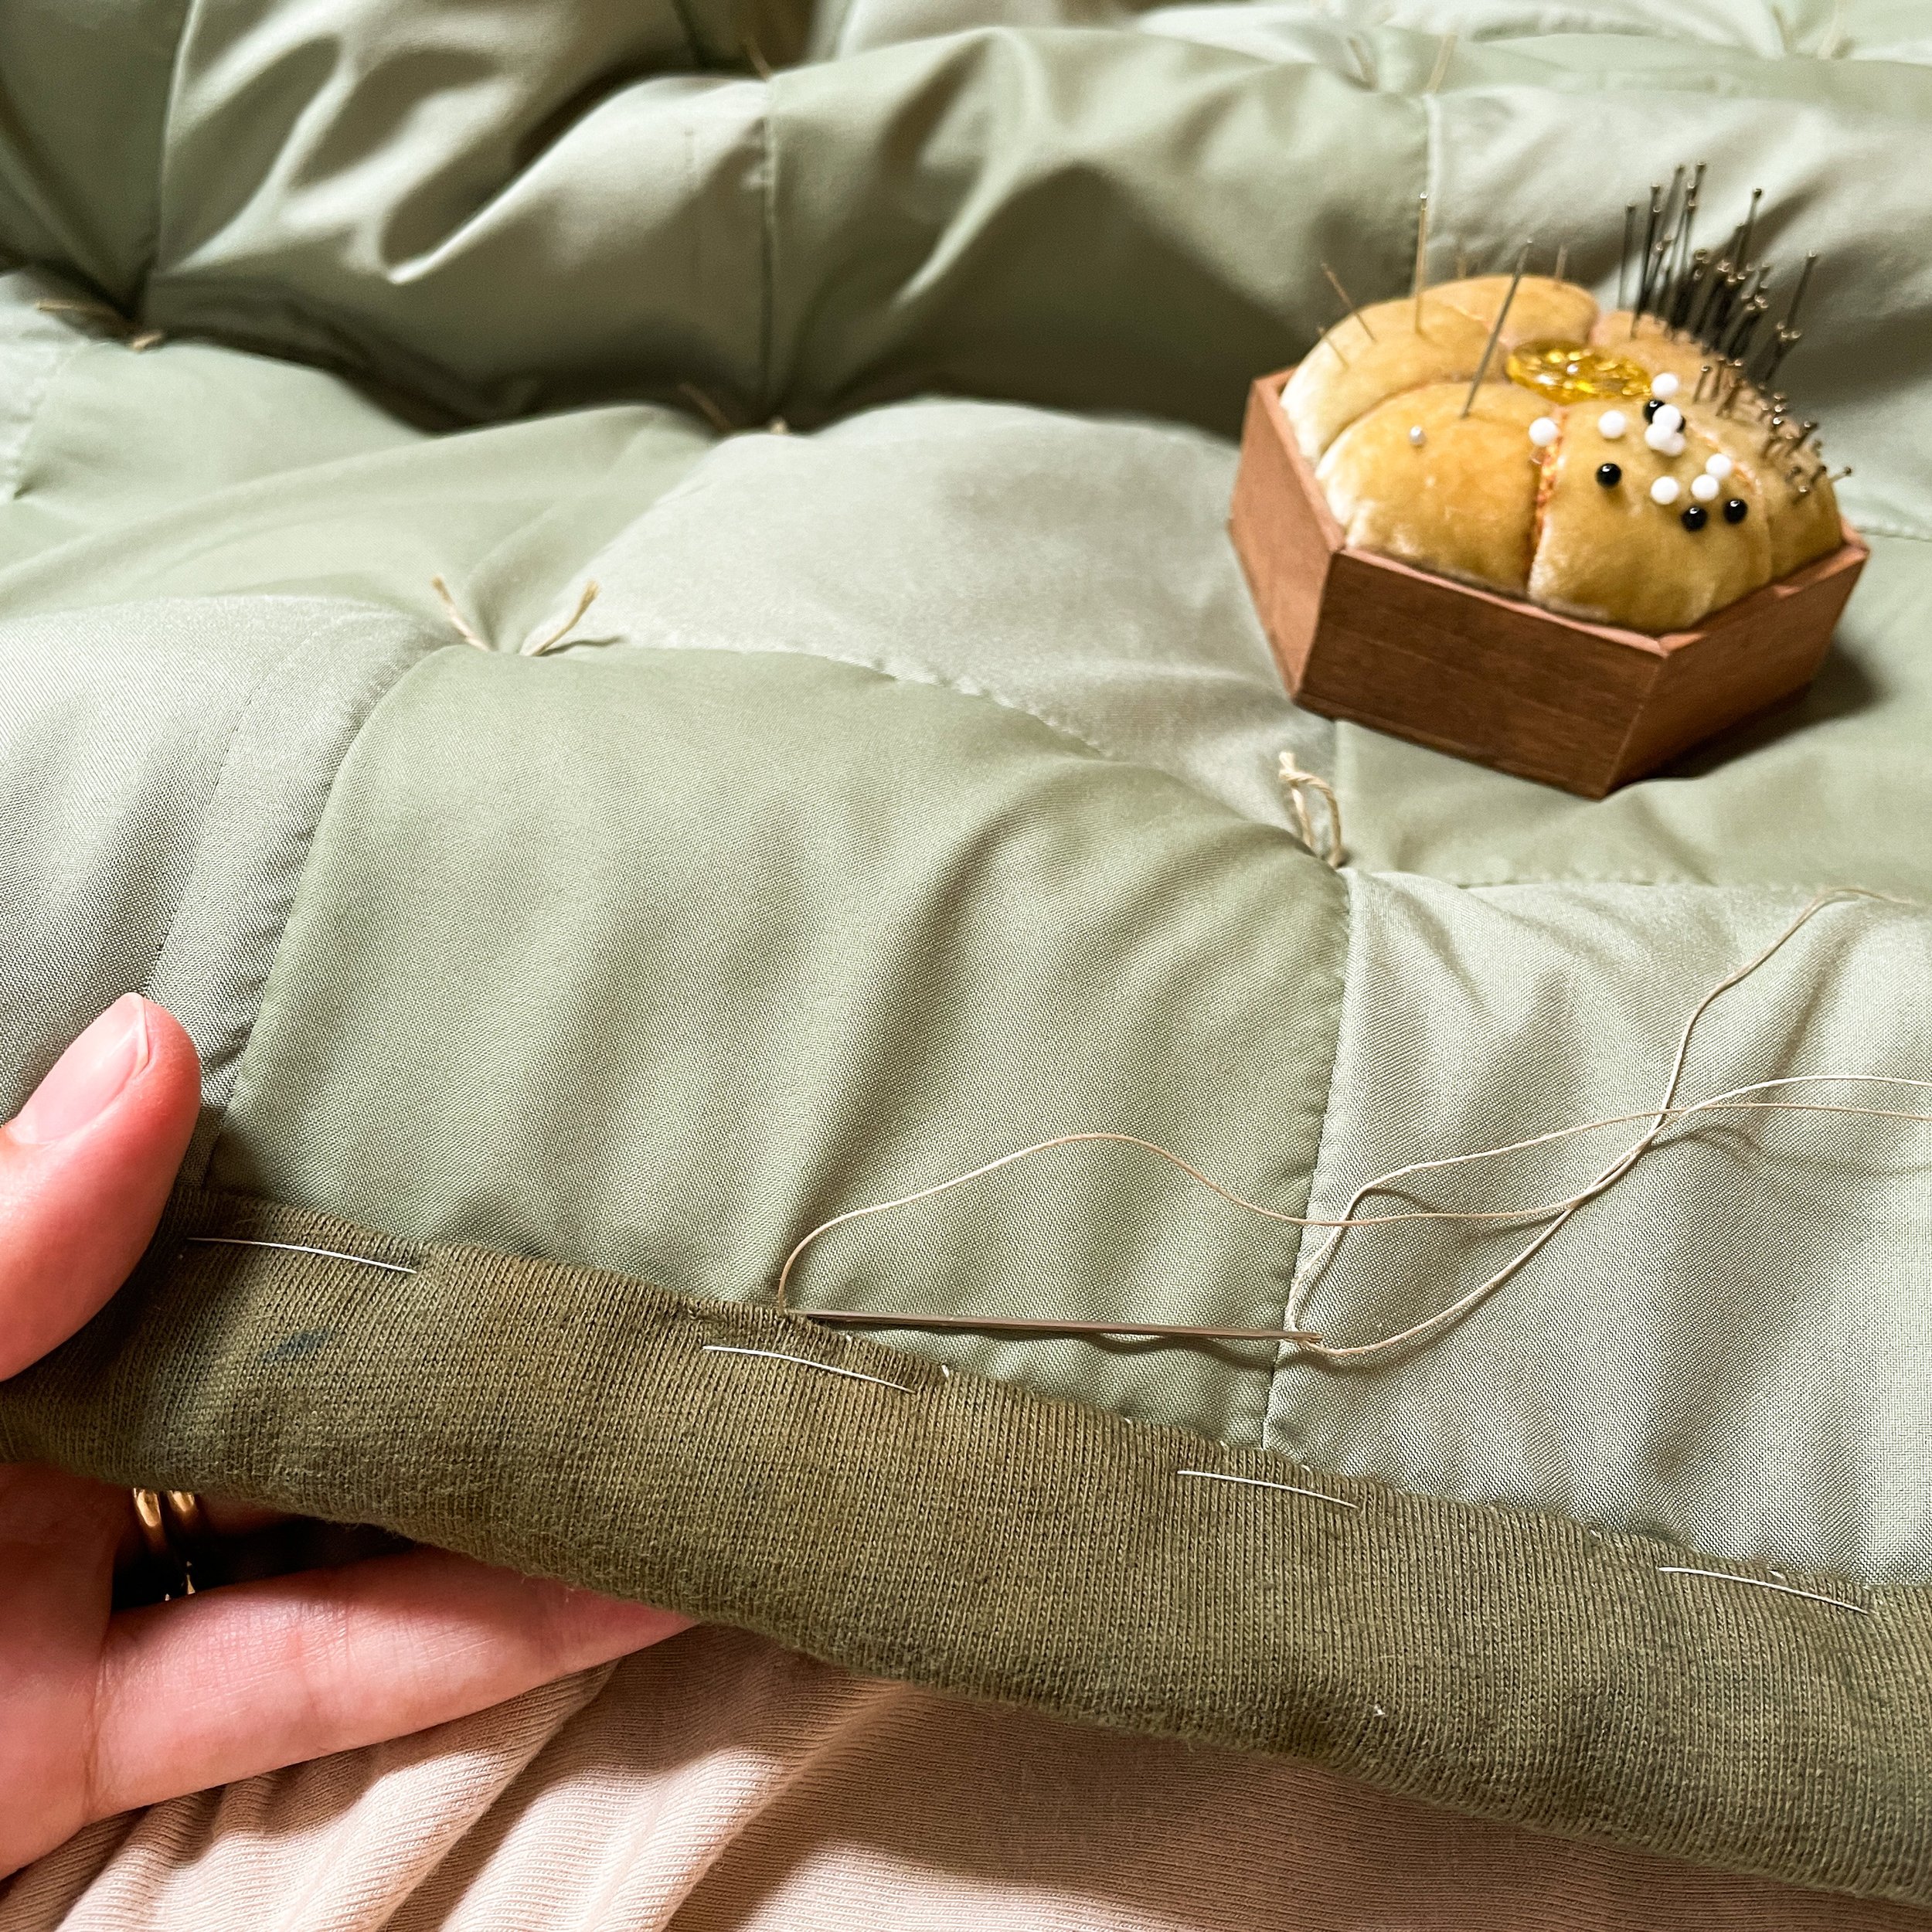
The binding of this play mat is made from cotton jersey. I am working on an Alabama Chanin style dress and had some leftover jersey fabric after cutting out the pattern pieces. I cut 3.5” strips on the cross grain and pieced them together to make one long strip, which I attached the same way you would attach regular binding to a quilt. I love that it is a little softer than using quilting cotton. I cut such a wide strip because I wanted a nice thick border around the play mat, I think the green compliments both sides nicely.

As for quilting: I did attempt to quilt this in my sewing machine and it was such a failure! I wanted this mat to be nice and thick so there is no way I could get it through my machine, even using a walking foot. So instead I used the knotted method of quilting, which is to use thread to tie a knot through all of the layers of the quilt at regular intervals. You can see the tails of the knots on one side of the quilt so I chose to have them on the water resistant piecework side, in between each square of the checkerboard. I used a cotton Sashiko thread (affiliate link) to tie my knots. I think this method works so well for a play mat! The knots are a cute design feature, it works well on extra thick quilts, and it is so quick to do.

You can of course make this playmat any size you like! The size of mine was completely based on the blanket and fabric I had available to use. For reference mine measures 27” x 32”. I recommend cutting your top piece to the size you want your mat, and then if you can, cut your batting/blanket and your backing fabric a little bigger. Things will shift around a little bit as you tie the layers together, so it’s nice to have some extra room for that. Then, before binding, you can trim the batting and backing fabric down so that the edges all line up perfectly. Then add your desired binding! The knotting method of quilting makes this project so easy, and it’s such a great way to use up fabric you already have!

How to Cross Stitch on Jersey Knits

Some links in this blog post may be affiliate links. This means if you click through and purchase the product, I earn a small commission at no additional cost to you. Thank-you.

So, I titled this post as if it was more of a tutorial, but really it should read more along the lines of “I did something one time and it worked so well, so I want to share what I did!” I’ve only done cross-stitch a handful of times, and usually on linen fabric, but I really loved the idea of stitching little scenes onto pre-bought baby clothes, which are usually stretchy. I’ve gotten so many simple little onesies as hand-me-downs and gifts, so this is a fun and quick way to add some personality to them.

I used a cross stitch pattern from Fifi Grace Designs on Etsy and the little scenes she comes up with are so sweet and whimsical. As for actually stitching the design on the fabric I used a wash-away 14-count cross-stitch fabric (affiliate link). It’s genius! I use a similar wash-away interfacing for regular embroidery designs, but this one has a little stiffer feel to it and of course tiny holes so you know exactly where to stitch your little x’s.

Using the interfacing is very easy. You first need to figure out how big of a piece you need for your design, and then cut that out giving yourself a little extra space on each side. Baste the interfacing onto the knit fabric around the edges using a long running stitch. If you are sewing a big design you could also add a couple basting stitches in the middle to hold the interfacing to the fabric better, these basting stitches will all get removed later anyways. Then once your interfacing is in place, stitch your design, remove the basting stitches, and wash away the interfacing in water!

If you decide to try this out let me know how it goes! I hope it works as well for you as it did for me!

Links:

Fifi Grace Designs: Duck and Ducklings Cross Stitch Pattern

14-count water soluble canvas (affiliate link)

Thread: DMC 6-strand embroidery floss (affiliate link)

An Up-cycled Dinosaur Embroidered Baby Shirt

Some links in this blog post may be affiliate links. This means if you click through and purchase the product, I earn a small commission at no additional cost to you. Thank-you.

My first make for our coming baby boy! Right away when friends and family started finding out that we were expecting I started getting asked if I I’m planning on making all of my baby’s clothes, and I always have to answer that I’m definitely not! I spend so much time on each piece that I make, so I end up only completing a handful of projects a year, and that just won’t work for a growing baby. But I have been excited to make a couple special things to welcome him into the world. It’s one of the things that has been helping me to relax and prepare mentally.

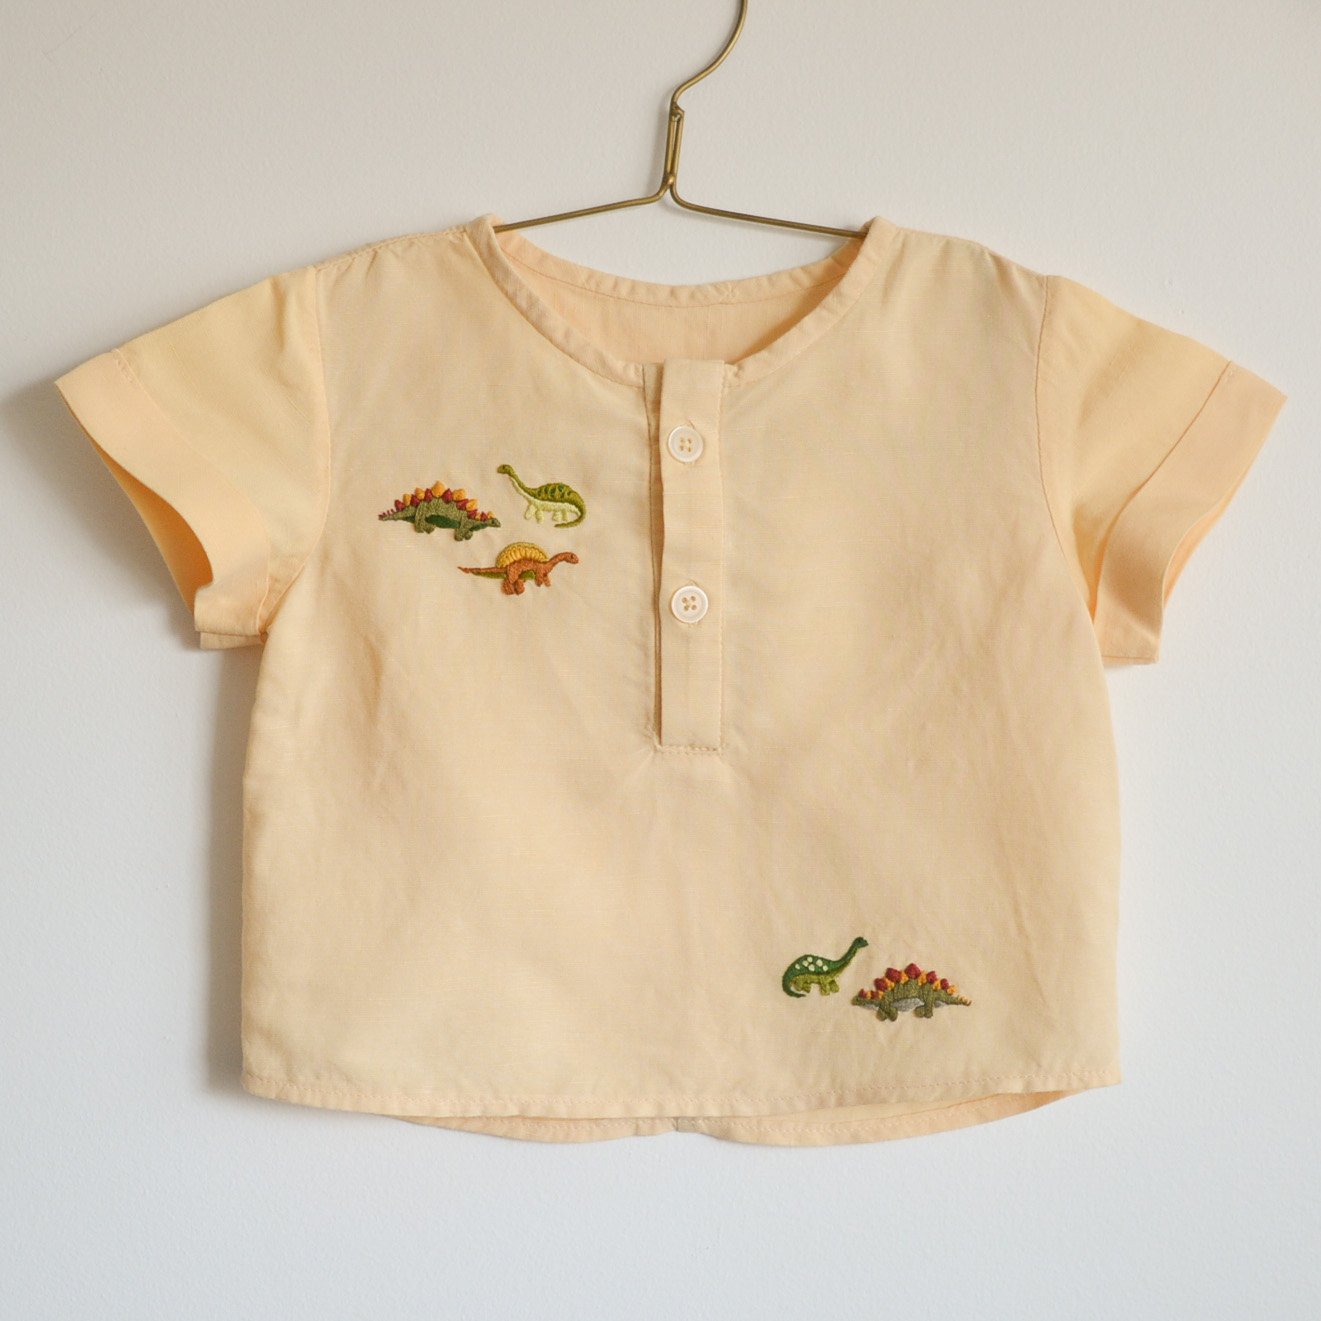
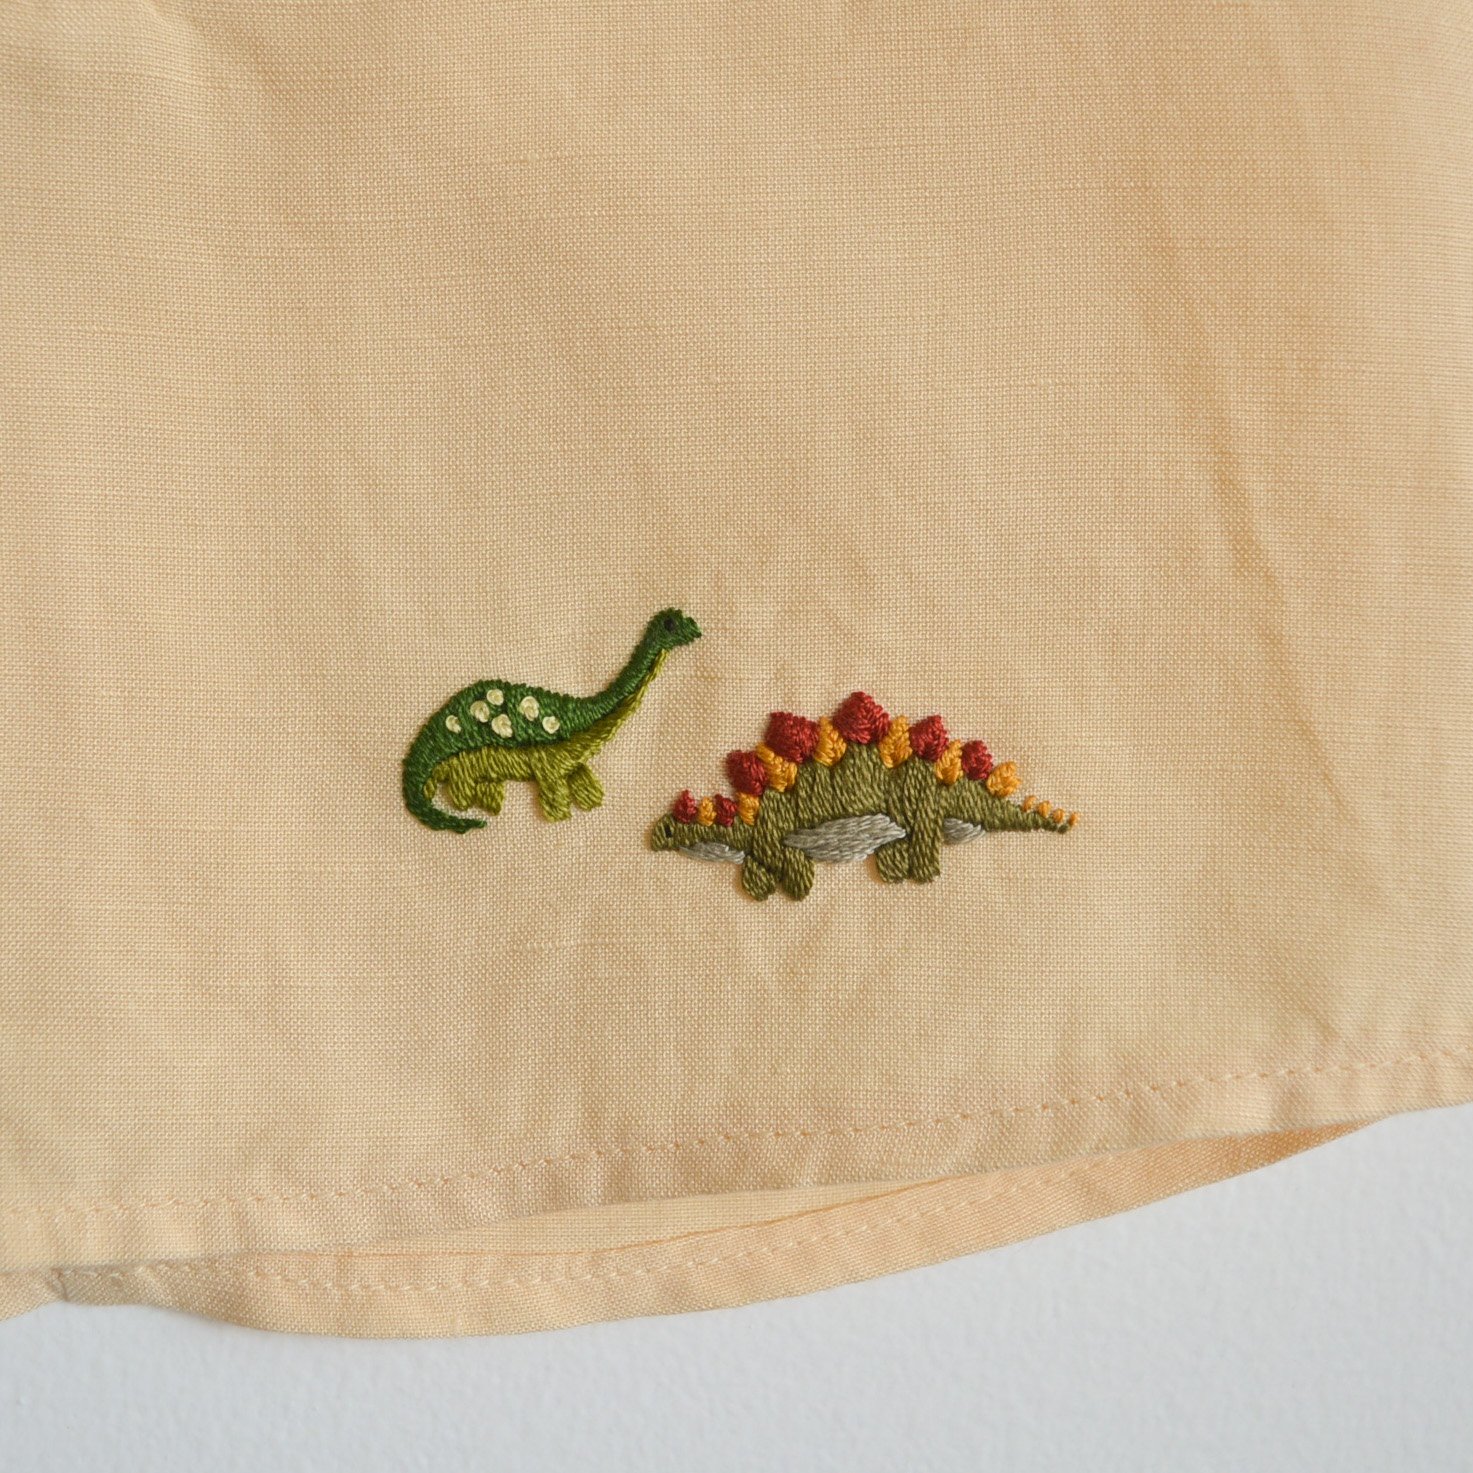
So my first make has been a little butter yellow henley style t-shirt, embroidered with the sweetest little dinosaurs. The fabric I used is from a shirt I thrifted a few months ago that I didn’t love the fit of. Unfortunately the thrift store near me decided to permanently keep their change rooms closed after they closed them in 2020, and sometimes it’s hard to get the sense of how something will fit by just holding it up. I missed the exchange period and so I wanted to upcycle the shirt into something I would get to use. The fabric is a linen rayon blend, it’s very soft, and it was just enough to cut a baby shirt from.

I used a PDF pattern I found on Etsy: the Miguel Shirt from a shop called costurinha sewing patterns. The pattern includes a long and short sleeve option, and sizes for baby’s and kids. I made this one in the smallest size, the 3 month size, but I’m hoping to get some more use from this pattern in the future. I think a colour-blocked version of it would be really fun as well. The only change I ended up making to the pattern was to add a seam down the back piece. I was using that shirt I thrifted, so I didn’t have enough fabric to cut the entire back piece as one, but I actually love the seam. I don’t think it looks out of place at all and it was what got me thinking about that colour-blocked version.

The dinosaur embroidery pattern is from the Love Embroidery magazine, originally printed in issue 15, but after that issue they added it to their free pattern archive online. I’ll link to the pattern below, which is a design for the magazine by Jessie Newton. It was such a quick and easy one for such a cute touch to this shirt. I used one of my favourite methods for transferring the pattern: I traced it with pencil onto some water soluble sew-on interfacing (affiliate link), and then basted that interfacing onto the shirt before stitching. The interfacing just rinses away when you are done stitching.

I ironed this little shirt before taking these pictures but honestly that will be the last time this ever gets ironed. It was so finicky of course! And really I think with linen wrinkles are just a part of the look. I’ve linked everything relevant below, and I can’t wait to share a photo of my little one wearing this when he arrives!

Links:

Miguel Shirt Pattern: costurinha sewing patterns

Little Dinosaurs Embroidery Pattern by Jessie Newton: Love Embroidery Magazine

Wash-away sew-on interfacing (affiliate link)

Baby Booties

One of my best friends is having her first baby, and so it will be the first chance I have to shower a mother with gifts. At the tender age of 22 she is having her first with the man she’s been with since we were in high school. I wanted to buy something off the registry, especially since I am not a mother and know nothing about what parents need, but I also really wanted to gift a handmade item.

booties.jpg

I went with baby booties because they were easy to make neutral (they’re letting the baby’s sex be a surprise!) and I thought they would look cute on top of a present, a decoration and gift in one. I’ve linked the pattern I used at the end of this post, I changed a couple numbers in the pattern to make it work out which I talk about on my Ravelry project page. They turned out so cute and I chose a nice cotton yarn so they are also very soft.

wrappedpresent.jpg

I also decided to include a book in my gift, a collection of short stories put together by Kristen Hedges called mama, bare. The short stories are all written by new mothers about their experiences following birth, in the early days of motherhood. From the registry I picked out a baby carrier and all together I’m really happy with the gift and excited for the shower. I think adding something handmade to a gift makes it so much more special.

Pattern: http://www.ravelry.com/patterns/library/stay-on-baby-booties-archive

My project page: http://www.ravelry.com/projects/ashleygeneral/stay-on-baby-booties-archive