
My Handmade Wedding Dress: Part 2
/
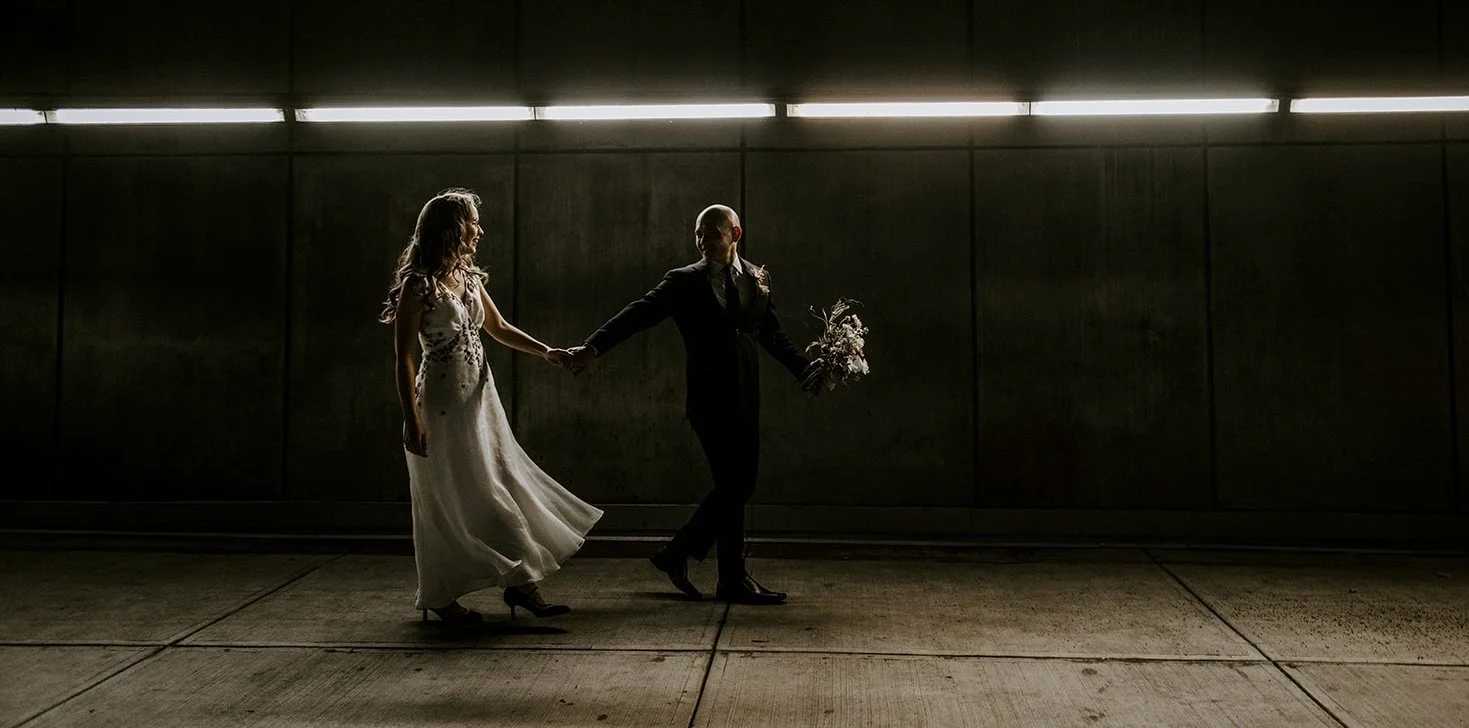
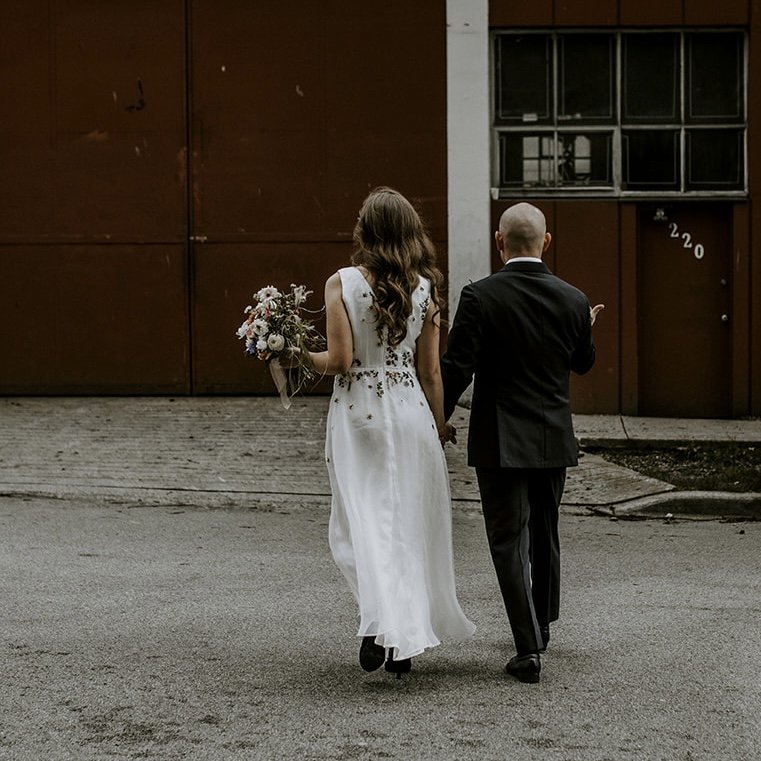
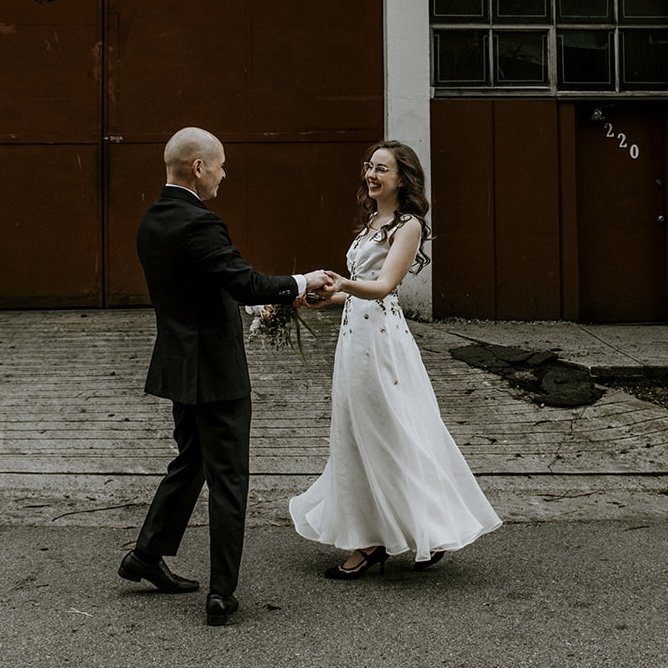
Wedding Photos by Isle + Oak Photography
Some links in this blog post may be affiliate links. This means if you click through and purchase the product, I earn a small commission at no additional cost to you. Thank-you.
So nearing a year after my wedding I should probably wrap up recording all the details of this project! I posted a Part 1 (which you can click here to read) where I talked about the materials and supplies I was using, the design sketches, embroidery samples and the mock-up of the dress. I’m going to wrap up everything else in this blog post, which mainly includes the embroidery on the silk organza, hand sewing the dress, and then some final photos from the wedding!


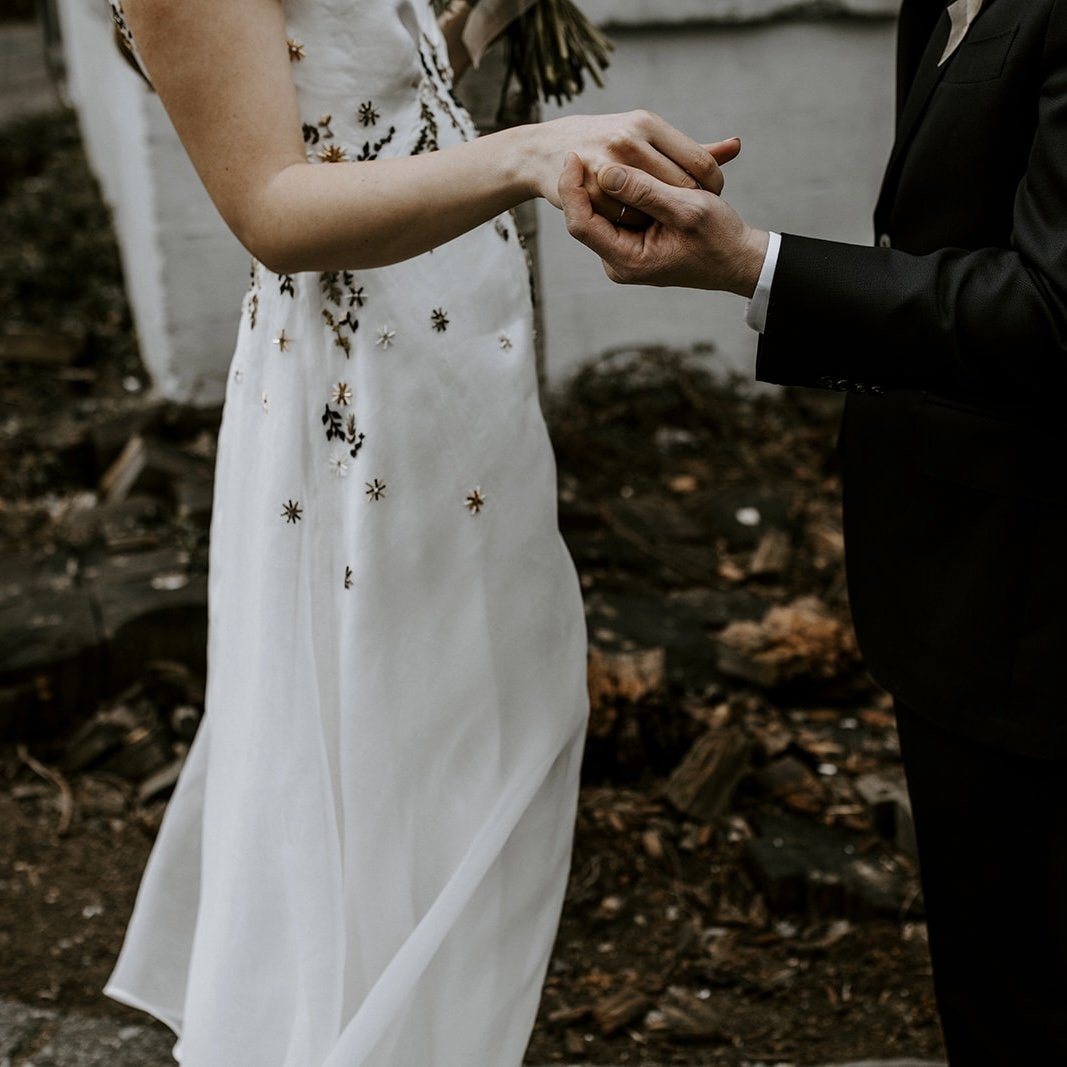
The embroidery motifs I came up with were all pretty fast to stitch, and the little beaded starbursts were really fast and satisfying to stitch onto the organza as well. I think what ended up being more time consuming (and maybe it just felt like that because it wasn’t that thrilling to do), was all of the tracing! I had a little sheet of the 9 motifs I was using, and I traced those onto a paper copy of the dress pattern where I wanted the embroidery to be. I tried to place everything randomly and kept flipping and rotating the motif’s so that they would look a little more unplanned. I then traced these arrangements onto a water soluble interfacing (affiliate link) which I then basted onto my organza fabric for stitching. But once I got to this point and had all of my pieces prepared for stitching I felt like I started to breeze through the actual embroidery.
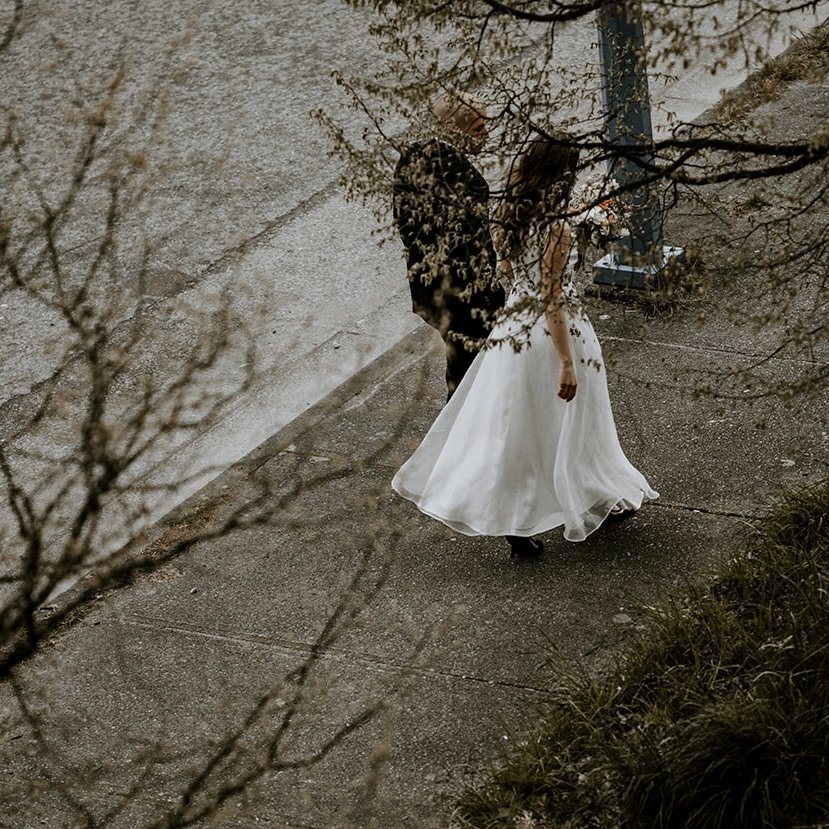
Wedding Photos by Isle + Oak Photography
The silk organza was going to be the top layer of my dress, so I couldn’t start actually putting the dress together until all of that was done. This made me a little nervous because we were getting closer and closer to the wedding and I didn’t actually have anything coming together that looked wearable! This was the point when I basically had to ditch the sleeves. I had everything else embroidered, and I had just started on the organza for the sleeves, and my anxiety started getting the better of me. I needed to start constructing this dress! I decided that I would make the sleeveless version of the Lune Dress and if I had time before the wedding I would make some detachable sleeves for it (spoiler: I didn’t have time for them!).
Sewing the dress itself took many, many hours. I talked in Part 1 about how I would be entirely hand-sewing this dress. The fabric was just too delicate to risk running through my machine, especially with all the time-consuming embroidery already done. Also, because the organza is sheer, you can also see the seam finishings from the outside, so I wanted them to be very neatly whip-stitched. The dress was three layers overall: the organza over layer, the silk charmeuse main layer, and a silk habotai lining layer. Looking back I wish I would have machine sewn the lining layer to knock a couple days off the construction of the dress, but I think I just got into a mindset that the entire thing had to be hand sewn. By that point for the lining I was just hand sewing to say I did it.
Anyways it all came together and I am really happy with the overall look of it and with the details of the dress. The hem ended up surprising me a little bit in the best way. It almost flares out a little bit where I sewed it, reminding me of a flower shape, which makes this wedding dress feel straight out of a fairy garden scene.
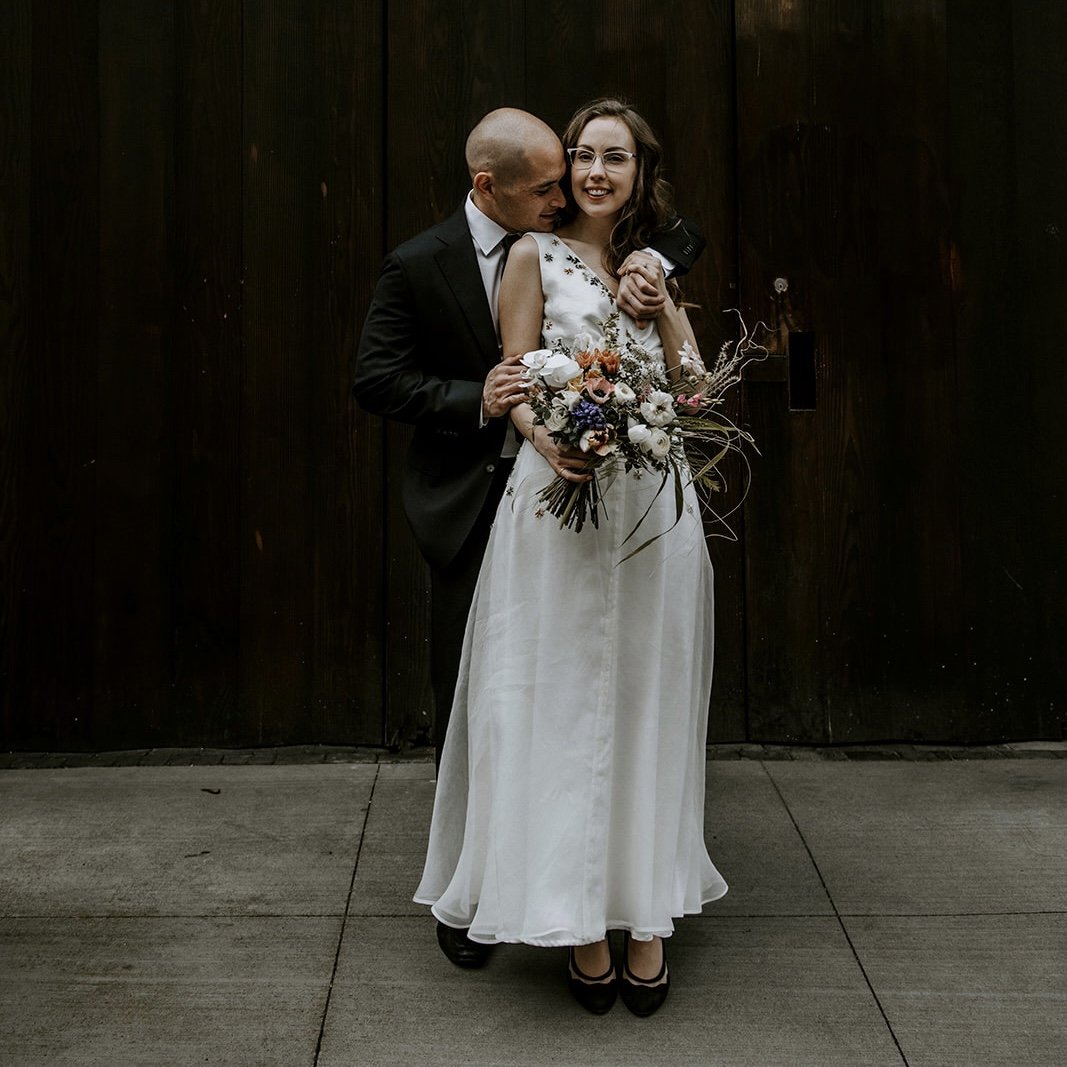
This definitely tops my list of projects I am most proud of in my life. From how much time went into it, to everything new I tried and learned, to the way I felt when wearing it, I just couln’t have imagined a better outcome! I hope you enjoy the photos and I hope this post inspires you to try something just a little bit bigger than you think you can handle, you might surprise yourself!
I also ended up using the piece of embroidery that I had started for the sleeves before I decided to scrap the sleeve idea. We framed a couple of our wedding photos for a photo wall in our apartment, and so to complement the arrangement I framed the embroidery piece in a vintage frame I ordered from Etsy. It looks like I cut a piece of the dress for framing but really the dress is still completely intact and stored away!

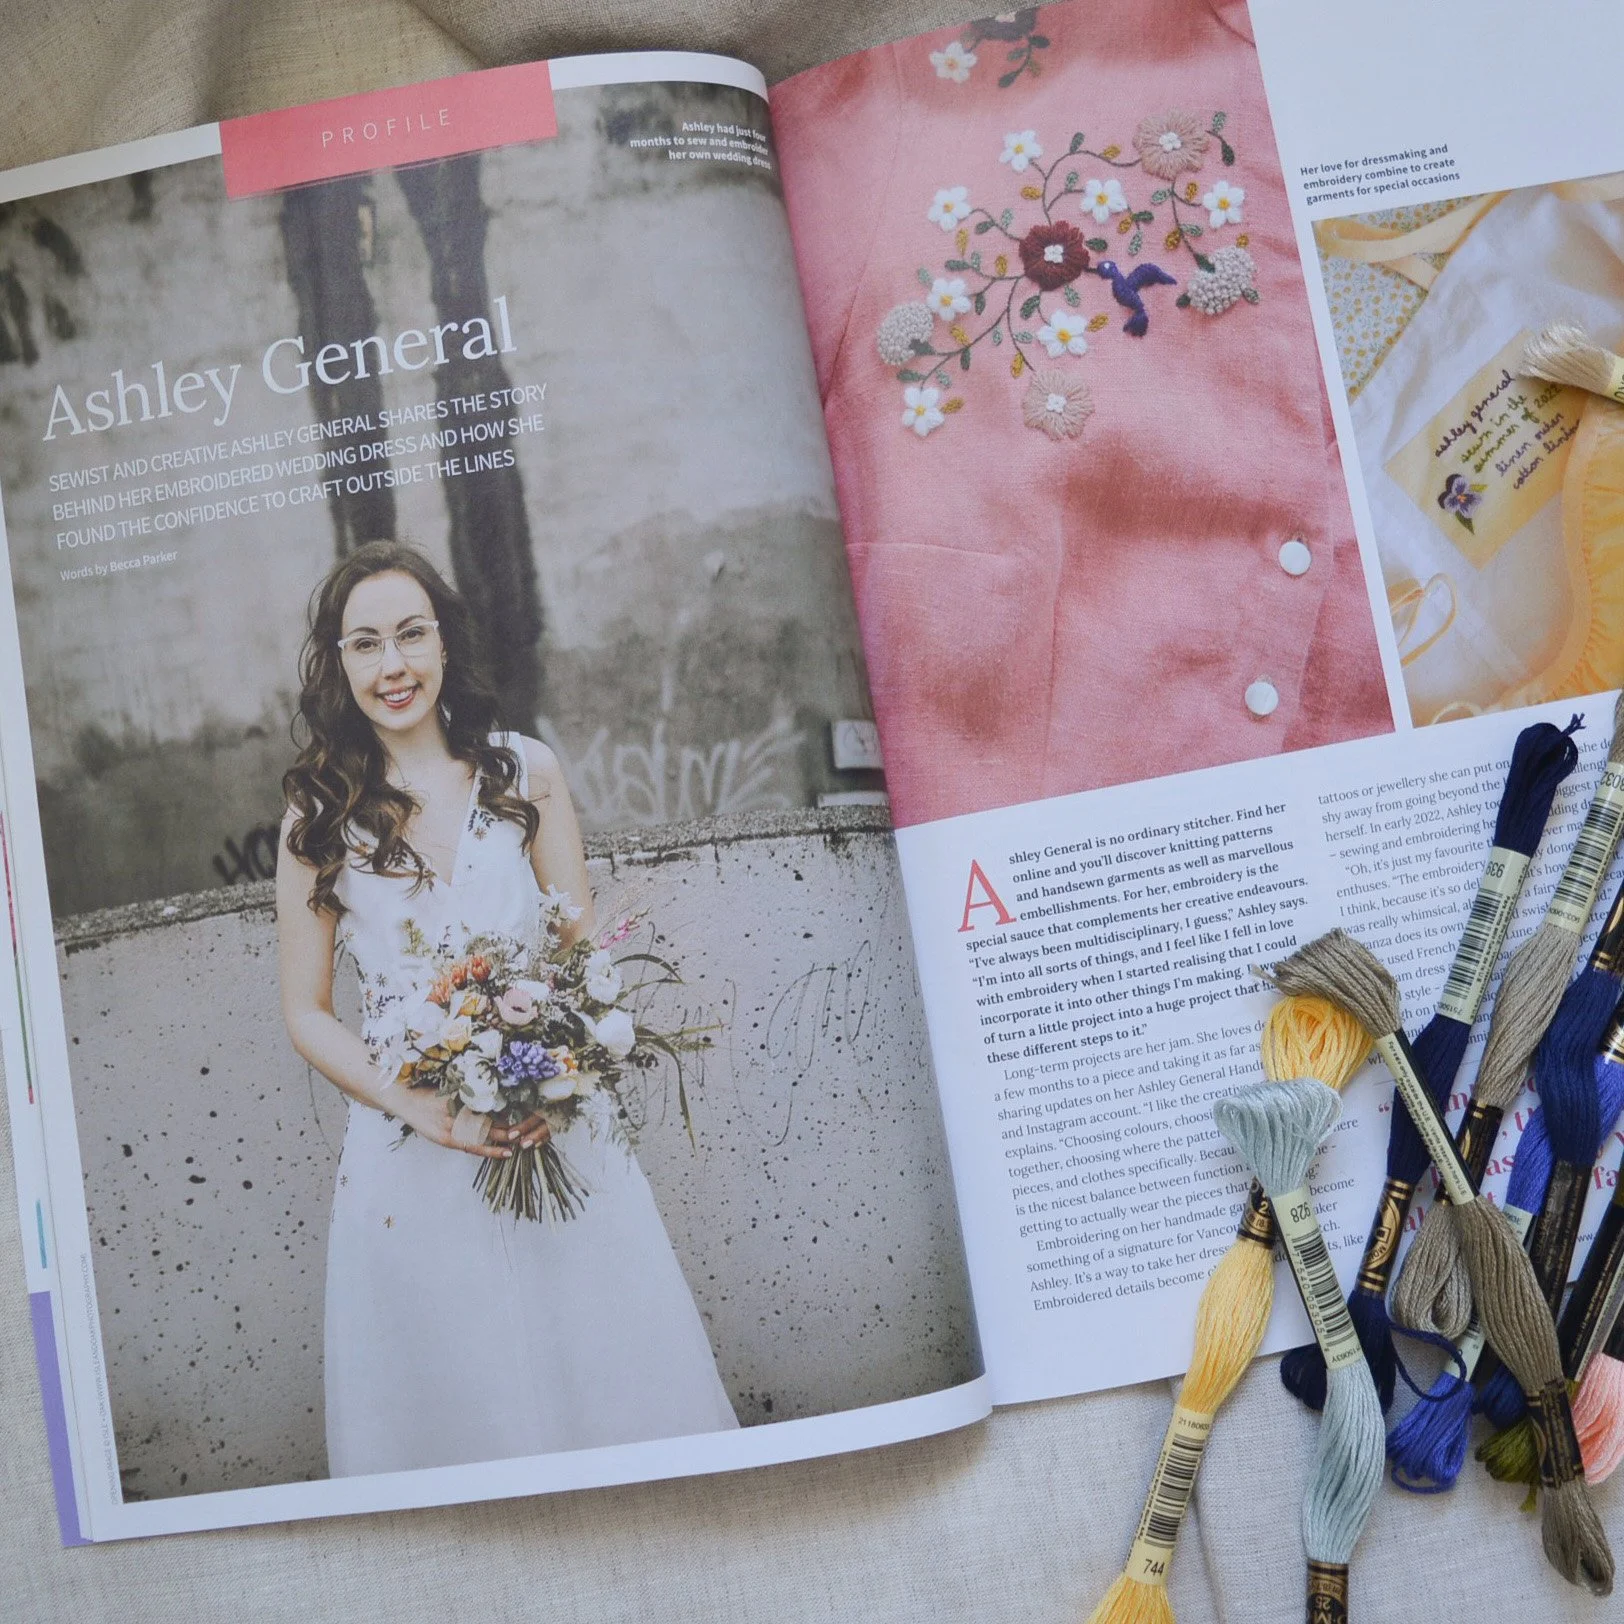
This dress, along with a couple of my other projects were featured in Issue 36 of Love Embroidery Magazine. You can order the magazine here.

Some other related links:
Wedding Dress Part 1: Planning, Mock-up, and Embroidery Samples
Our Wedding Photographers: Isle + Oak Photography
Silk Organza Fabric: Maiwa
Silk Charmeuse Fabric: Rokko Fabrics
Silk Habotai Lining Fabric: Maiwa
Beads: Beadworks on Granville Island
Embroidery Thread: DMC Six-Strand Embroidery Floss (affiliate link)
Interfacing: Wash-away water-soluble interfacing (affiliate link)
Dress Sewing Pattern: Lune Dress by French Poetry
Vintage Oval Frame: Carter & Wainwright on Etsy
