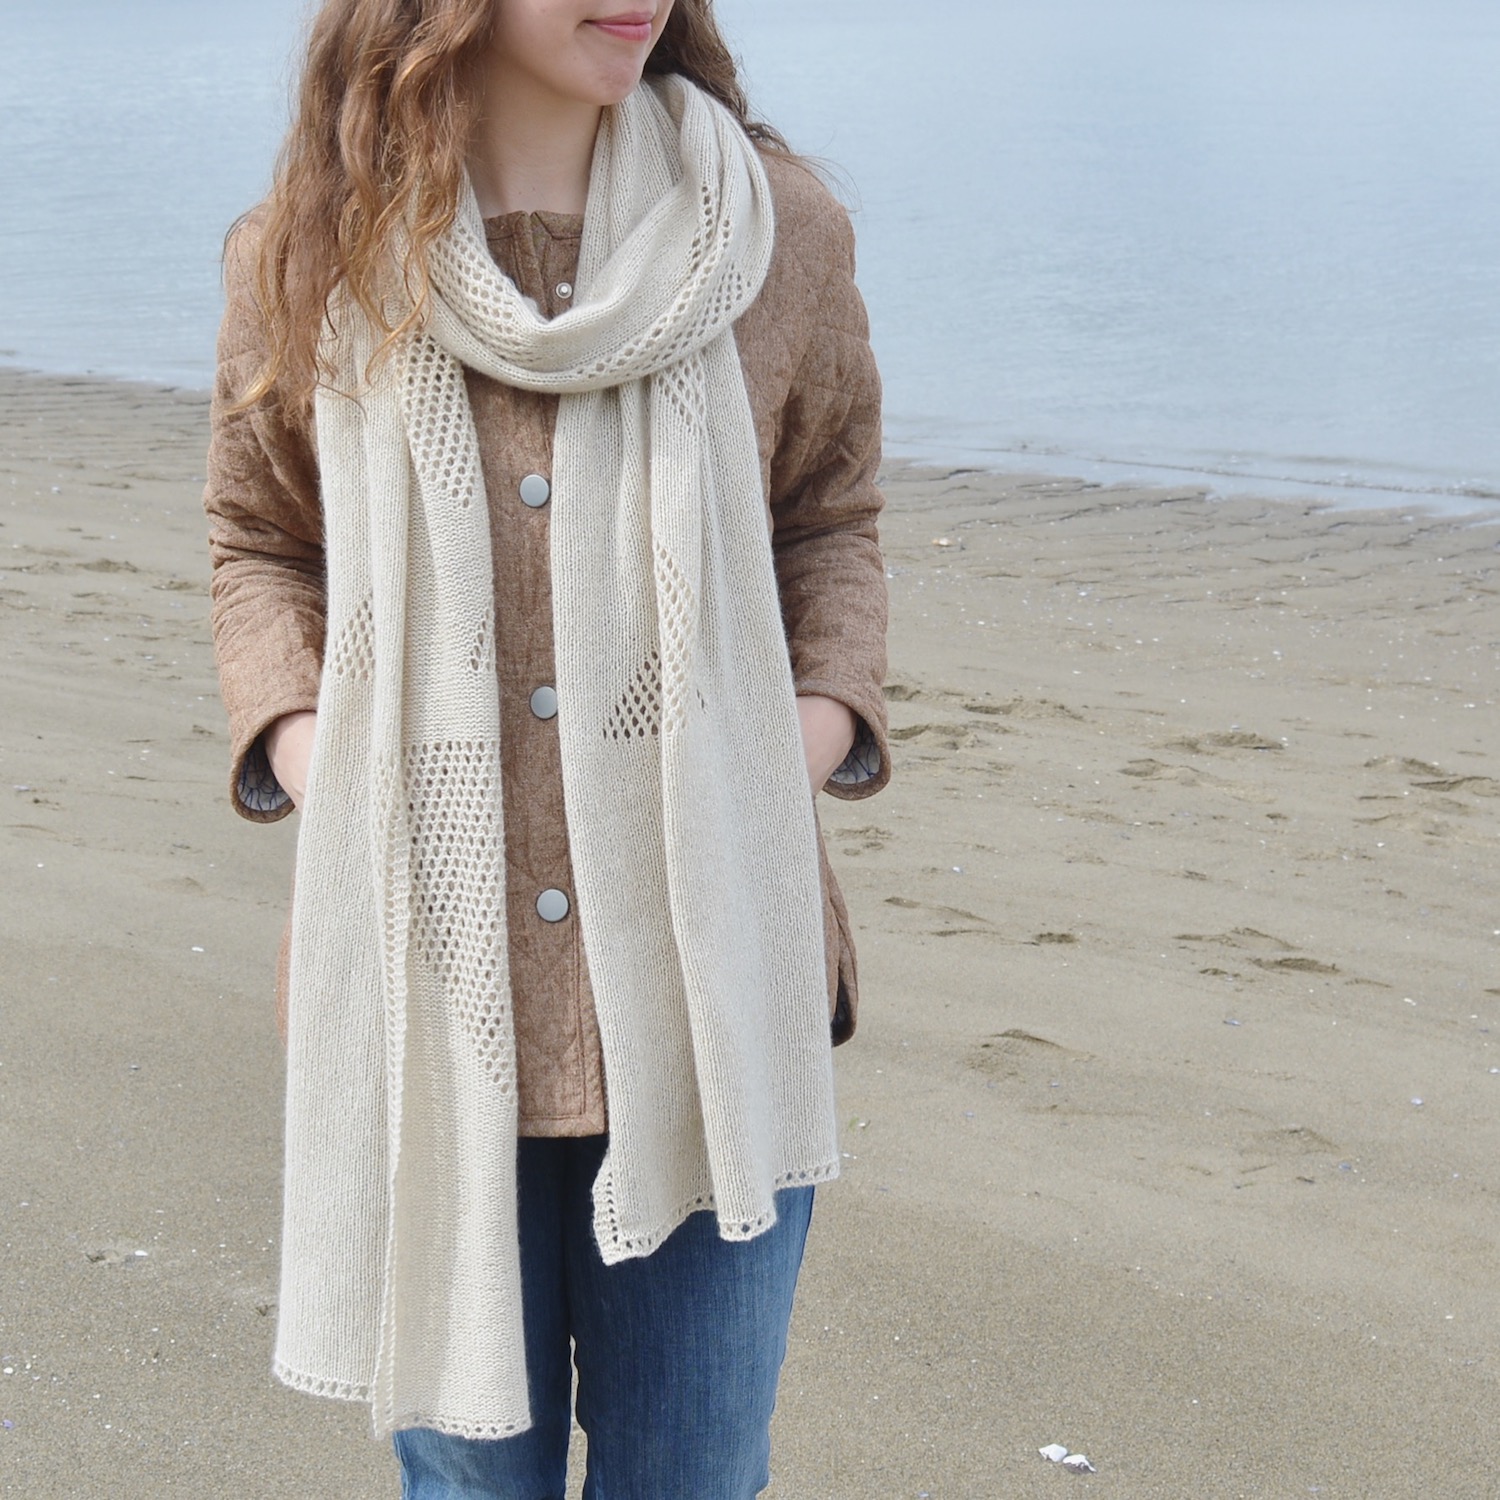
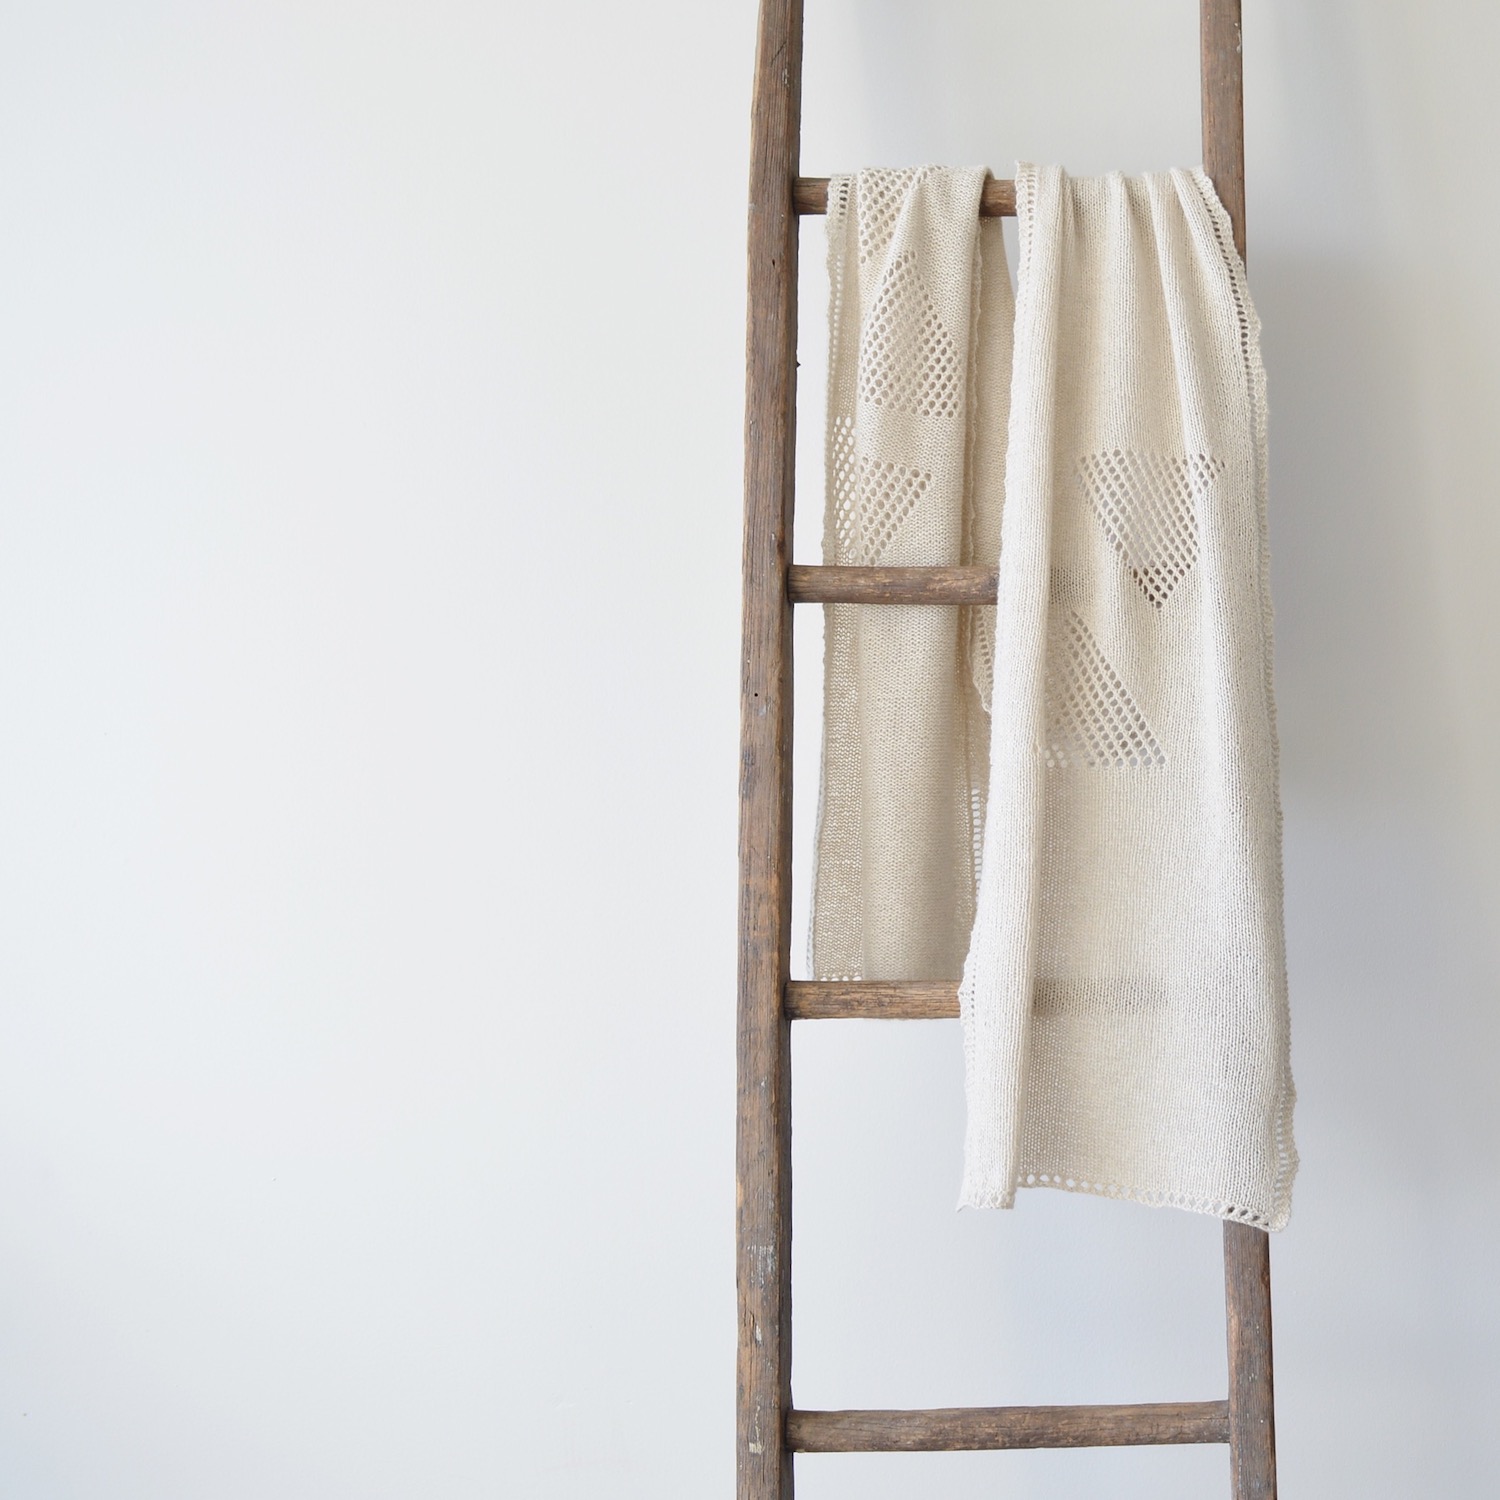
Backing a Knit Scarf with Wool Fabric
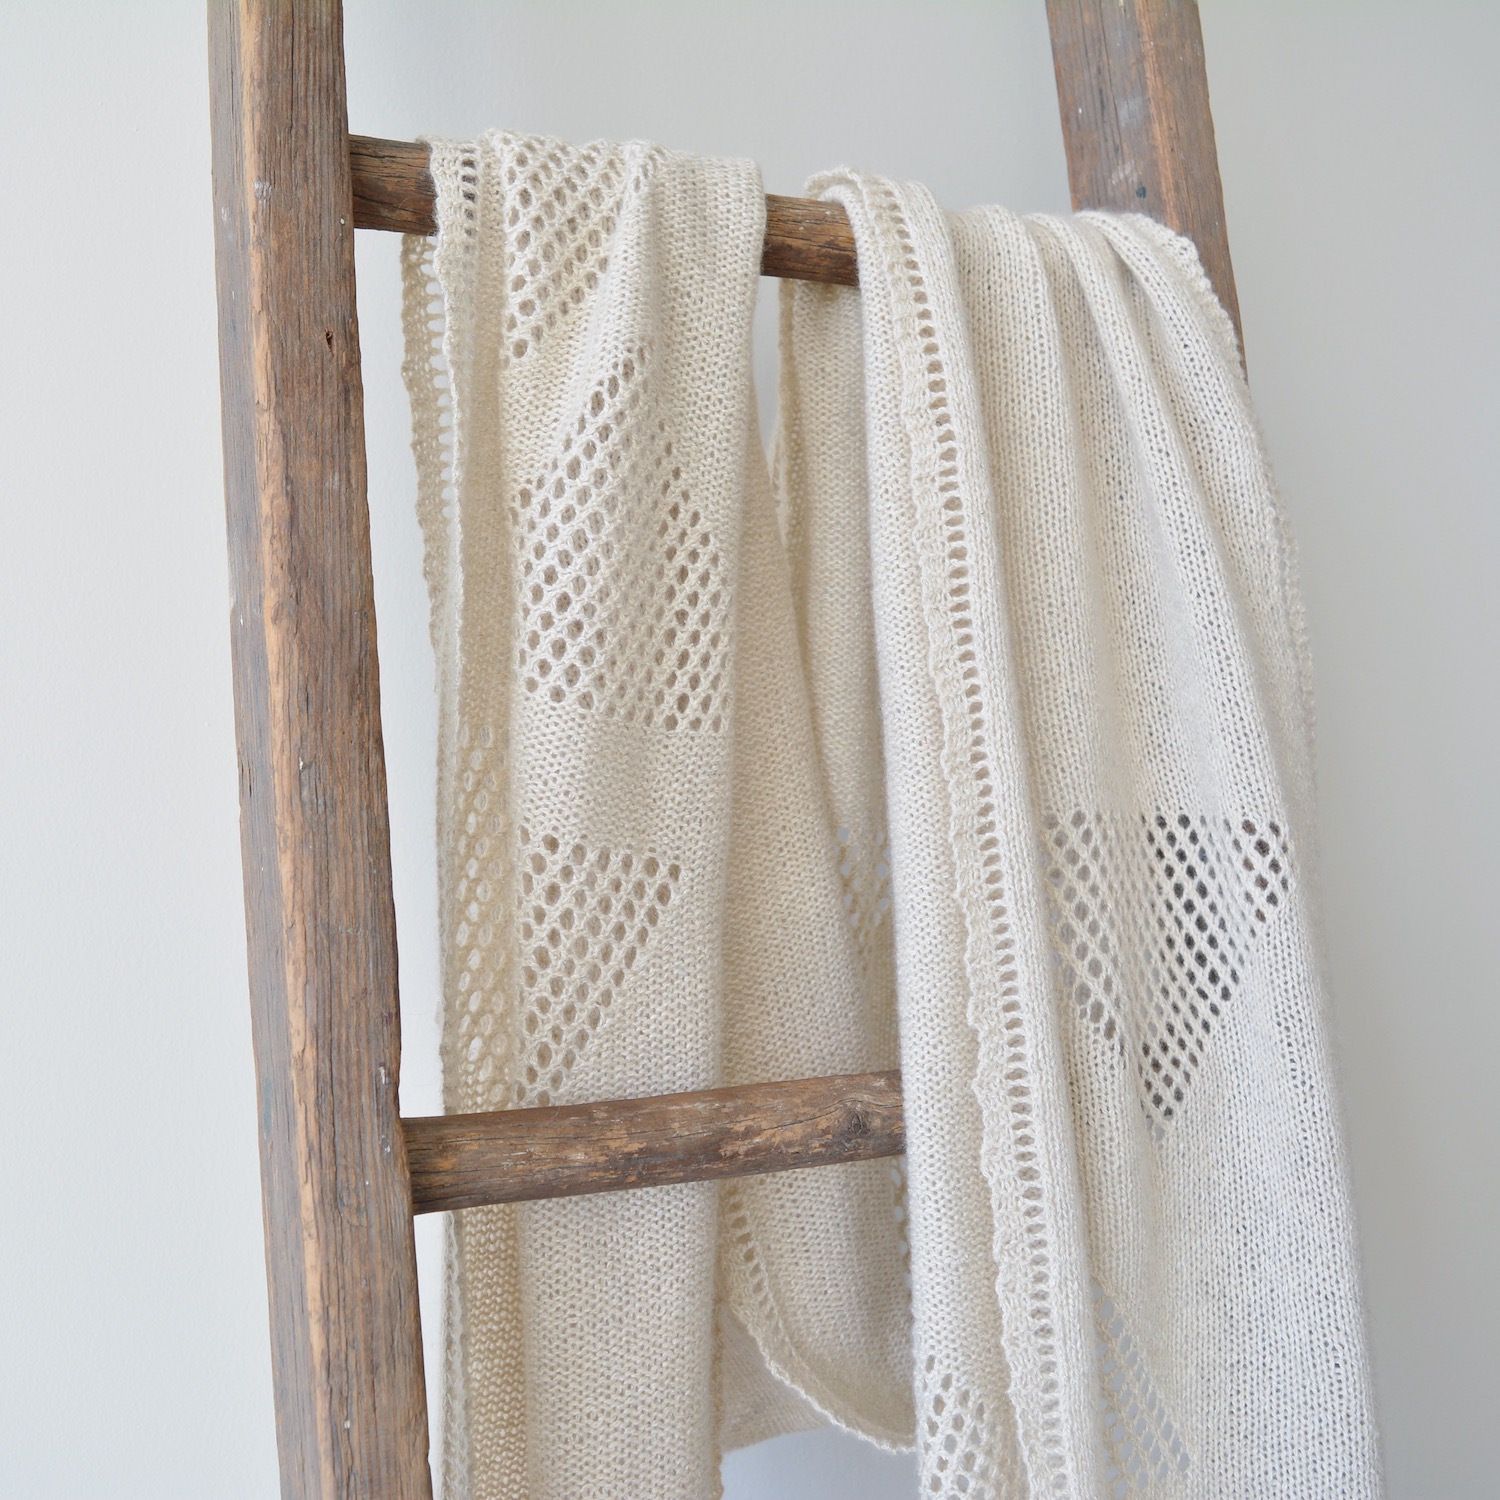
When I designed the Clayr Scarf, my intention was to create a wonderfully light and long airy scarf. It was a beautiful scarf, knit up in Shibui Knits Pebble, which is a blend of silk, merino wool, and cashmere. Although I loved the scarf, it has ended up sitting folded in a drawer for years, it just doesn't suit cold Canadian winters. I always find myself reaching for something warmer, so I thought I would put some time into making Clayr a scarf I reached for more often.

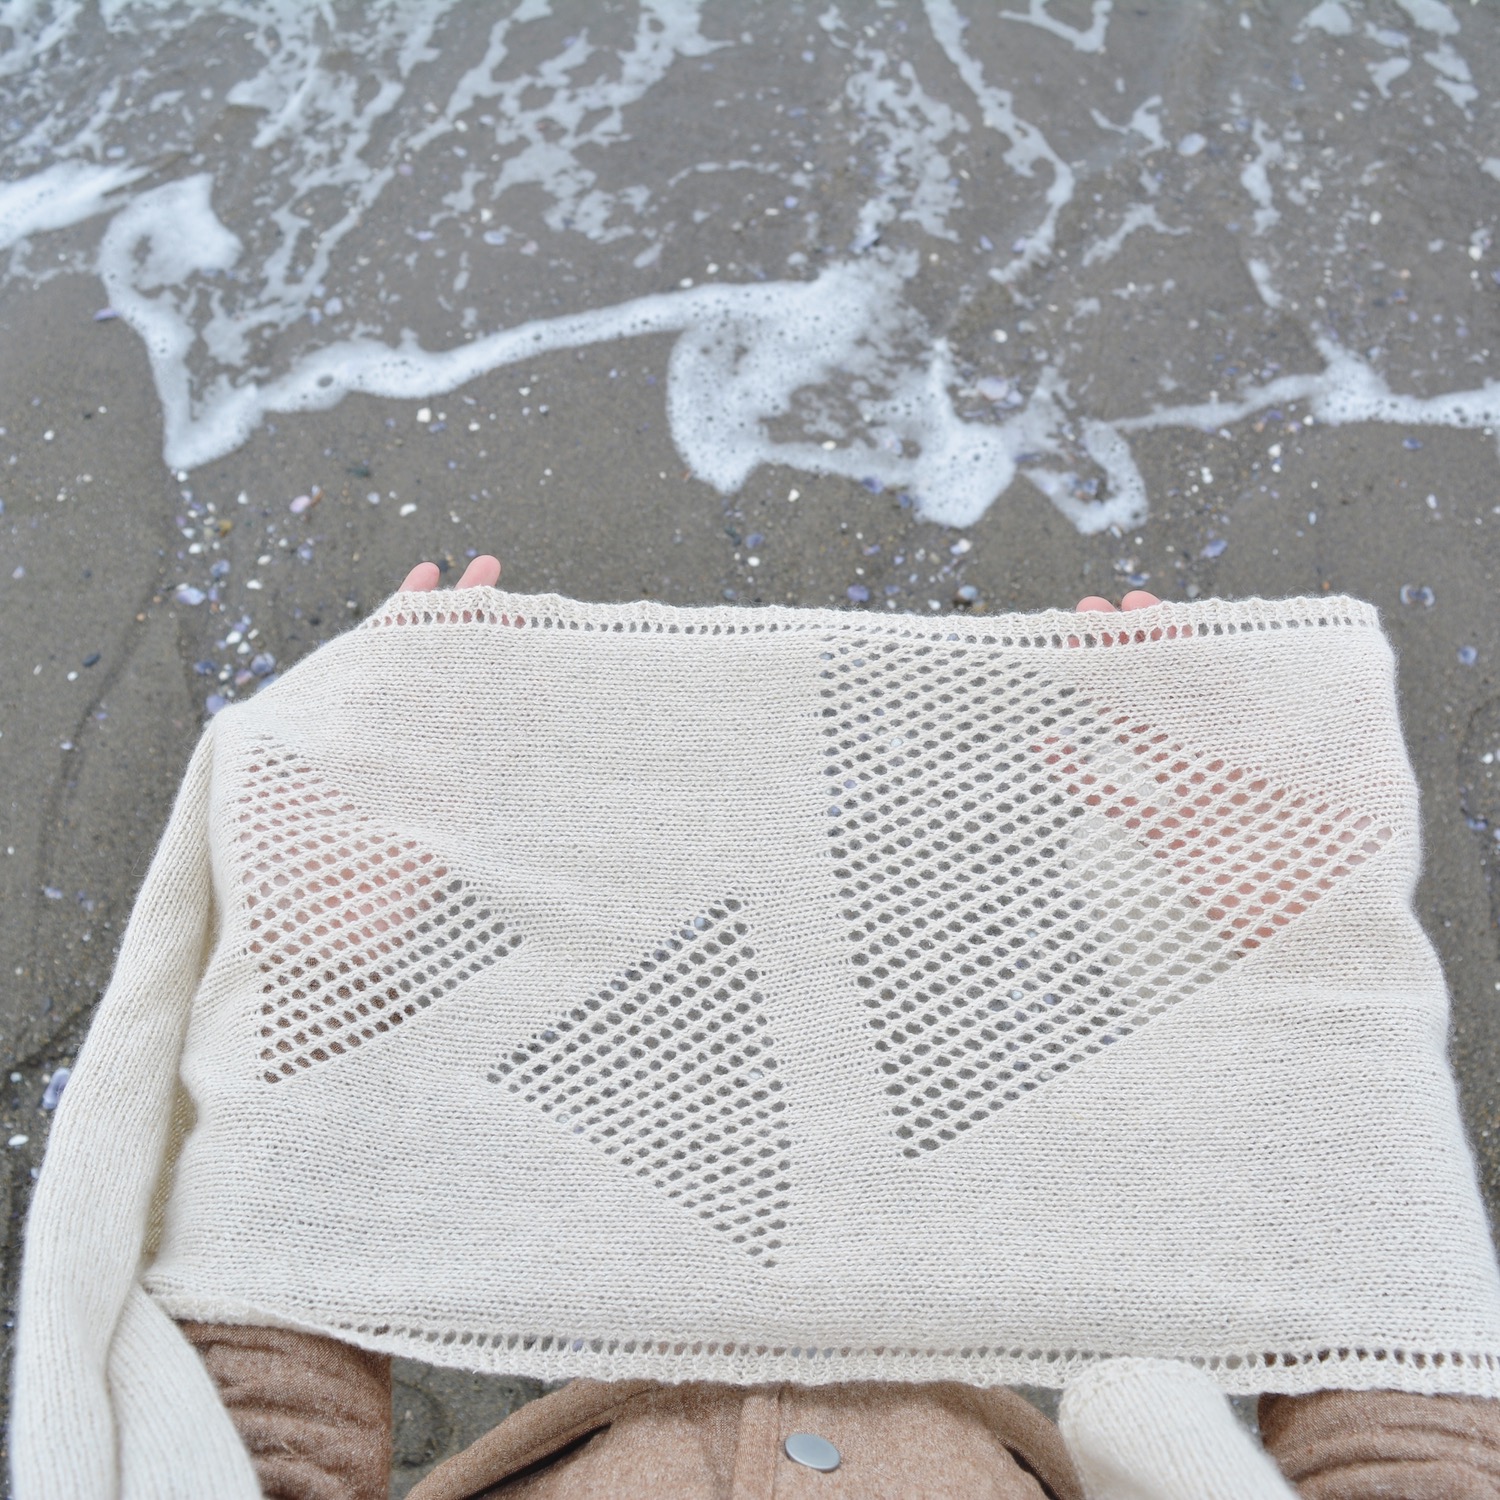
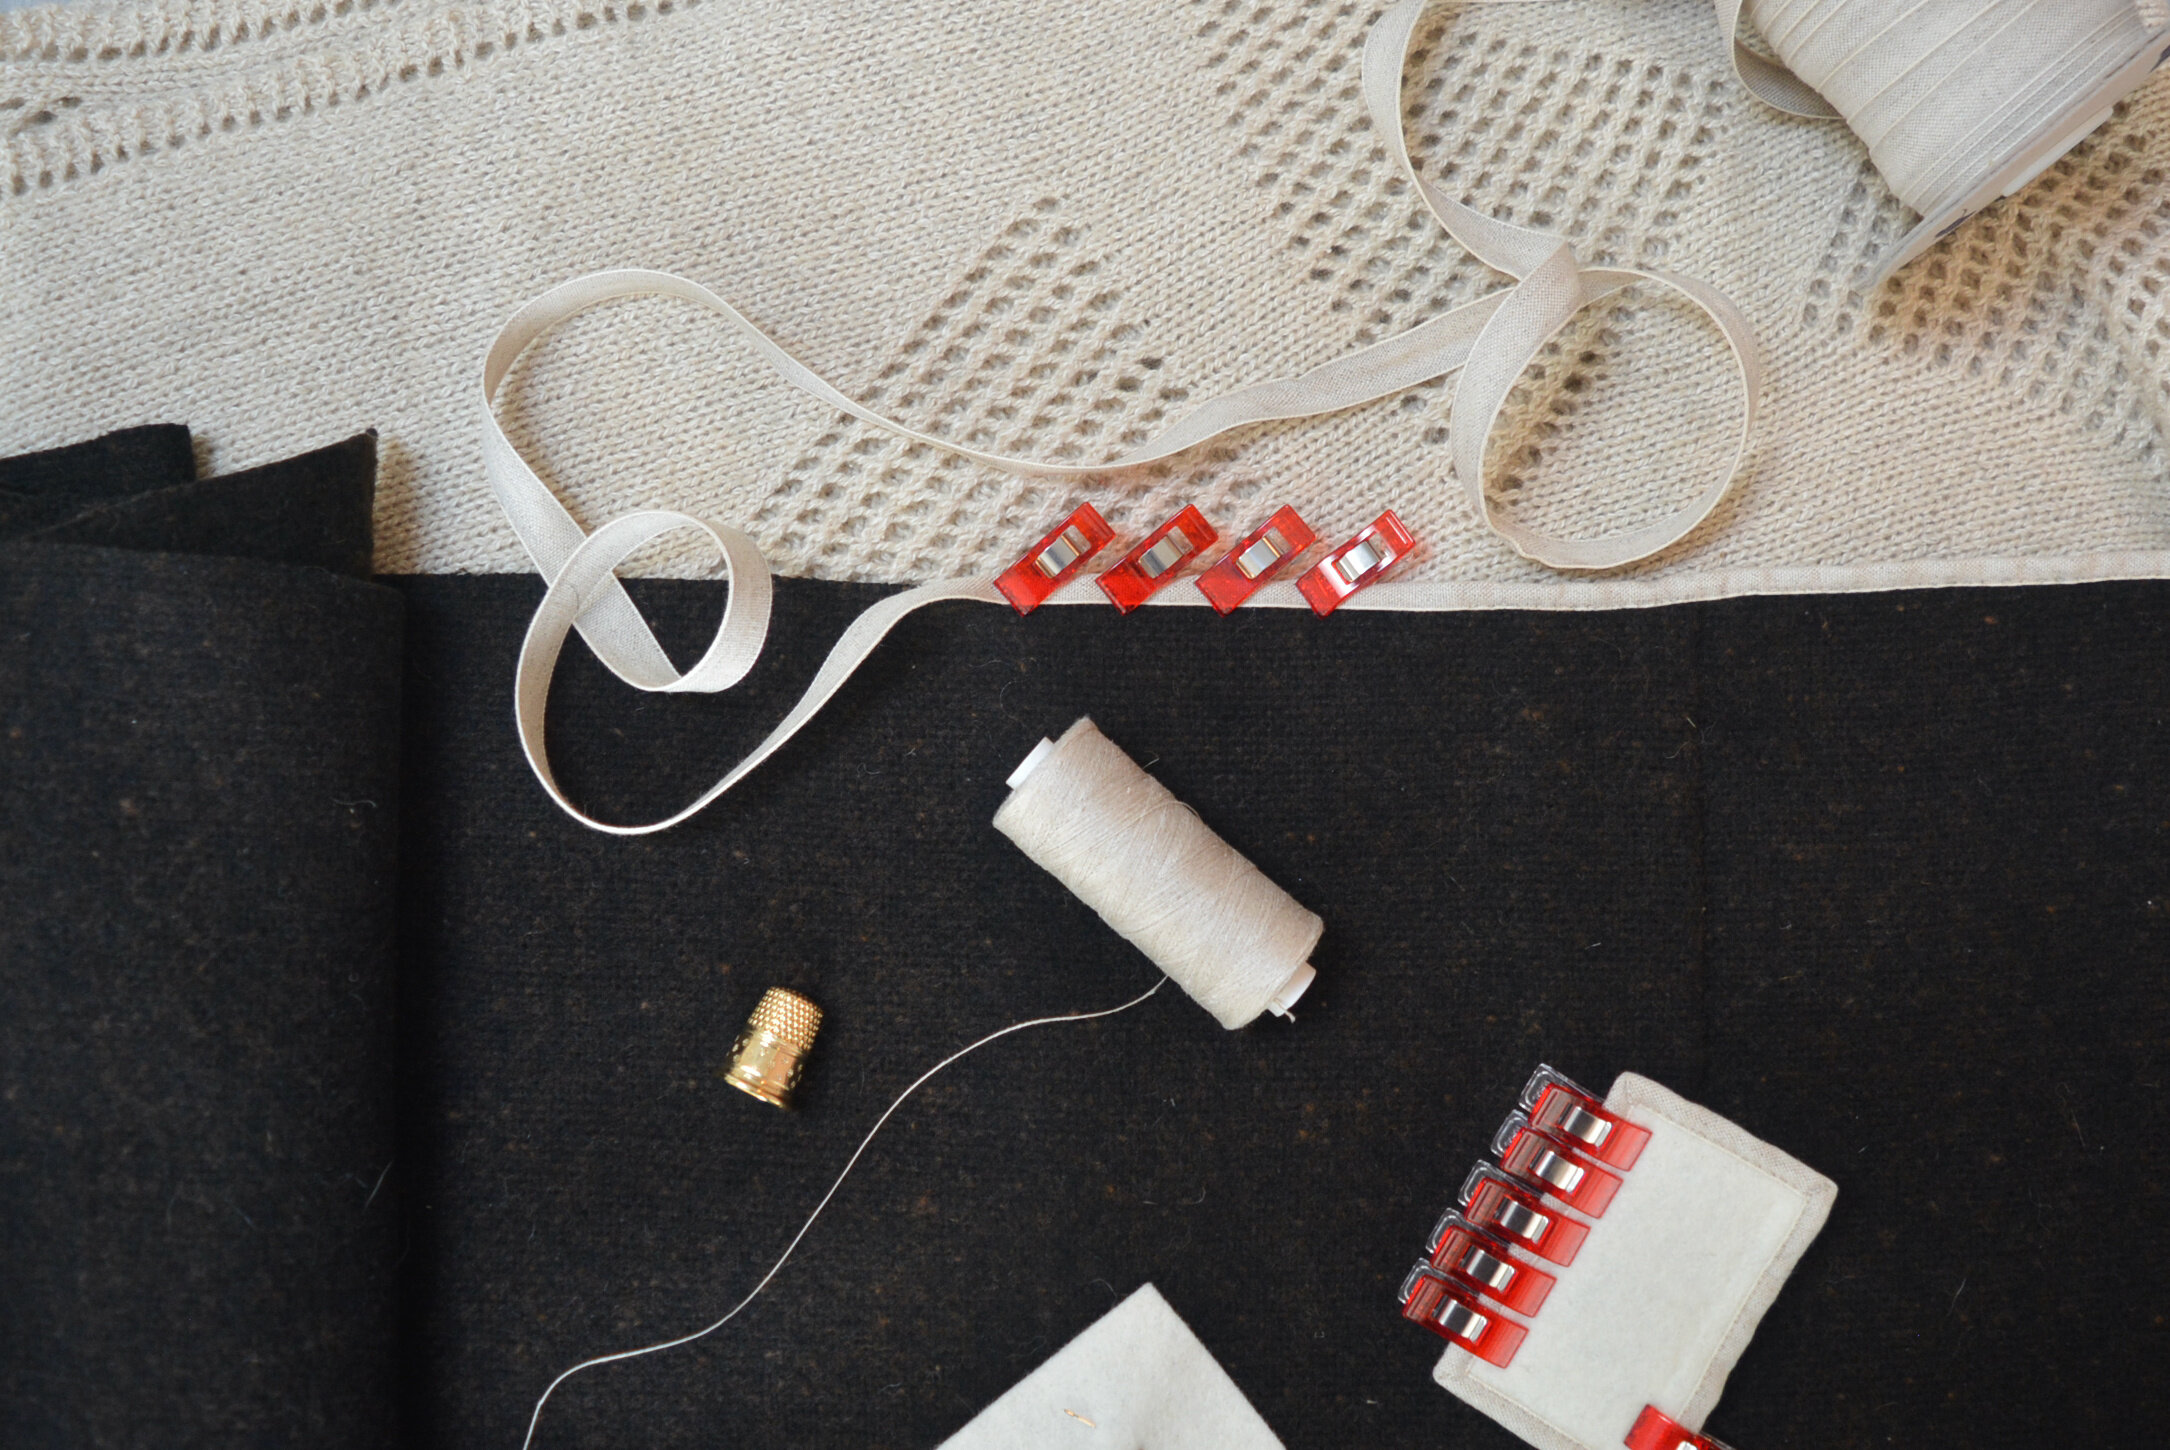
I decided to back (or 'line') Clayr with a woven wool fabric, which would give the scarf both structure and warmth. I chose a fairly heavy and dark wool, so that the lace triangles would be emphasized. To start I cut a piece of wool the size of the scarf (I ending up having to do a little bit of piecing to get a piece of fabric long enough).

The wool was a little too heavy to hem around the edges, so instead I used a linen tape to bind the edges. I hand stitched the linen tape along all 4 sides using a running stitch, which kept the bulk down compared to hemming. I chose to hand stitch this project because it gave me more control, and I was able to perfectly hide the stitches in the linen tape. I've also been wanting to get quicker at hand stitching with a thimble, and this project gave me lots of practice with that.

After binding the piece of wool, I whip stitched the knit scarf onto the wool backing, going around all 4 edges. Again I hand stitched this, which gave me a really clean finish. I blocked the scarf at this stage (essential!), and then tacked the two pieces together every couple of inches with some thread that blended in really well with the wool fabric. This gave an effect similar to double gauze fabric, which gives the scarf lots of body and structure, and keeps the layers lined up nicely.

2020-03-29_14-56-23.jpg

This was a very tedious project, but relaxing to do in the evening with a cup of tea while watching movies. Of course I finished the scarf right in time for the first few days of spring, but alas, that's the way these handmade projects seem to go. Next winter this will be pulled out plenty!

Some recent blog posts for you to check out:

A First Attempt at Avocado Dye

My first time using a natural dye was at an Indigo workshop I took a couple years ago through Maiwa (a textile school and shop here in Vancouver). I loved the process but it all just seemed so daunting to me. The workshop was a one evening event, so we didn't go into detail about all the chemicals and steps that were used, and I went home feeling like it was something I couldn’t replicate at home without taking more classes.

Queue Instagram, where there's always someone making these types of things look effortless. I follow a lot of people in the craft community and started to see swatches of pale pinks, golden yellows, and olives greens in my feed, all dyed naturally with kitchen scraps. I went back to Maiwa and read through their free PDF about natural dying (you can find that here). I also bought the e-book from Rebecca Desnos, a natural dyer I follow on Instagram who has found ways around using harsh chemicals (you can find her book here). Both resources were incredibly helpful. I decided to start with the process Maiwa suggests, and later I might experiment with the chemical-free natural approach and do some side-by-side comparisons.

Maiwa sells dyestuff and concentrated powder dyestuff, and so their instructions focus on those that they sell, not necessarily kitchen scraps. So I referred to both books, Maiwa for their scouring and mordanting instructions, and Rebecca Desnos for specifics on avocados. I chose avocados as my first experiment because it seems like so many people have had success with them, they're easy for me to get a hold of (I work in a restaurant), and I love the peachy hues that they produce. From what I've read they also have tannins in them so the dye tends to be more colour-fast. I spent a couple weeks collecting avocados, which I kept in the freezer until I would be using them. While I was collecting I wrote up a plan. I would be dying a large piece of linen fabric to make a dress out of, along with some smaller scraps of fabrics and lace I had in my stash which I wanted to experiment with. Some were cellulose fibres (made from plants), and some were protein fibres (made from animals).

Materials to dye:

  • 3m handwoven linen (cellulose)

  • small cotton hankie (cellulose)

  • 2m cotton lace trim (cellulose)

  • small scrap of linen tape (cellulose)

  • fat quarter silk rayon velvet (protein)

  • 1m silk rayon velvet ribbon (protein)

  • fat quarter silk habotai (protein)

2020-02-12_14-56-42.jpg

I won't be going into detail about the scouring and mordanting process that I used as this blog post isn't intended to be an instructional post. I tried to follow Maiwa's natural dye PDF as closely as possible, using different agents and processes for the different types of fibres (cellulose vs. protein), and measuring everything based on the weight of the fibre. I wore protective gear when measuring or touching any chemicals and every vessel and tool used will never be used for food again. I now have a set of dishes exclusively to be used for natural dying.

Cellulose fibres:

  • scouring: soda ash and synthranpol

  • mordanting: alum (mordanted twice)

Protein fibres:

  • scouring: Orvus paste

  • mordanting: alum

The whole process of scouring and mordanting took an entire day, morning until night. I only had one large pot dedicated to dying so I was doing everything one step at a time in my small apartment kitchen. I'll be looking in thrift stores to build my collection of large stainless steel pots so that this process can go a little quicker, and hopefully I'll try my next experiment in the summer so that I can do some of this outside on my patio.

Next I started to make my avocado dye. The total weight of my fibre was 550g, and I was using 850g of avocado stones and 200g of avocado skins (total weight of dyestuff = 1050g). The weight of my dyestuff was about twice that of my fibre, which is more than most people recommend but I didn't think I would mind a darker colour so I just went with it. I fully submerged my dyestuff in a pot of water and let that simmer for 2 hours. I then let the temperature come down and used gloves to mash everything up, and then brought it back up to a simmer for 2 more hours. At this point my "dye" looks very brown and I was starting to feel like I did something very wrong. Anyways I carried on and put my fibres into the dye bath, topping up with hot water so everything was submerged and could move easily in the bath. After 9 hours the fibres are a light brown colour, not at all what I was hoping for. I ended up leaving everything to soak for 4 full days because I got sick and just didn't have the energy to pour the water out and rinse everything. When I did finally empty the bath and rinse the fibres the colour was still a little more brown toned and pale then I was hoping for. Before I could wash and use the fabric it needed to rest for 2 weeks. During these 2 weeks I felt like the colour set and started to look more pink.

After washing all the fibre I was really happy with the colours I got and I'm not sure if the colour did get more pink over time, if the brown tones washed out, or if I just grew to like it more over time. Anyways I'm very excited to turn the linen into a Wattle Fawn dress by Common Stitch (check out the pattern here), more on that to come soon.

2020-03-12_14-32-53.jpg

Summer FO's

2017-09-04_15-17-48.jpg

FO #1: Miette Wrap Skirt in Robert Kauffman black Essex linen-cotton blend (top left)

FO #2: Short Sleeve button up shirt (Burda 6527) in a grey cotton chambray with fancy copper buttons from Button Button in Vancouver, BC (middle right)

FO #3: Indigo dyed scarf made at the Indigo Social event in Vancouver, dyed using the scrunchie method (bottom right)

FO #4: Salt marsh skirt made using hand-woven cotton from Maiwa Handprints (woven in India) and the Sat marsh Skirt pattern from the Merchant and Mills Workbook (middle left and bottom middle)

FO #5: Striped Beach Tank modified to have a low back and knit in Bernat Handicraft cotton yarn (top right)

FO #6: Palmer Cardigan knit in Brooklyn Tweed Loft (middle and bottom left)

FO #7: Indigo dyed bed sheets and pillow cases (top middle)

2017-09-06_00-02-29.jpg

Summer of Basics Wrap-Up

2017-08-31_12-58-56.jpg

FO #1: Saltmarsh Skirt

Size & Modifications:

I made this skirt in size 8 exactly as the pattern directed, just shortening it 7 inches so it would hit me mid-calf instead of at the ankle.

Materials:

  • Saltmarsh Skirt pattern from the Merchant & Mills Workbook (which was available at my local library!)

  • 100% cotton handwoven cotton with a subtle stripe from Maiwa Handprints

Cost:

2 meters at $15.00/m= $30.00 (Canadian Dollars)

IMG_4719.JPG

FO #2: Striped beach tank

Size & Modifications:

I made this tank in a size S, the front of the tank was knit exactly as the pattern describes I just added the stripes. The back of the tank I modified so it would have a scooped back. I just cast off in the middle of the row where I wanted my scoop to start and then worked each side separately, decreasing in a nice sloped shape. This is my submission for #sob17bestmod

Materials:

  • Beach Tank Pattern by Jess Schreibstein

  • 4 balls (2 black and 2 white) of Bernat Handicrafter cotton yarn

Cost:

4 balls at $2.50/ball + $7.00 pattern = $17.00 (Canadian Dollars)

IMG_4732.JPG

FO #3: Palmer cardigan

Size &Modifications:

I shortened the cardigan by 2.75” and the sleeves by 1”.

Materials:

  • Palmer Pattern by Michele Wang

  • 7 skeins of Brooklyn Tweed Loft in the colour Sweatshirt

Cost:

7 skeins at $19.95/skein + $12.00 pattern = $151.65 (Canadian Dollars)

New Pattern: Clayr

Clayr is officially out in the world! Clayr is a generously long, light, and airy scarf that will bring you from those first spring days into the cool evenings of summer. Sporadic lace triangles give this scarf both a sharp geometric design element while keeping a soft airy look. You’ll find yourself reaching for Clayr time and time again. You can now find Clayr on Ravelry: http://www.ravelry.com/patterns/library/clayr