Knitting for Others

When I’m watching a movie and I don’t have the mental capacity for the process of writing my own patterns I love working on quick projects that I don’t have to think too hard about. Right now  I’m working on making baby hats and since I don’t have a baby myself (and if I did it definitely wouldn’t need this many hats) I’m going to be donating them to the hospital in my area. I like working on projects like this because I find knitting multiples of a pattern relaxing, and it feels good to know that someone in need will be getting something that was handmade with love.

babyhats.jpg

My grandma used to knit pneumonia vests for children in Africa, which were used to keep sick children warm. I remember she would send them off about once a year, and she would have about 50 of them to send off which I always thought was really impressive.

Some other projects I’ve heard of are knitted hats for soldiers, warm clothes and winter accessories for local shelters, and even knitted jumpers to protect penguins from oil spills. The penguin jumper story went viral a while back so they put an announcement up saying they didn’t need any more, but I do understand why so many people wanted to knit cute little jumpers for penguins.

Have you knit any projects similar to these ones? I’d love to hear about them!


Newborn Hats: http://www.themakeyourownzone.com/2011/03/knitting-newborn-hats-for-hospitals.html

Hats for Soldiers: http://www.ravelry.com/patterns/library/ribbed-watchmans-hat

Penguin Jumpers: http://penguinfoundation.org.au/about-the-penguin-foundation/wildlife-rehabilitation/

Notions Bag

bagandsocks.jpg

After carrying various Ziploc bags full of random notions around with all of my projects I’ve decided it’s time to make a permanent toolkit. One that has everything I need for every project, so I can grab it along with whatever project I decide to work on that day. I’ve been using this one for a couple months now and I haven’t needed to add anything, so it feels complete for the time being. I thought I’d empty it and let you know what I’ve been taking everywhere with me.

contents.jpg

Bag: The clear bag is from KnitPicks. It works well for me because I’m not digging around looking for my smaller notions, I can see everything and grab exactly what I need. I also like the way all my tools look in the bag, because I think some of them are pretty cute. $3.99

Pens and notebook: I use this little notebook all the time, for jotting down pattern ideas and also for making notes about where I am in a pattern. Sometimes I’ll change a pattern as I’m knitting to suit my needs, so I like to keep track of those sorts of things.

Scissors: This pretty pair of black scissors is from Lantern moon. Scissors are definitely my most used item here. $19.95

Stitch markers: I keep a tiny bag of stitch markers with me. The duck ones are from Lantern moon and they make me so happy when I use them. I also have a couple other random markers that I carry, including a removable one. $11.00

Repair hook and finishing needles: This is the first repair hook I’ve had, and it pretty much works the same as a crochet hook does. I mainly use it when I drop stitches. I got it from Lantern Moon and it came in a cute little pouch, which I store my tapestry needles in as well. $10.50

Needle point protectors: I only really use these when I’m bringing a project(usually socks) on the go with me. When I’m carrying my project in a soft cloth bag they keep the needles from poking through the material. These ones are from KnitPicks and they come in a pack of four. $1.19

Interchangeable needle cable ends: I use the interchangeable knitting needles from KnitPicks, and they come with these twist on caps, so you can keep a project on the cable and use the needles from that project for something else. To be honest I’ve never used these, but I keep them in here just in case the time comes.

Knitting gauge & ruler: I picked this up at a dollar store near my house, and it’s definitely a tool I recommend every knitter gets. When I started working with DPN’s and circulars, I realized not all needles are nicely labelled, so it’s great to have this for reference!

Stitch holders: Again I picked these up at a local dollar store. They come in handy so I would definitely recommend getting a couple.

Cable needle: This one is from KnitPicks. I haven’t actually knit a project with cables in a while, but I keep one in case the feeling ever hits to cable something! $4.49

Crochet hooks: I like using crochet hooks to do certain edges and to pull in loose ends, so I always keep a couple sizes with me.

Measuring tape: This one isn’t a necessity, because the ruler is usually long enough for most projects, but sometimes I have bigger things to measure and a 6-inch ruler just won’t cut it for me. This sunflower one is from Lantern Moon and I love how cute it looks. $12.10

Do you keep a similar bag to this? I’d love it if you let me know what you keep in yours below!

Driftwood Weaving

At the beginning of the summer my family and I went camping at the campground we visit every year, and I spent a couple hours one day collecting treasures on the beach. There was a bunch of pieces of driftwood a couple meters back from the water, as well as a ton of pretty stones so I took a bunch home with me thinking about ways I could incorporate them into a craft. 

driftwood.jpg

A couple weeks ago I bought a starter loom at Value Village, which is a second hand store in Ontario if you’re unfamiliar. I wasn’t really sure what sorts of things I could make with a loom but it was a couple dollars and it was in the section with all the other fibre arts so of course I couldn’t help myself!

I’ve been seeing a lot of woven wall hangings on Pinterest lately so I thought it would be cool to follow one of those tutorials and use a piece of driftwood as the dowel to hold the hanging up. I ended up following a mixture of a couple tutorials. I chose to do simple stripes and I added on some fringe to the bottom which I cut into a pointed design. I found the whole process of weaving straightforward, the only problem was that the loom I picked up from the second hand store was broken! A couple of the screws had stripped the wood so I had to hold the two poles to keep my strings from falling off. I guess that’s what you get when you buy something used and you don’t check it properly!

weaving.jpg

All in all I’m really happy with how the wall hanging turned out. If I happen to see another inexpensive loom I’ll probably pick it up because I would love to do this again!

Learning to Crochet

My grandma taught me to knit when I was just a kid, but when I picked it up again in high school I didn’t adventure very far right away. I learned how to knit a simple scarf by one of my high school teachers, just row after row of knitting, and I didn’t think I had the skills for anything beyond that. I think I knit four scarves before I even learned how to purl, but once I started knitting things from patterns I realized I hadn’t given myself enough credit and I probably could have started knitting more complex things a lot sooner.

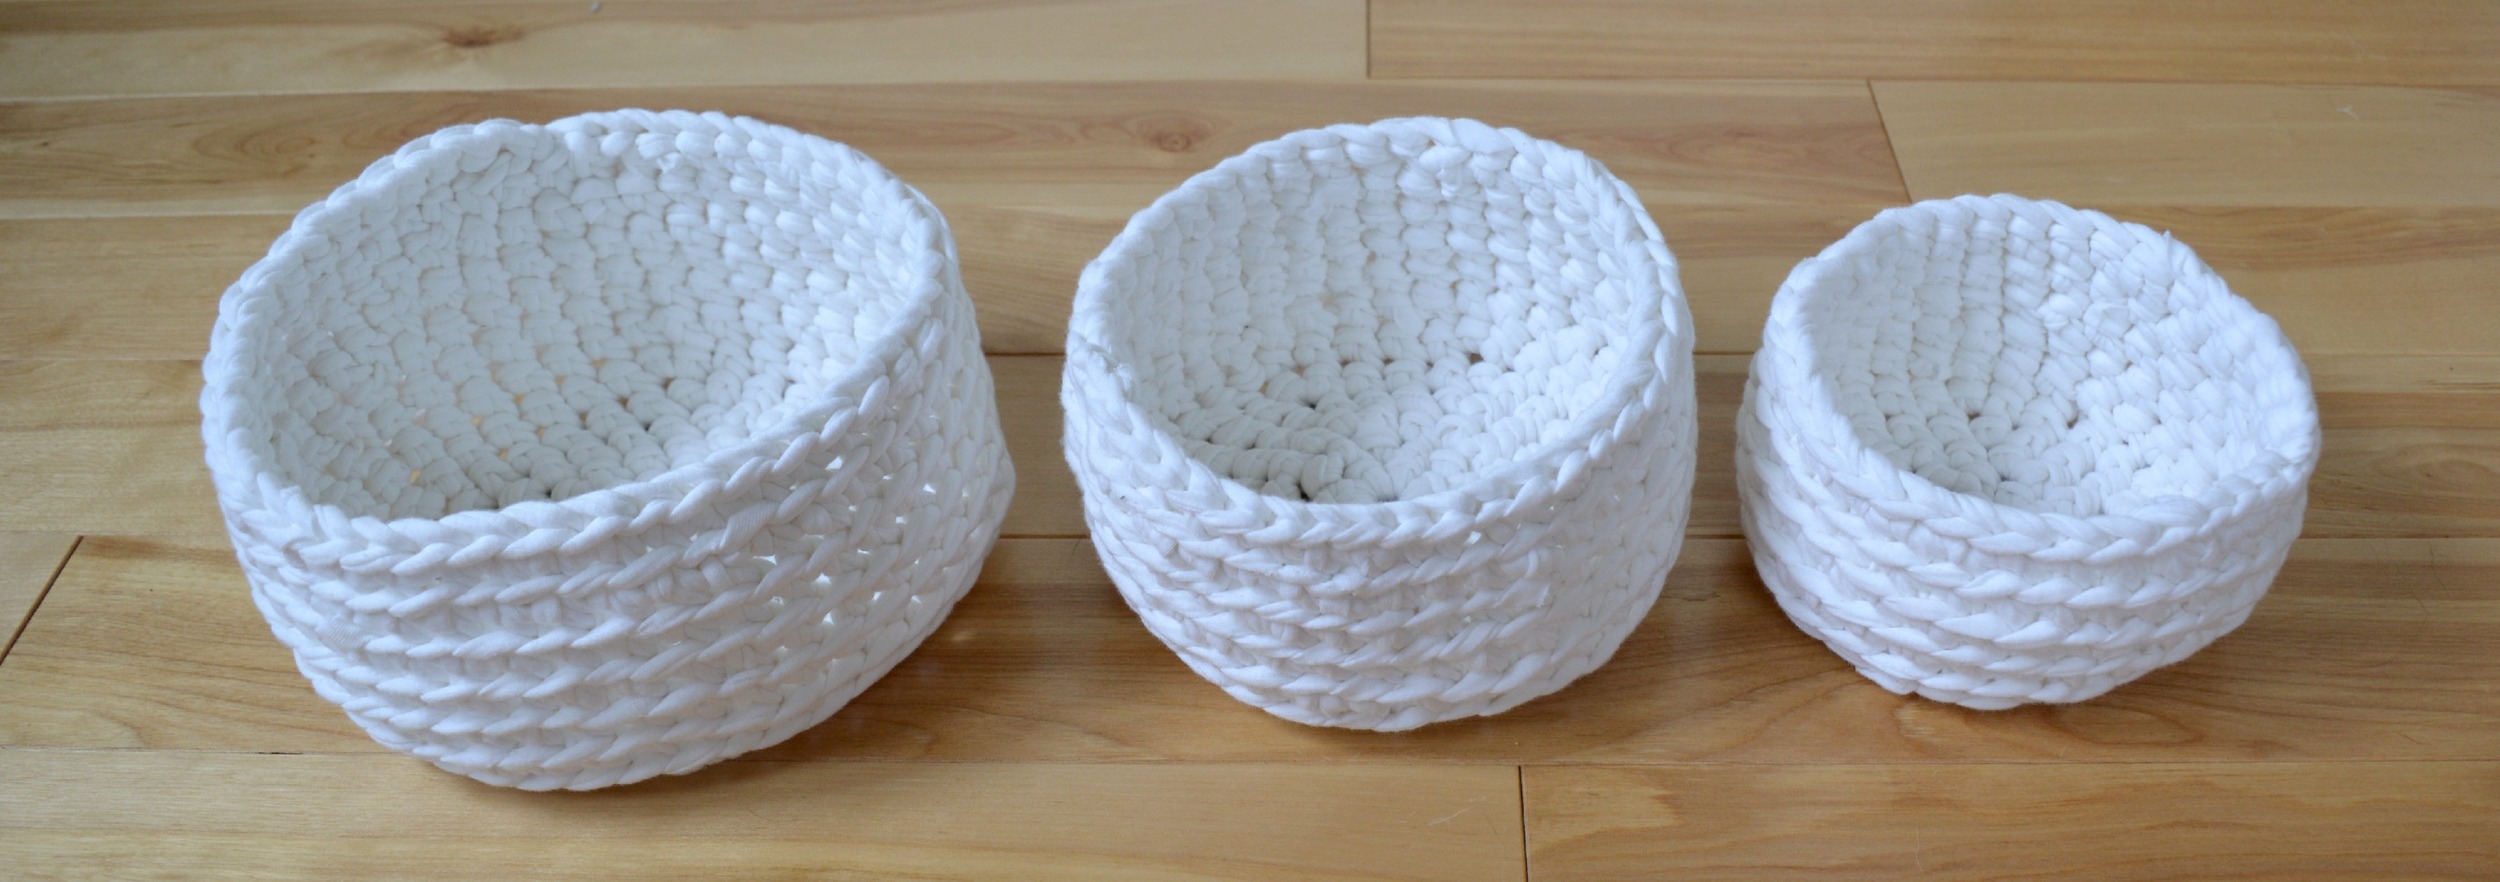
I’ve been wanting to learn how to crochet for a while now, so I decided that instead of spending a ton of time doing the basic stitches over and over again I would jump right into doing a pattern. Of course I needed to watch plenty of instructional videos, as well as get help from my friends on Instagram, but finding my way around my very first crochet pattern was easy enough and I ended up with a set of three nesting baskets that I’m pretty proud of.

nestingbowls.jpg

I crocheted the baskets using homemade fabric yarn, which I wrote a blog post about a couple months ago. I found the tutorial for making the yarn and the pattern for the nesting baskets on the same blog, Petals to Picots, by Kara. The links to her blog and the specific tutorials will be listed at the bottom of this post. I found the pattern pretty clear, considering it was the first thing I’ve ever made with crochet. One step at the beginning of the pattern confused me, which was starting a circle of stitches, but that was just due to my lack of crochet skills. As soon as I figured that step out the rest of the project came together very smoothly.

DSC_01202.jpg

I’ve been using my nesting baskets to hold gift wrapping supplies for the time being, but you could also use them to hold wrapped candies, knitting supplies, or have them sitting by the door to hold your keys and wallet. What was the first thing you ever crocheted? Did you jump right in to a pattern or did you perfect your skills first?

Making Fabric into Yarn: http://www.petalstopicots.com/2012/03/green-crocheting-making-fabric-into-yarn/

Fabric Nesting Baskets Pattern: http://www.petalstopicots.com/2012/03/green-crocheting-fabric-nesting-baskets-pattern/

Knit Necklace Tutorial

As I become more obsessed with knitting I’m always trying to think of new ways to incorporate it into my life, so I thought it would be fun to make a knitted necklace. I’ve included the instructions in this blog post, but the pattern will also be available on Ravelry. If you would prefer the pdf version follow the link under the patterns tab above.

KnitNecklace.jpg

What You'll Need:

  • Fingering weight yarn (I used Knit Picks Comfy Fingering in Ivory)
  • Size 2 mm needles (US 0)
  • Chain
  • Lobster clasp
  • 4 jump rings
  • Needle nose pliers (with wire cutters)

Gauge:

In my opinion gauge is not important for this project, because it isn’t something that needs to be sized correctly. Instead of knitting a swatch just knit the triangle for the necklace, and if you aren’t happy with the size adjust your tension. This is a quick project to knit, so knitting a swatch would take about the same time as knitting the triangle anyway.

Abbreviations:

  • sts - stitches
  • ssk - slip, slip, knit
  • k2tog - knit two together
CSC_0029.JPG

Directions:

  1. Cast on 13 sts
  2. Purl 1 row
  3. ssk, knit until there’s 2 sts left, k2tog
  4. Purl 1 row
  5. Repeat steps 3&4 until 3 sts remain (knit side facing you)
  6. ssk, knit 1
  7. Pass 1 stitch over the other, and sew in all loose ends
  8. Sew a length of chain around the three edges of the triangle
  9. Attach jump rings to the top two corners of the triangle
  10. Attach a length of chain to each jump ring (cut chain so it’s the length of necklace you want)
  11. Attach a jump ring and a lobster clasp to the end of one chain
  12. Attach a jump ring to the end of the other chain

You’re done! Now you can wear a knitted piece with every outfit, even though it’s the middle of the summer and too hot for most knitted accessories like scarves and hats. I hope you enjoyed this tutorial!