Wattlebird Cami and Fawn Skirt Pattern Review

wattlebird-cami.jpg

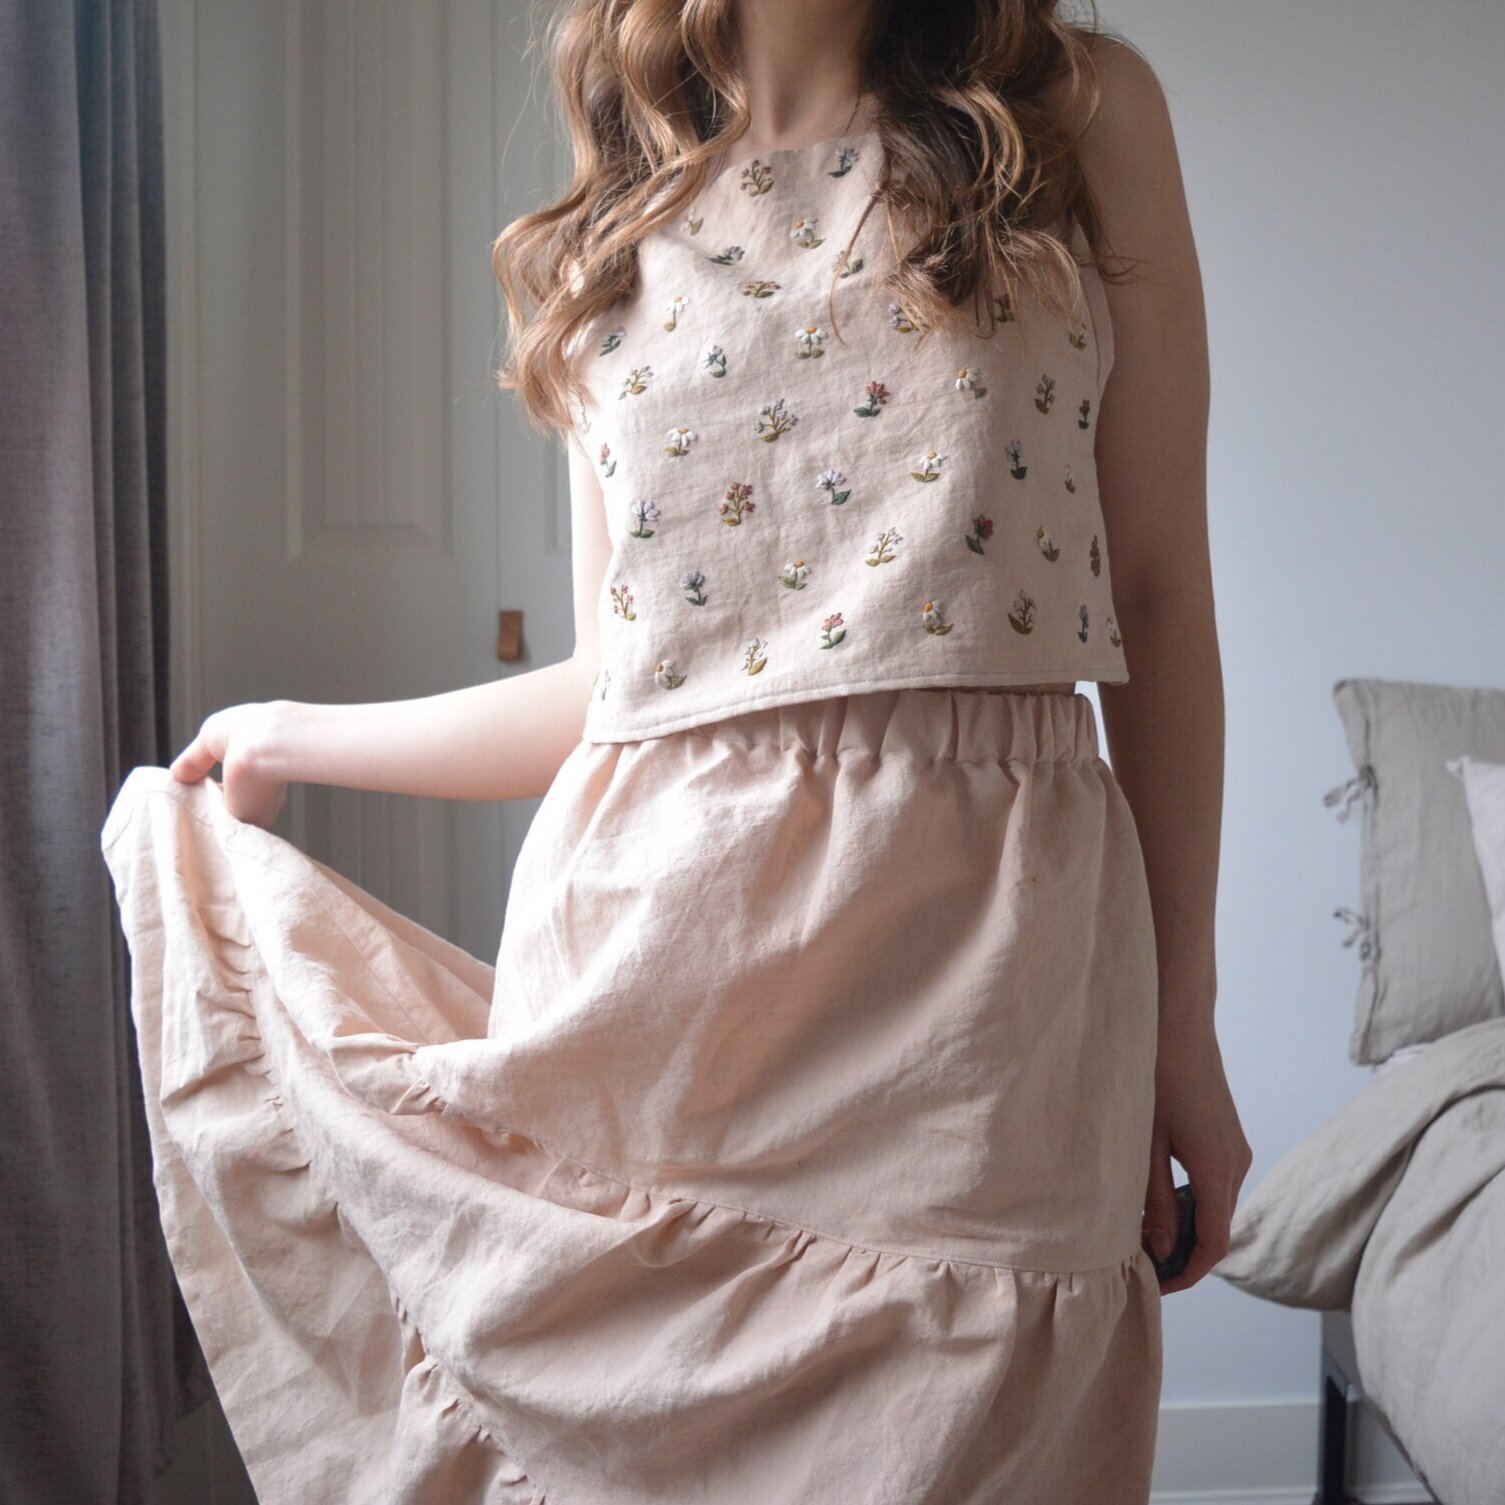
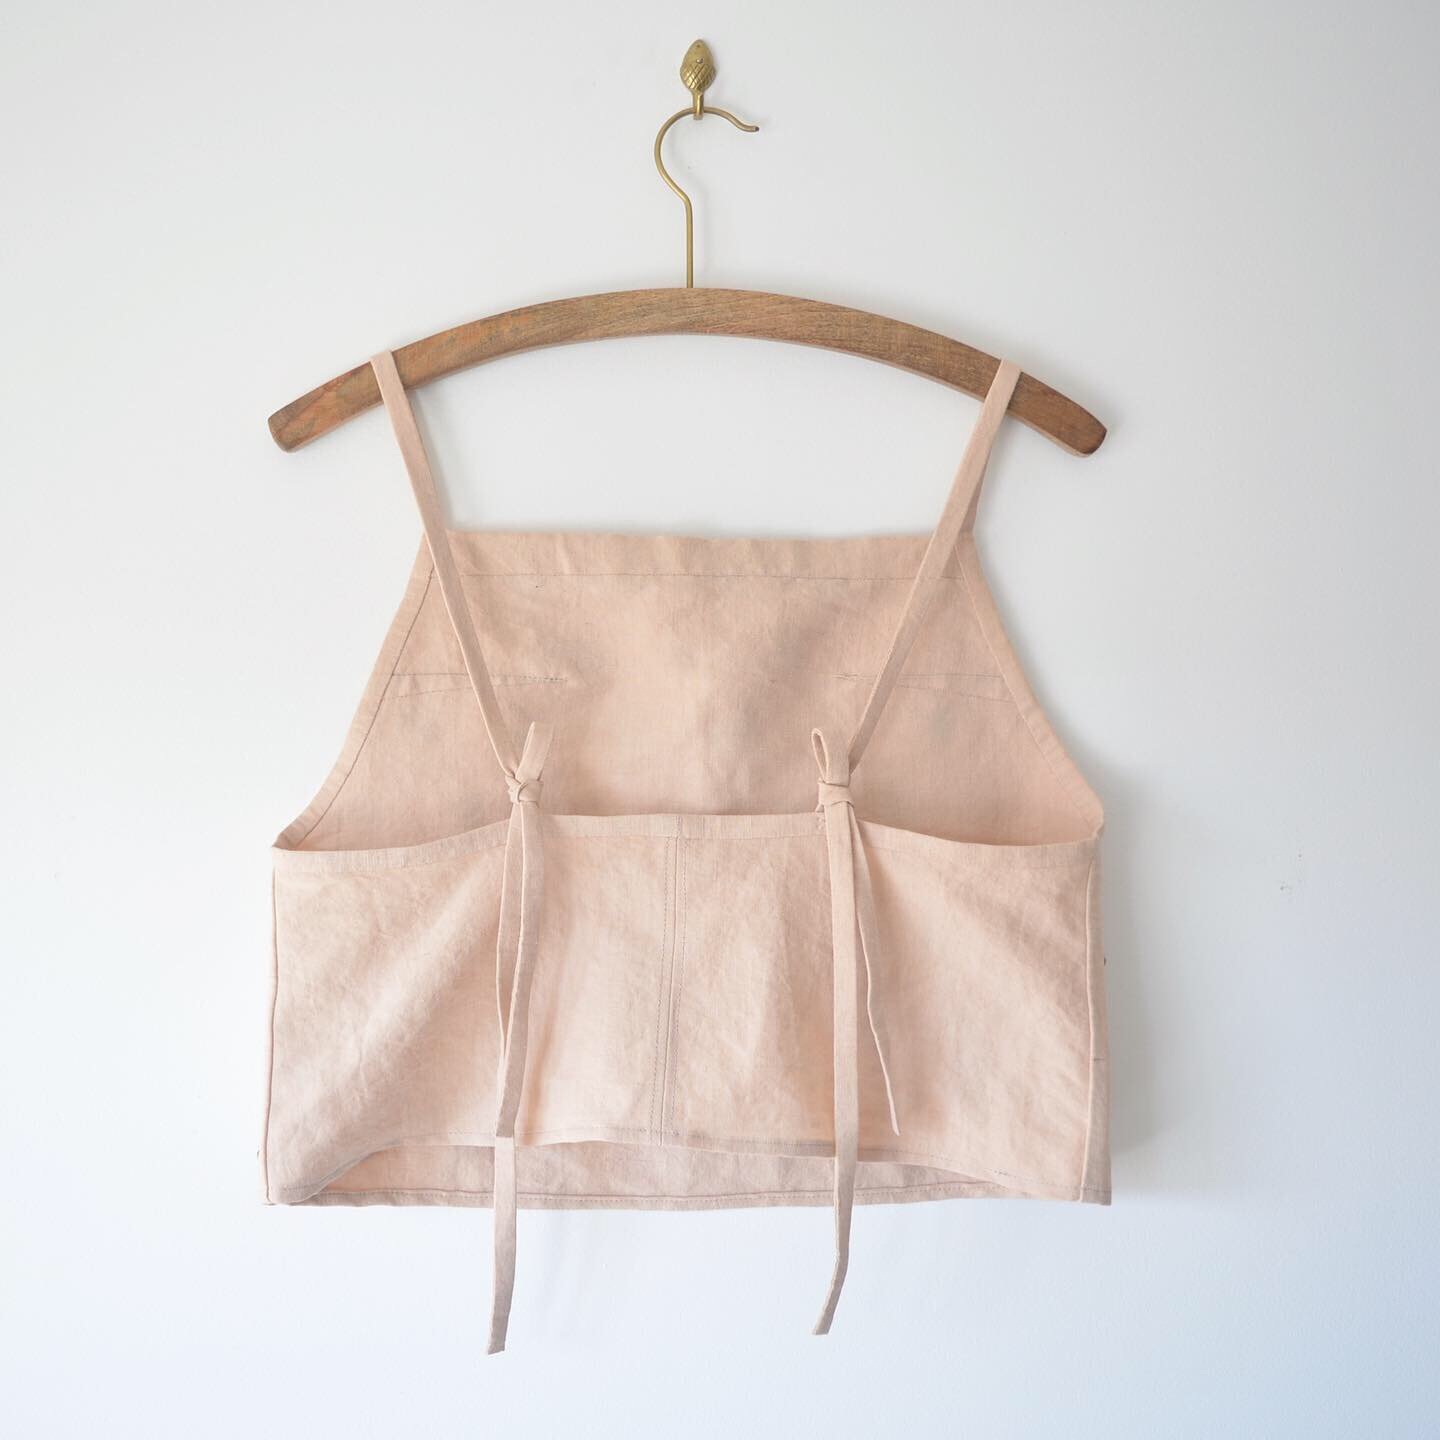
If I've ever poured all my love and energy into making something it was this project right here. My avocado dyed, hand-embroidered, hand-finished Wattlebird Cami & Fawn Skirt set. I started this project with the intention to make the Wattle-Fawn Dress hack, but it evolved into separates that can be worn together to look like a dress. This is the most involved I've ever been in the process of making a garment, and that makes me so proud of the finished pieces.

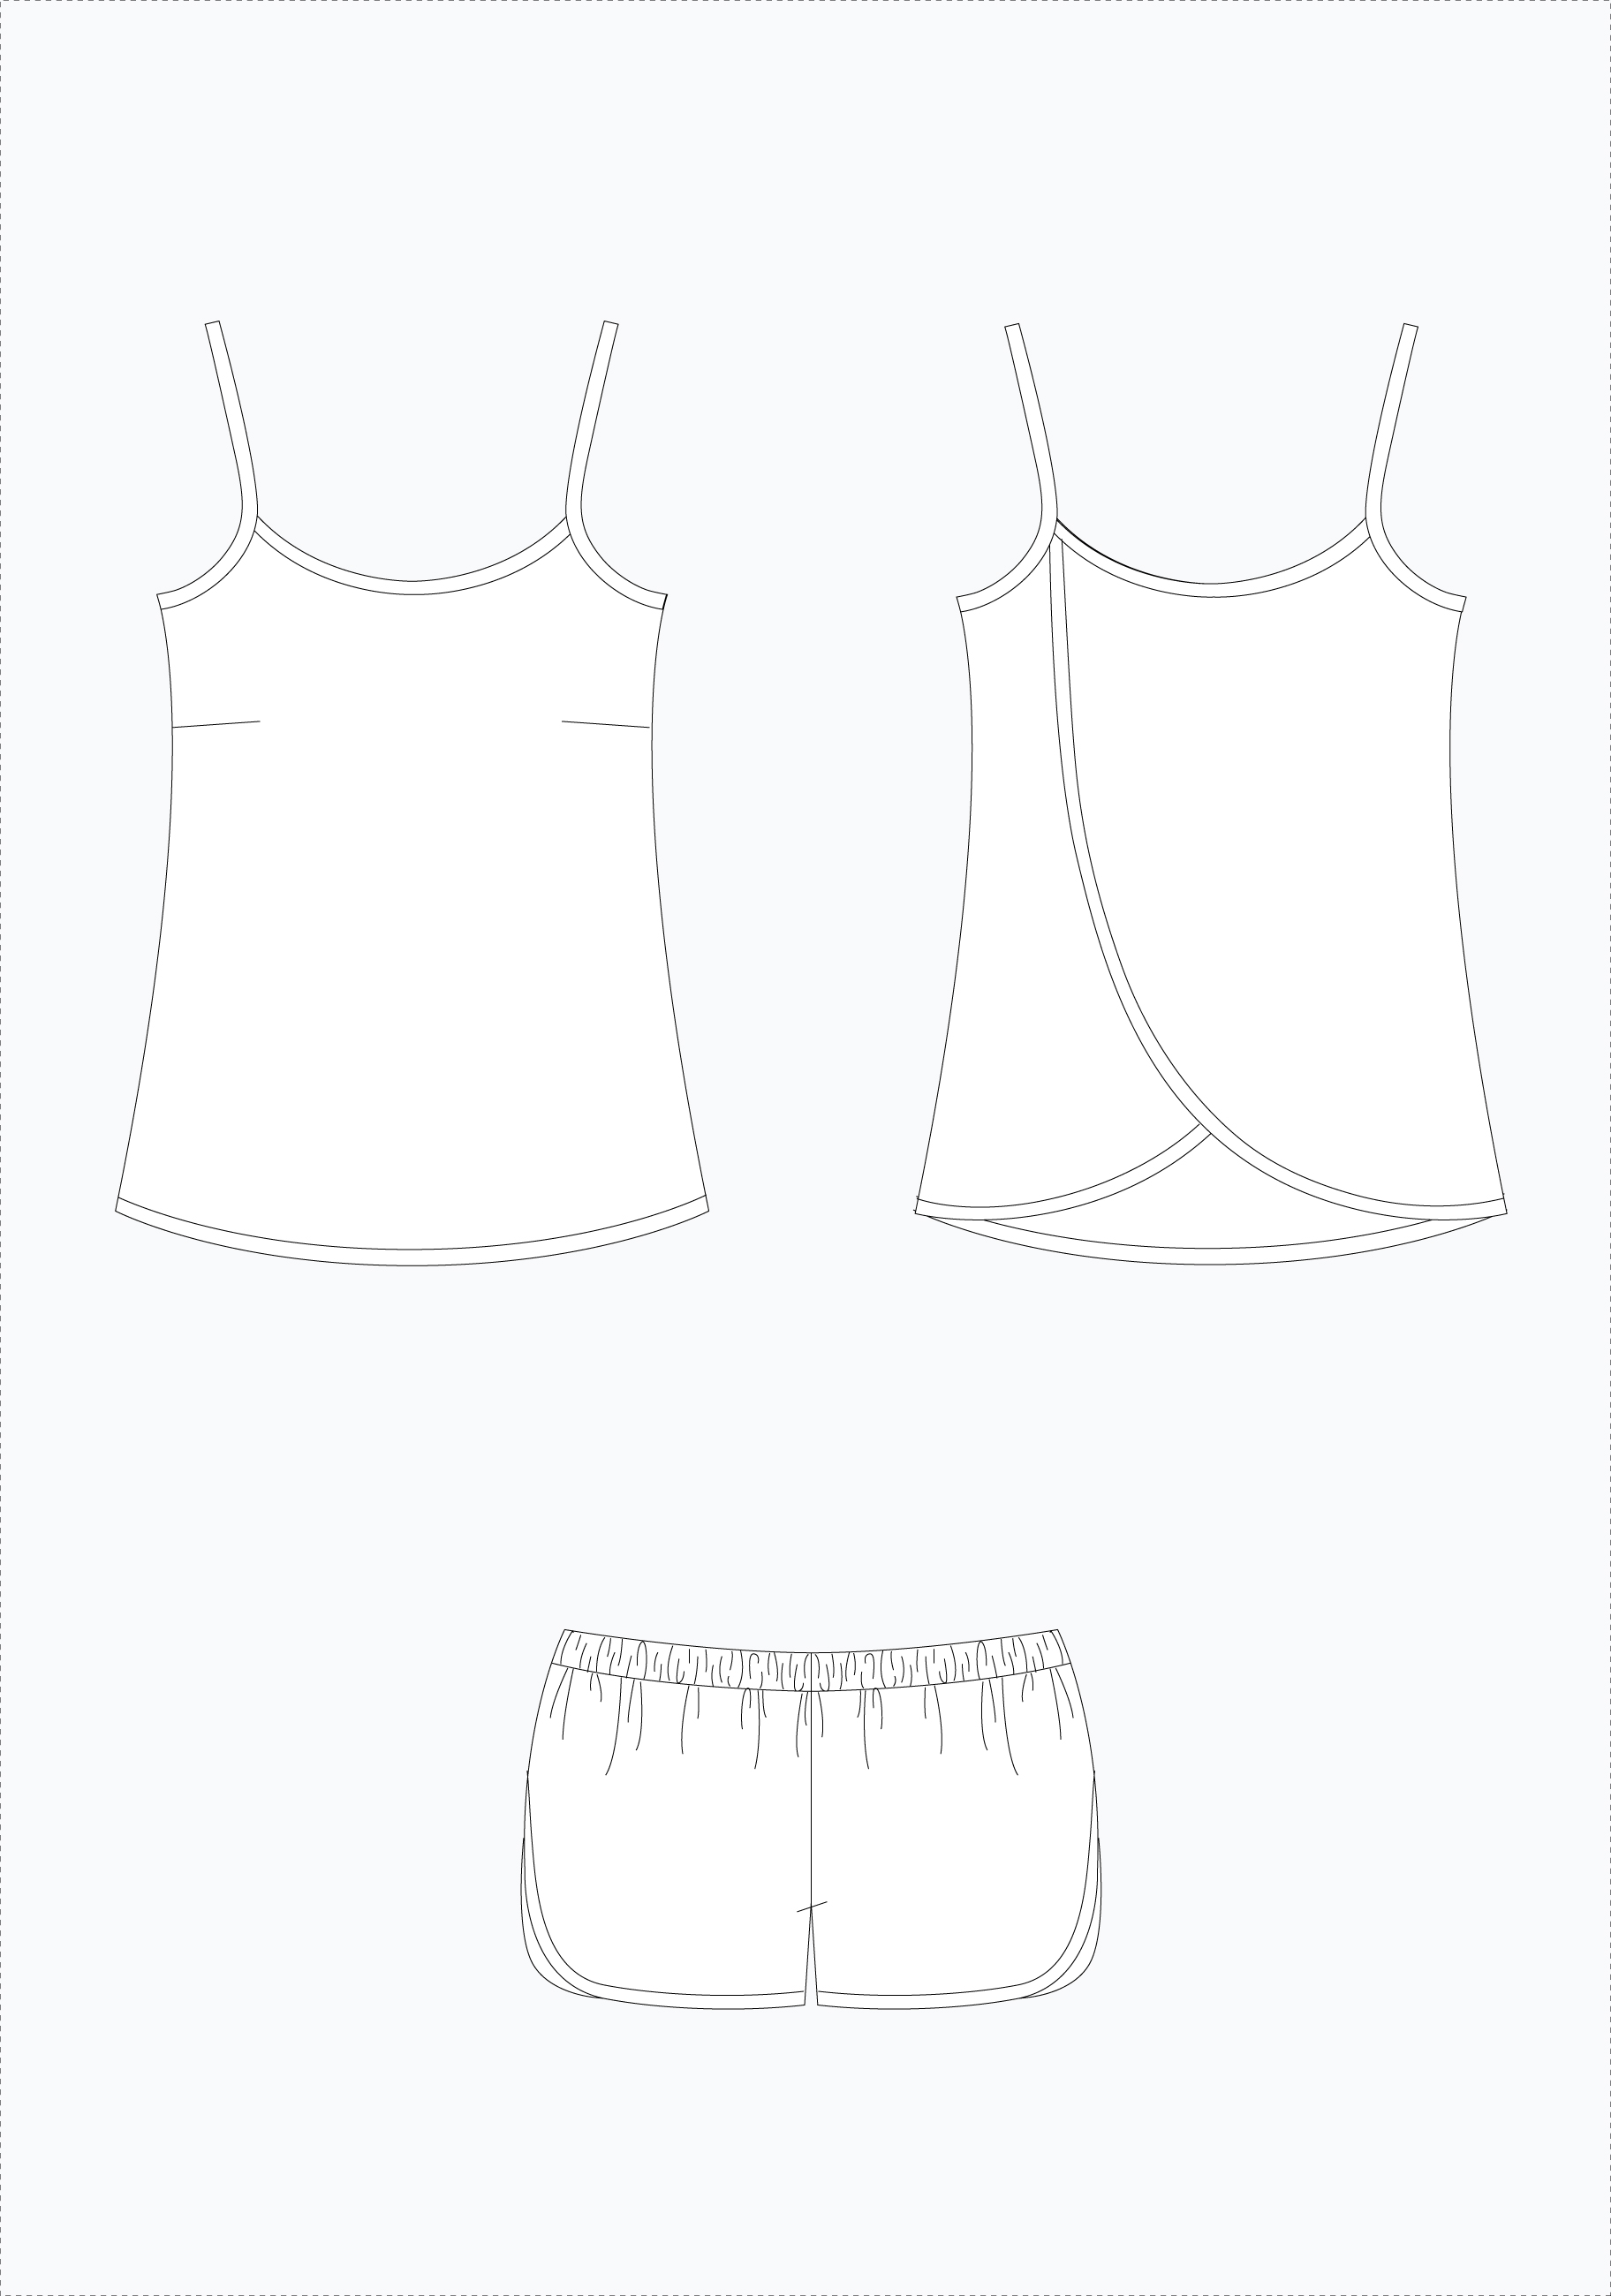
The Wattle-Fawn dress is a mash-up of two patterns by Common Stitch: the Wattlebird Cami and the Fawn Skirt. I bought the PDF version and had the pattern printed at my local copy shop so I wouldn't have to do any paper piecing. It was an investment to buy this pattern (which Common Stitch sells as a package including both individual patterns), but I really think I'll get a lot of use out of it. I love both the cami and skirt on their own, and I think I'll be doing plenty of future sewing from these patterns.

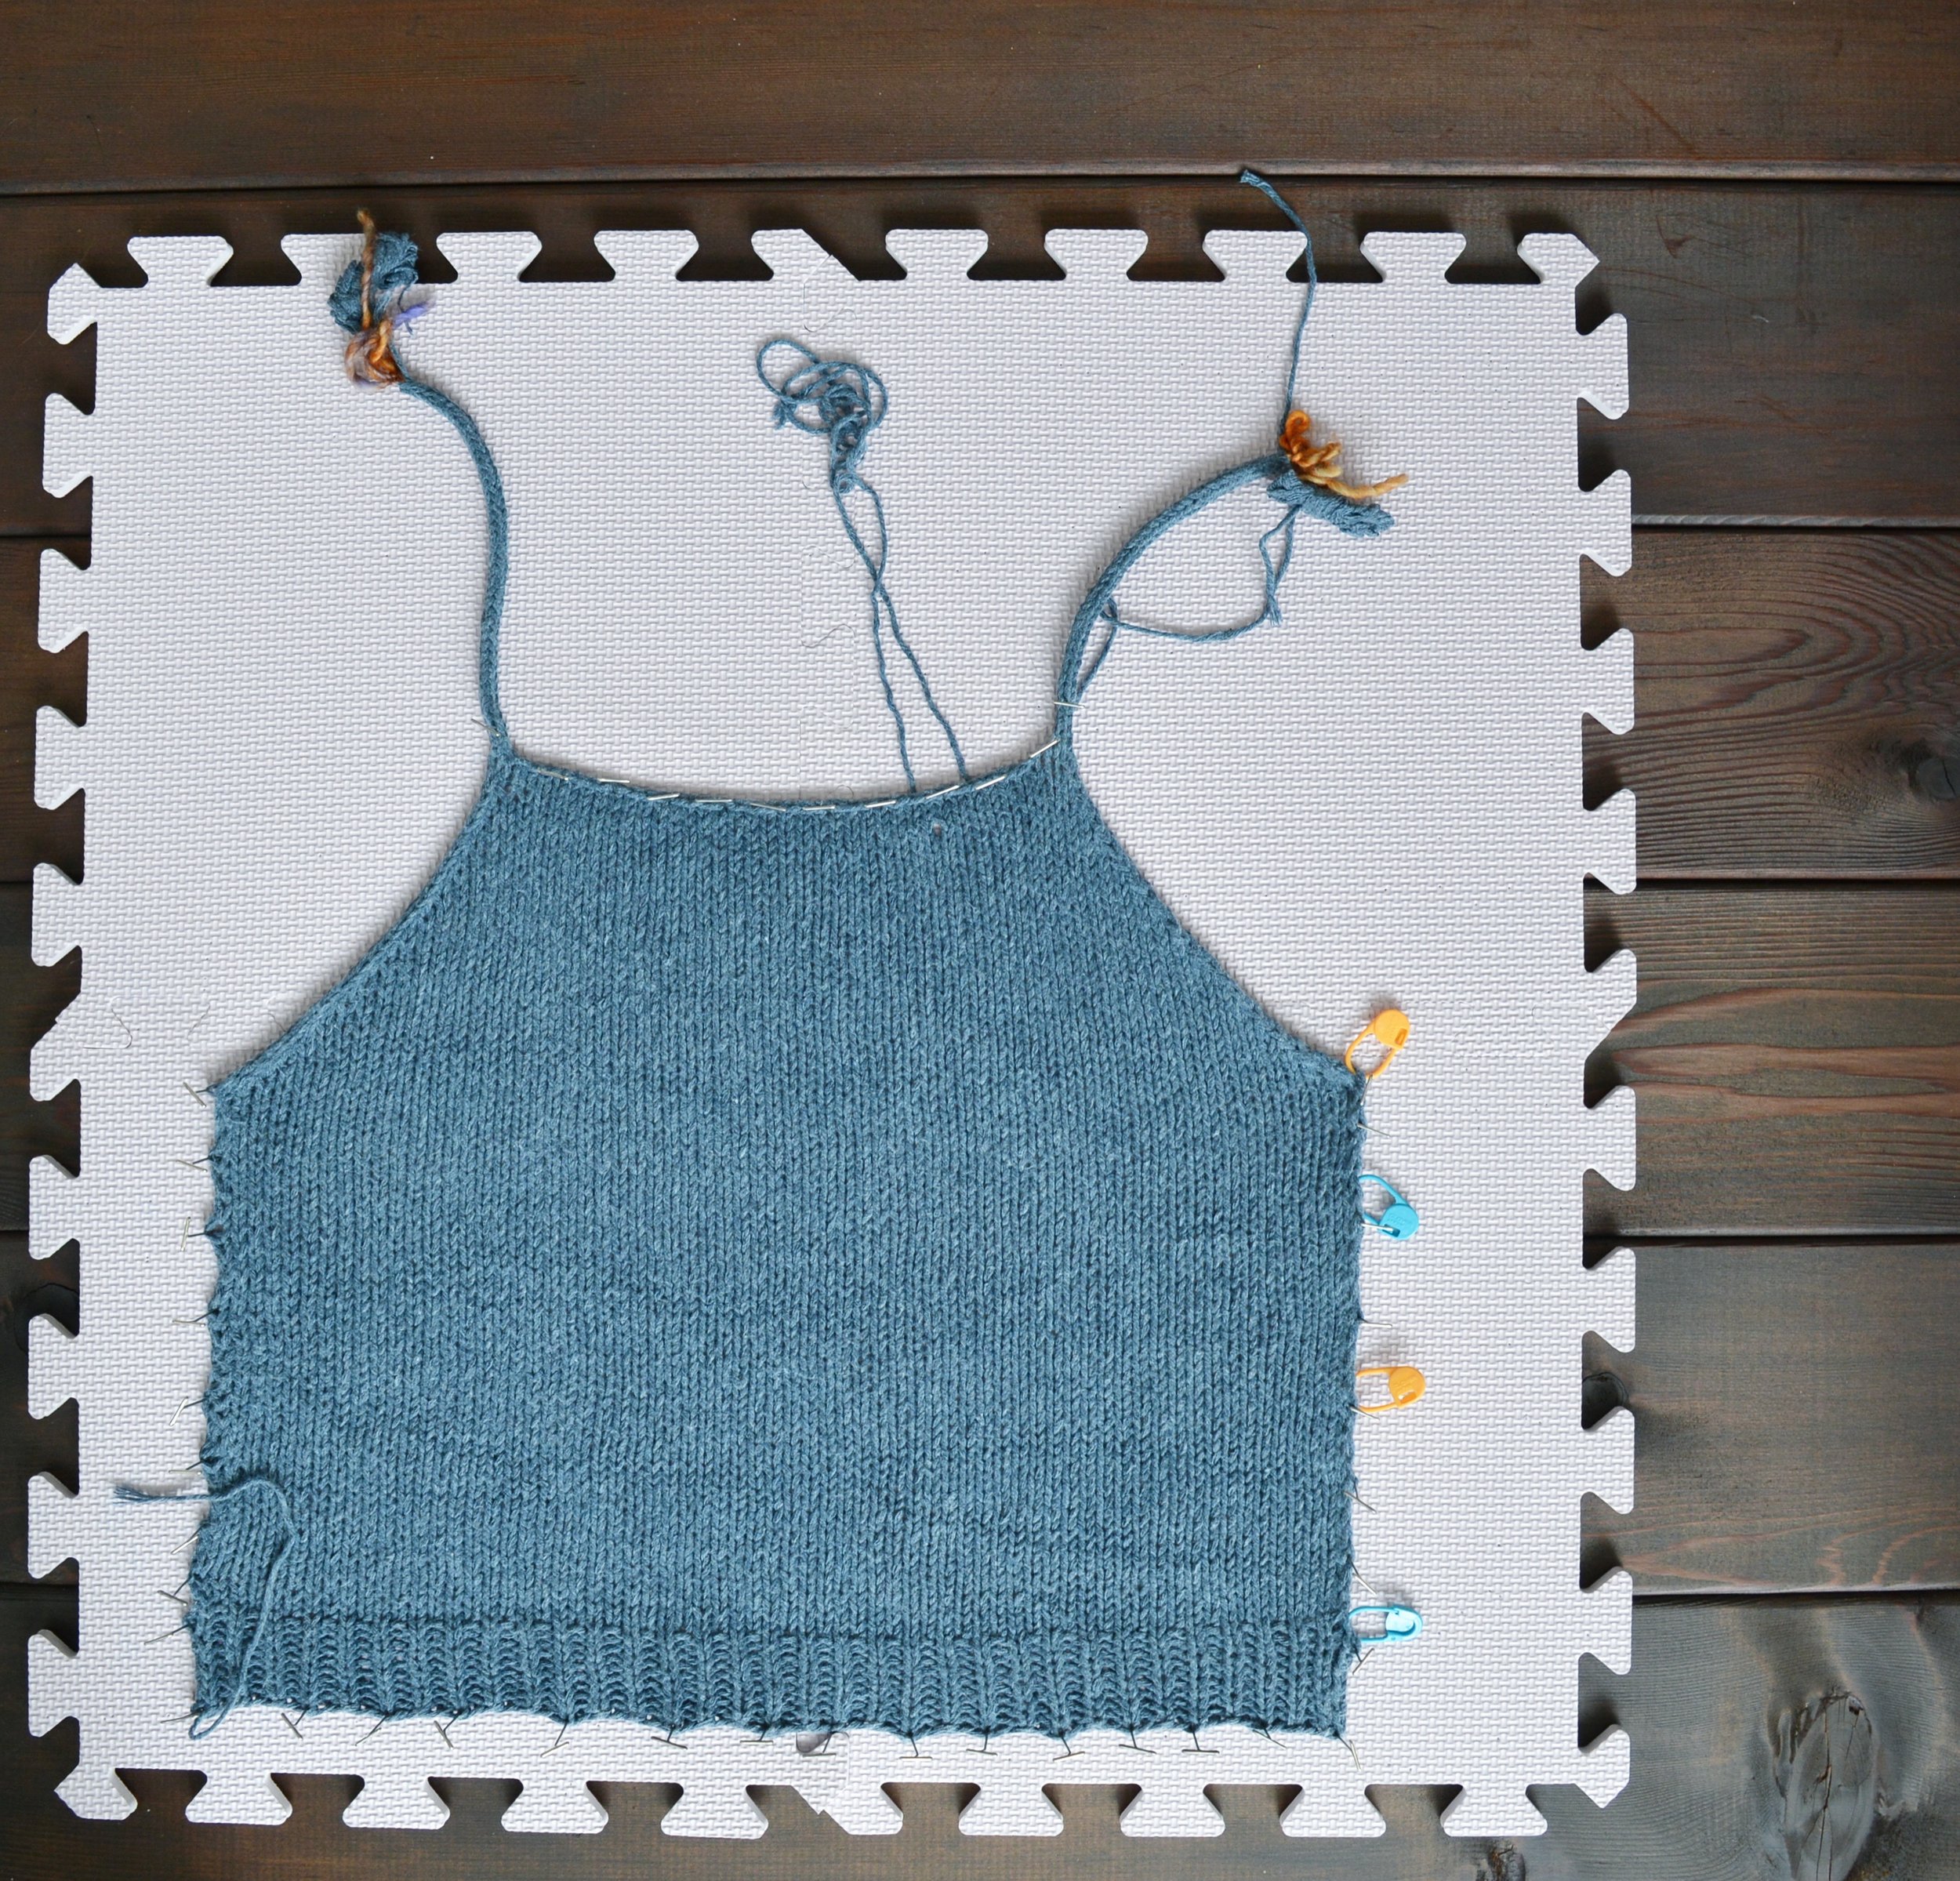
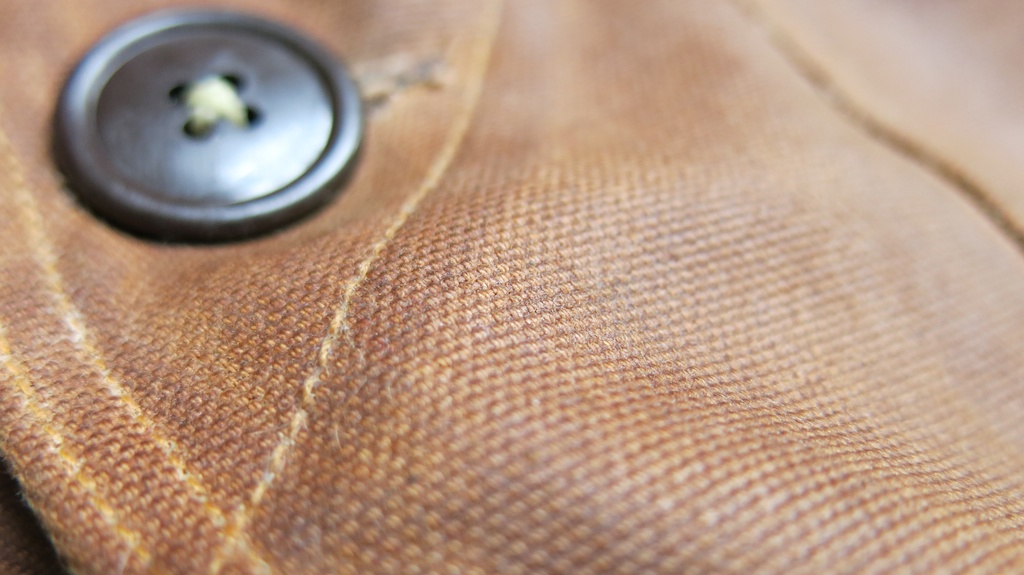
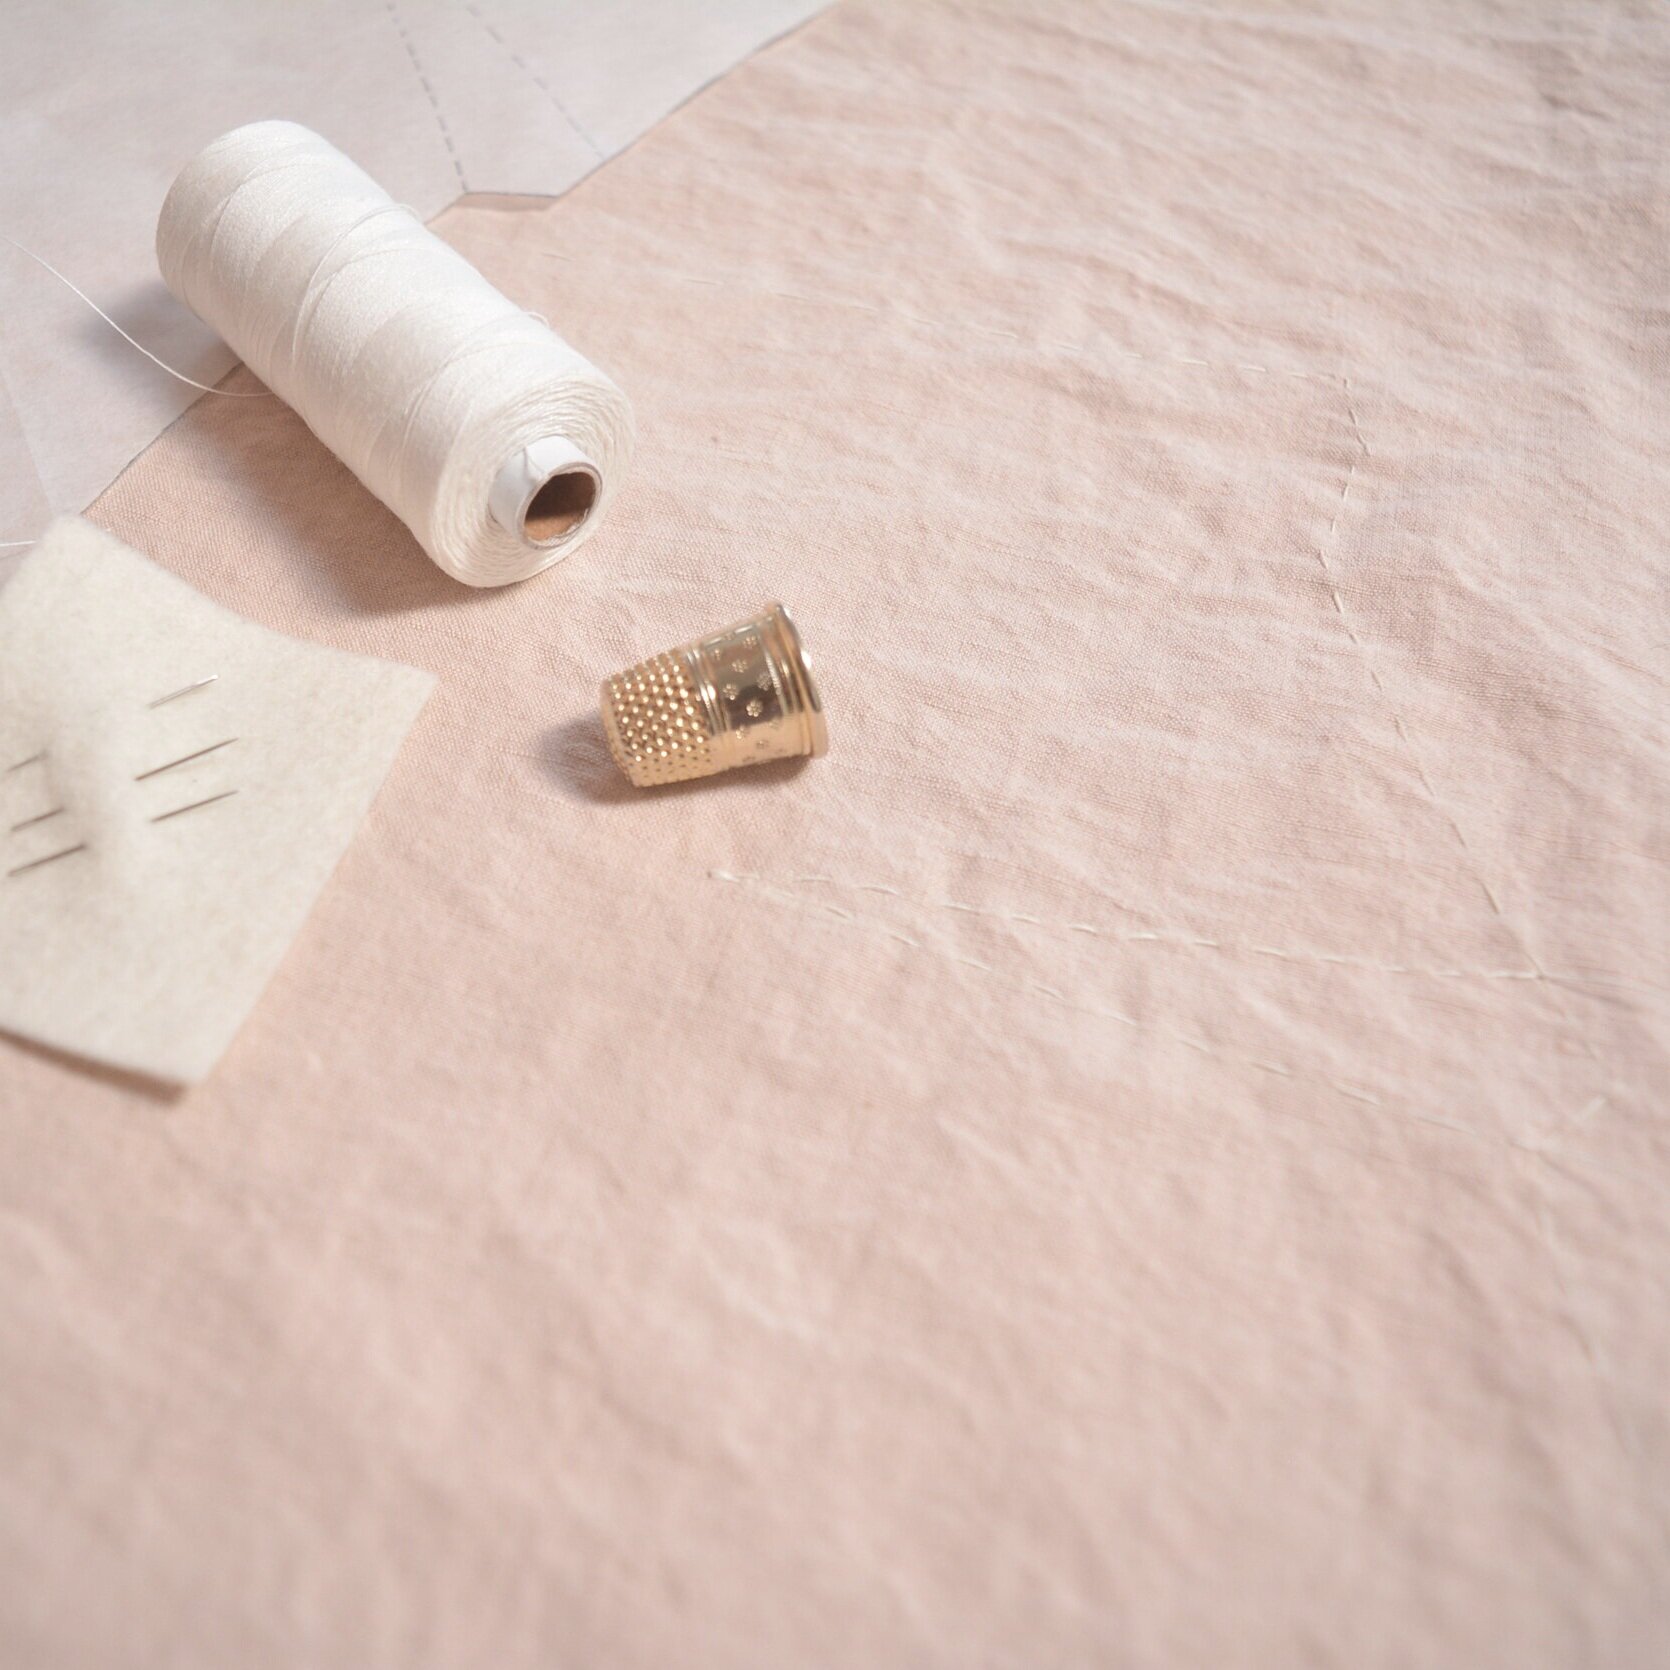
The fabric I used for this project is a handwoven 100% linen from Maiwa Supply. I dyed the fabric naturally using avocado skins and pits to get the peachy pink colour (you can read more about that here). I cut all my pieces like usual, except for the front cami piece. Because I knew that I would be embroidering that one I thread basted where I would be cutting later, and then left myself plenty of fabric all around that thread basted line so that the piece would comfortably fit into my embroidery hoop. I decided not to sew a mock-up for this dress, mainly because I'm not usually too picky about how garments like this fit. The Wattle-Fawn dress is designed to be a loose fitting flow-y dress without too much structure (and also no sleeves to fit!) so I figured I wouldn't have a problem just jumping straight into it, and making small adjustments later if necessary. Of course this bit me in the butt later when I realized that the dress was a little too shapeless for my preference, but turning it into a set of separates was a quick fix for that.

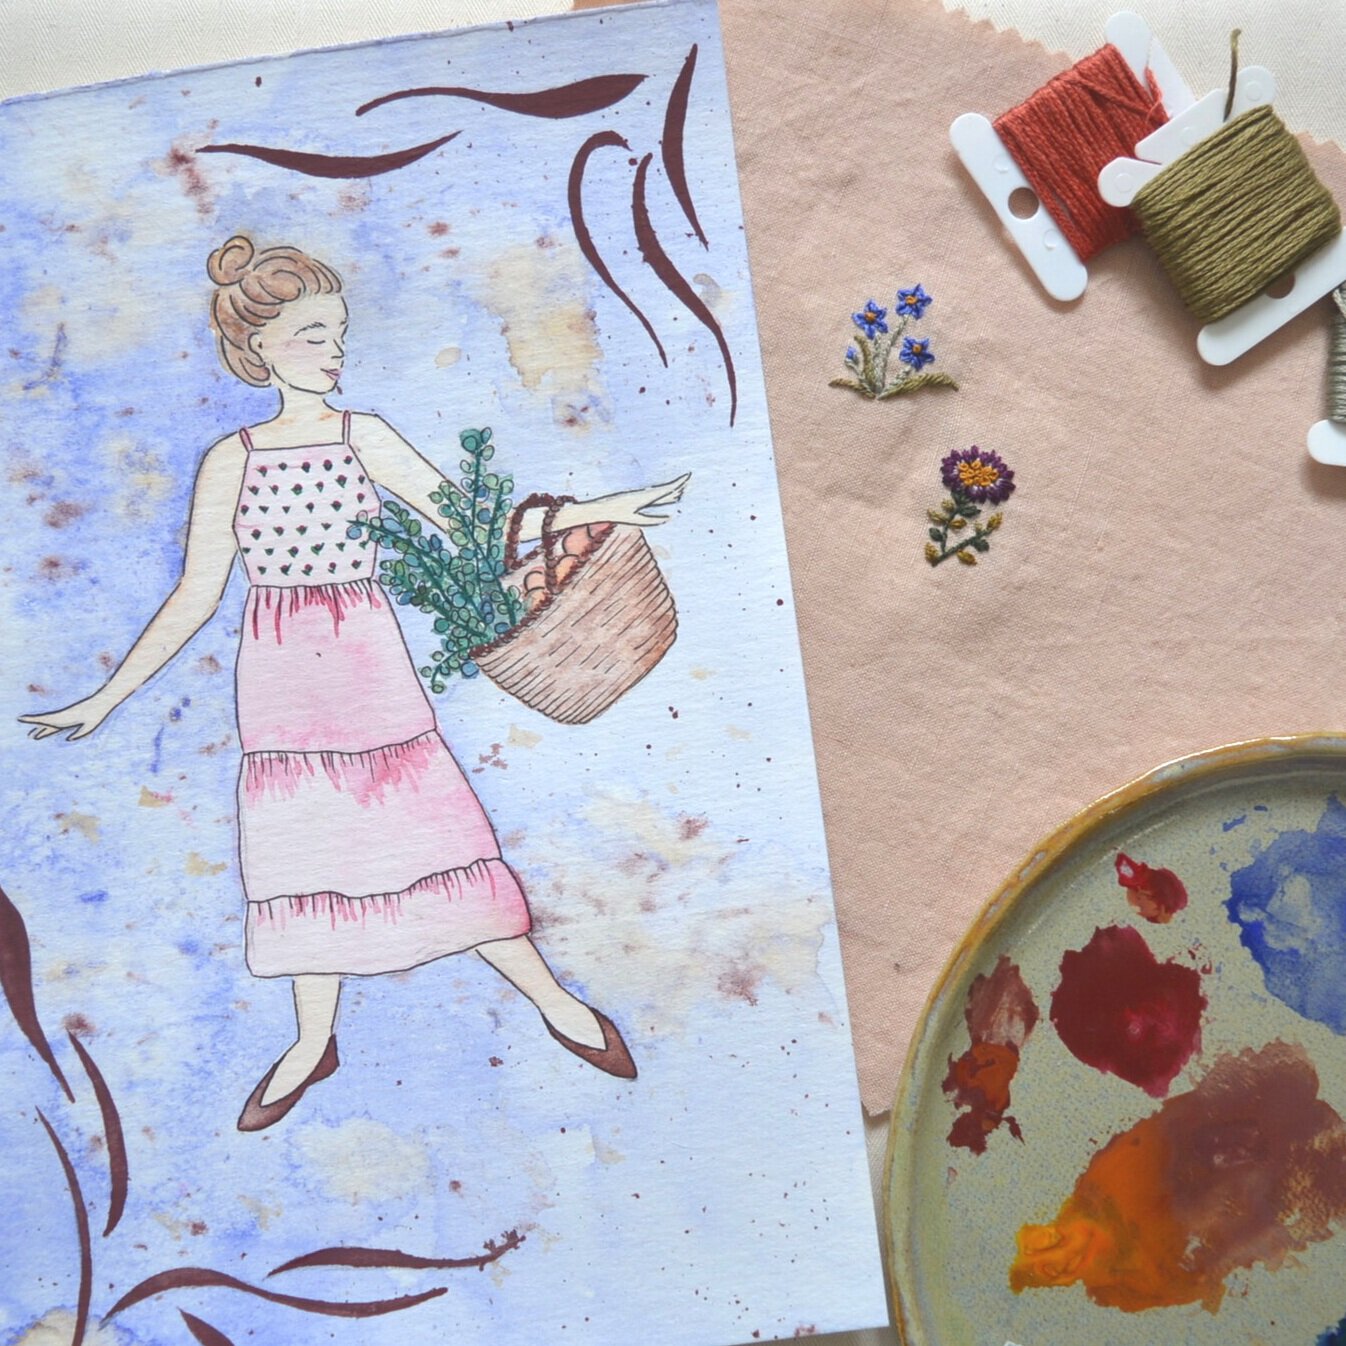
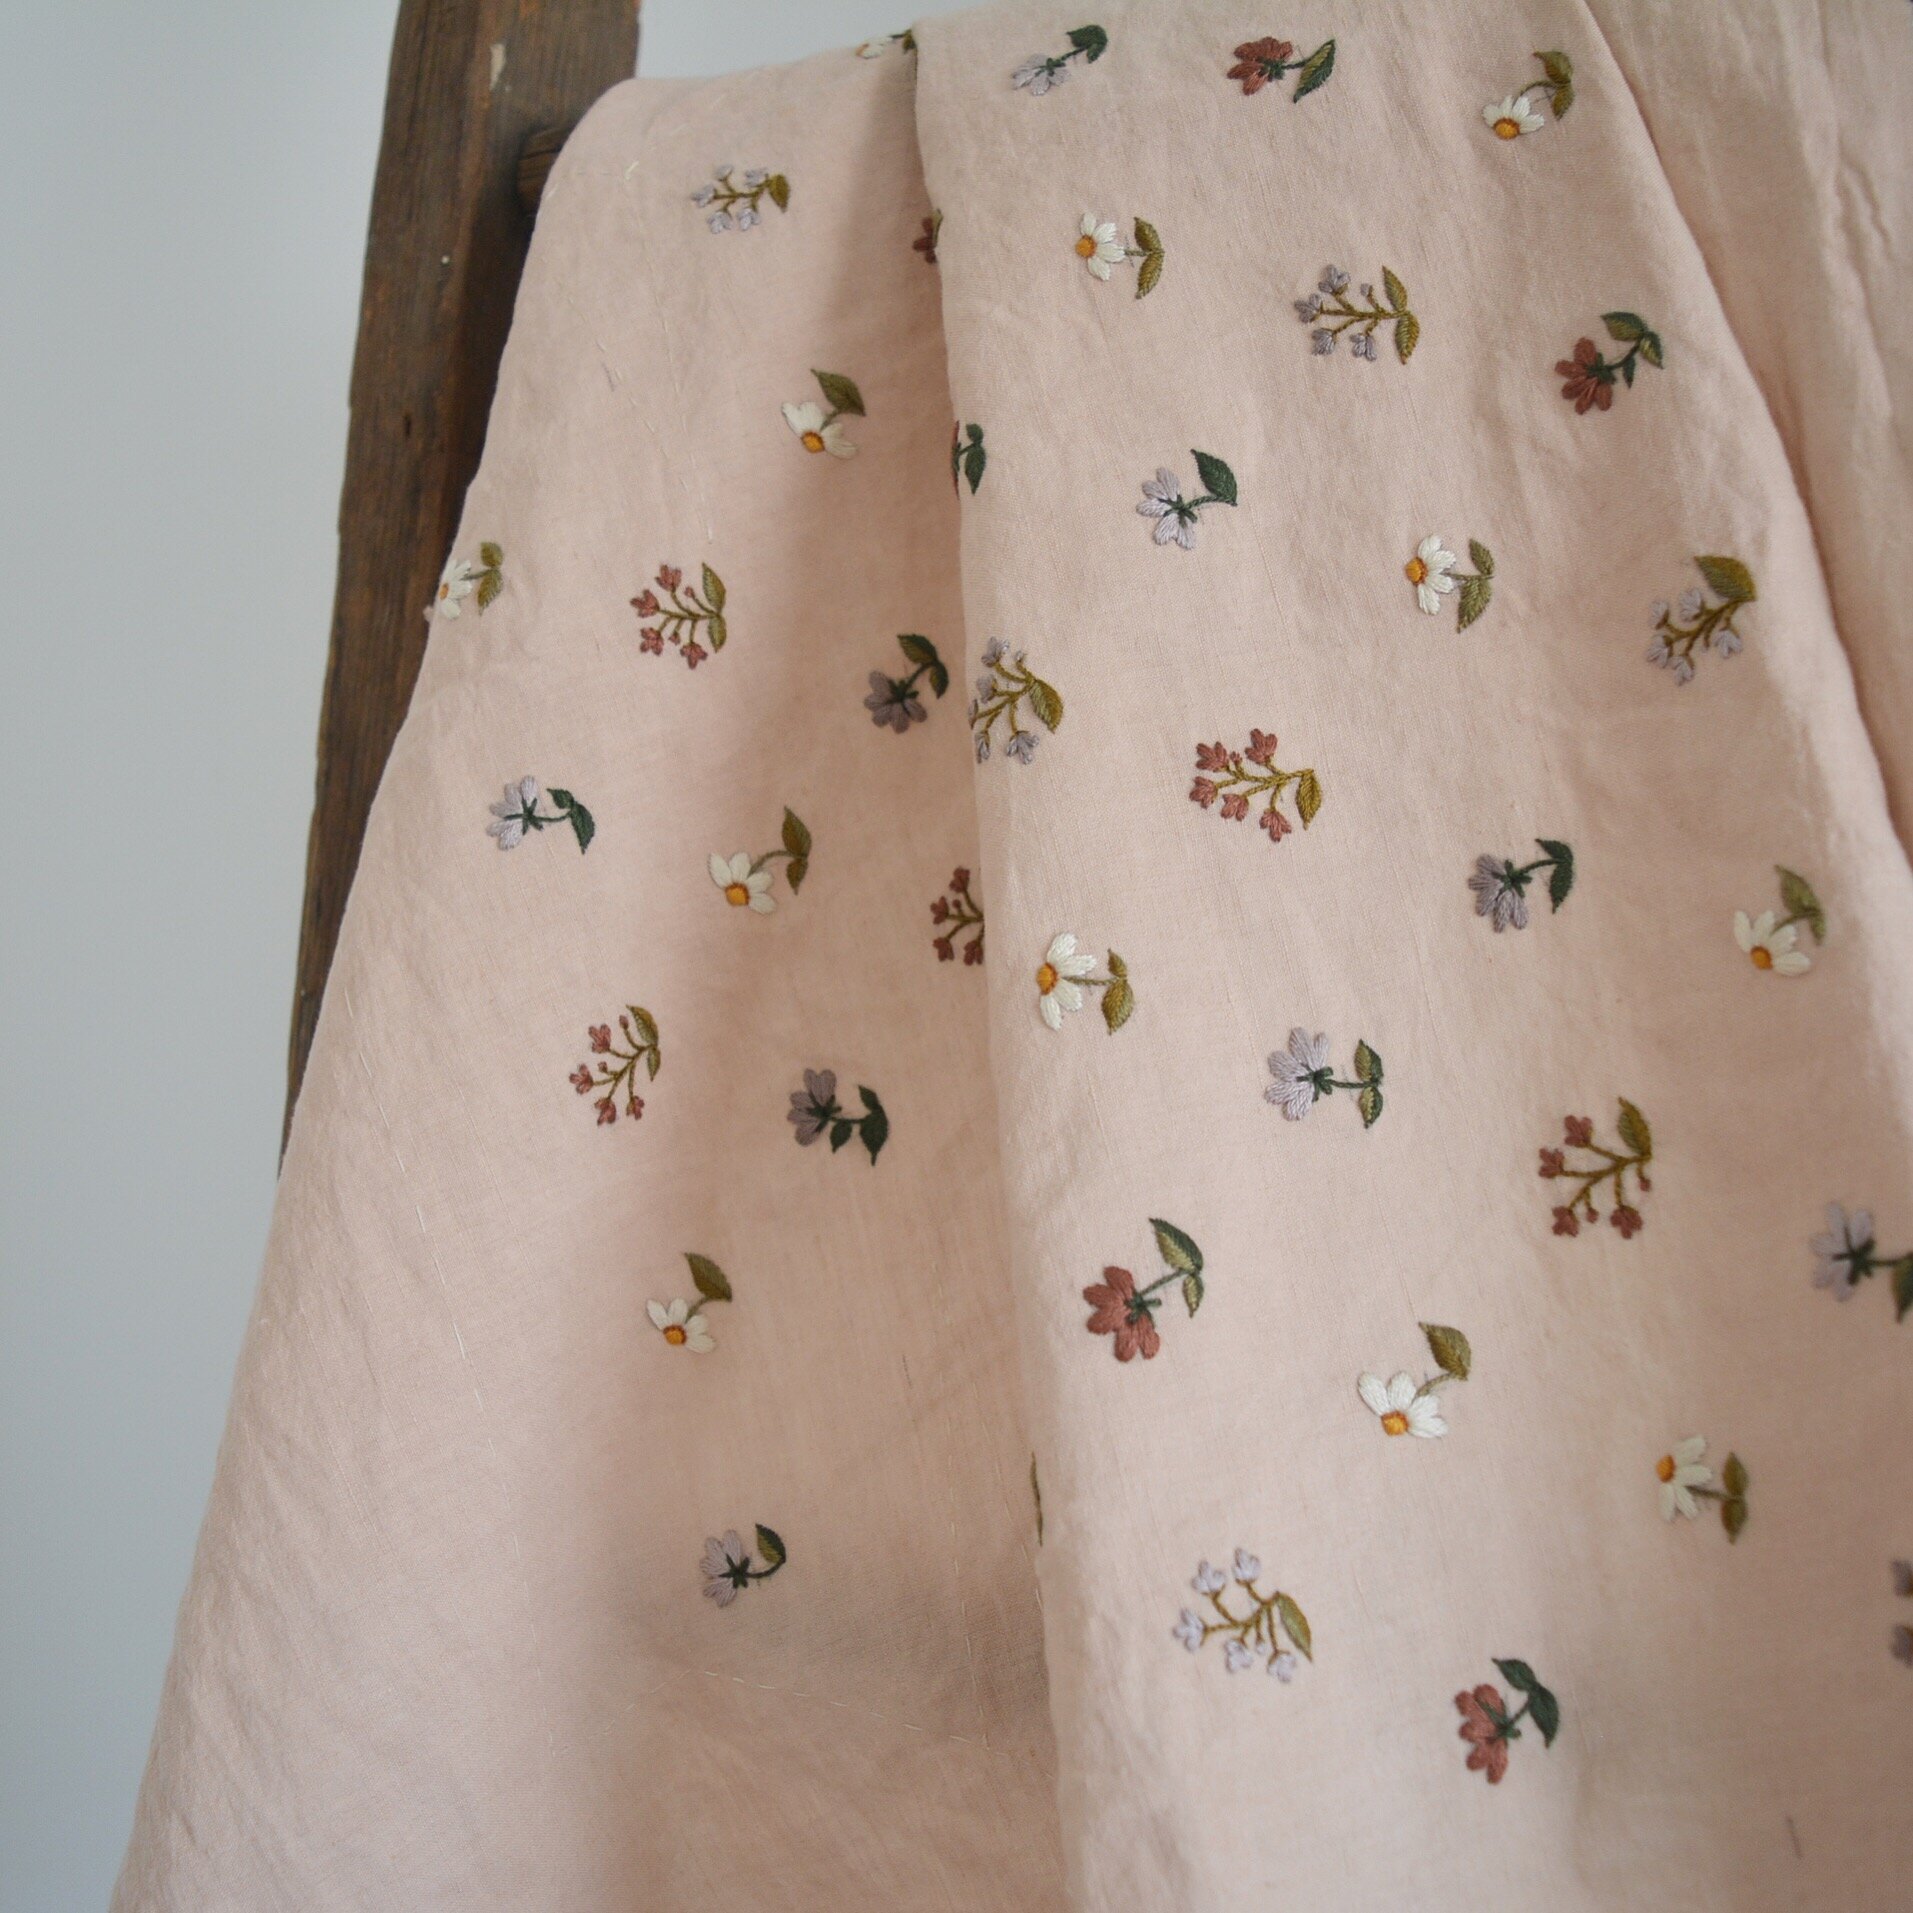
I wanted an all over embroidered floral print for the cami piece, so I tested a couple flower ideas on some scrap avocado dyed fabric, and once I had my plan I sketched it all out on my thread basted piece with pencil, measuring to make sure the flowers were equally spaced. Pencil doesn't wash out as nicely as a marker made for this purpose, but it's what I had on hand and I would be covering it all up with embroidery anyways. I went about embroidering, and 38 hours of stitching later (spread out over a couple weeks of course) I was ready to start assembling.

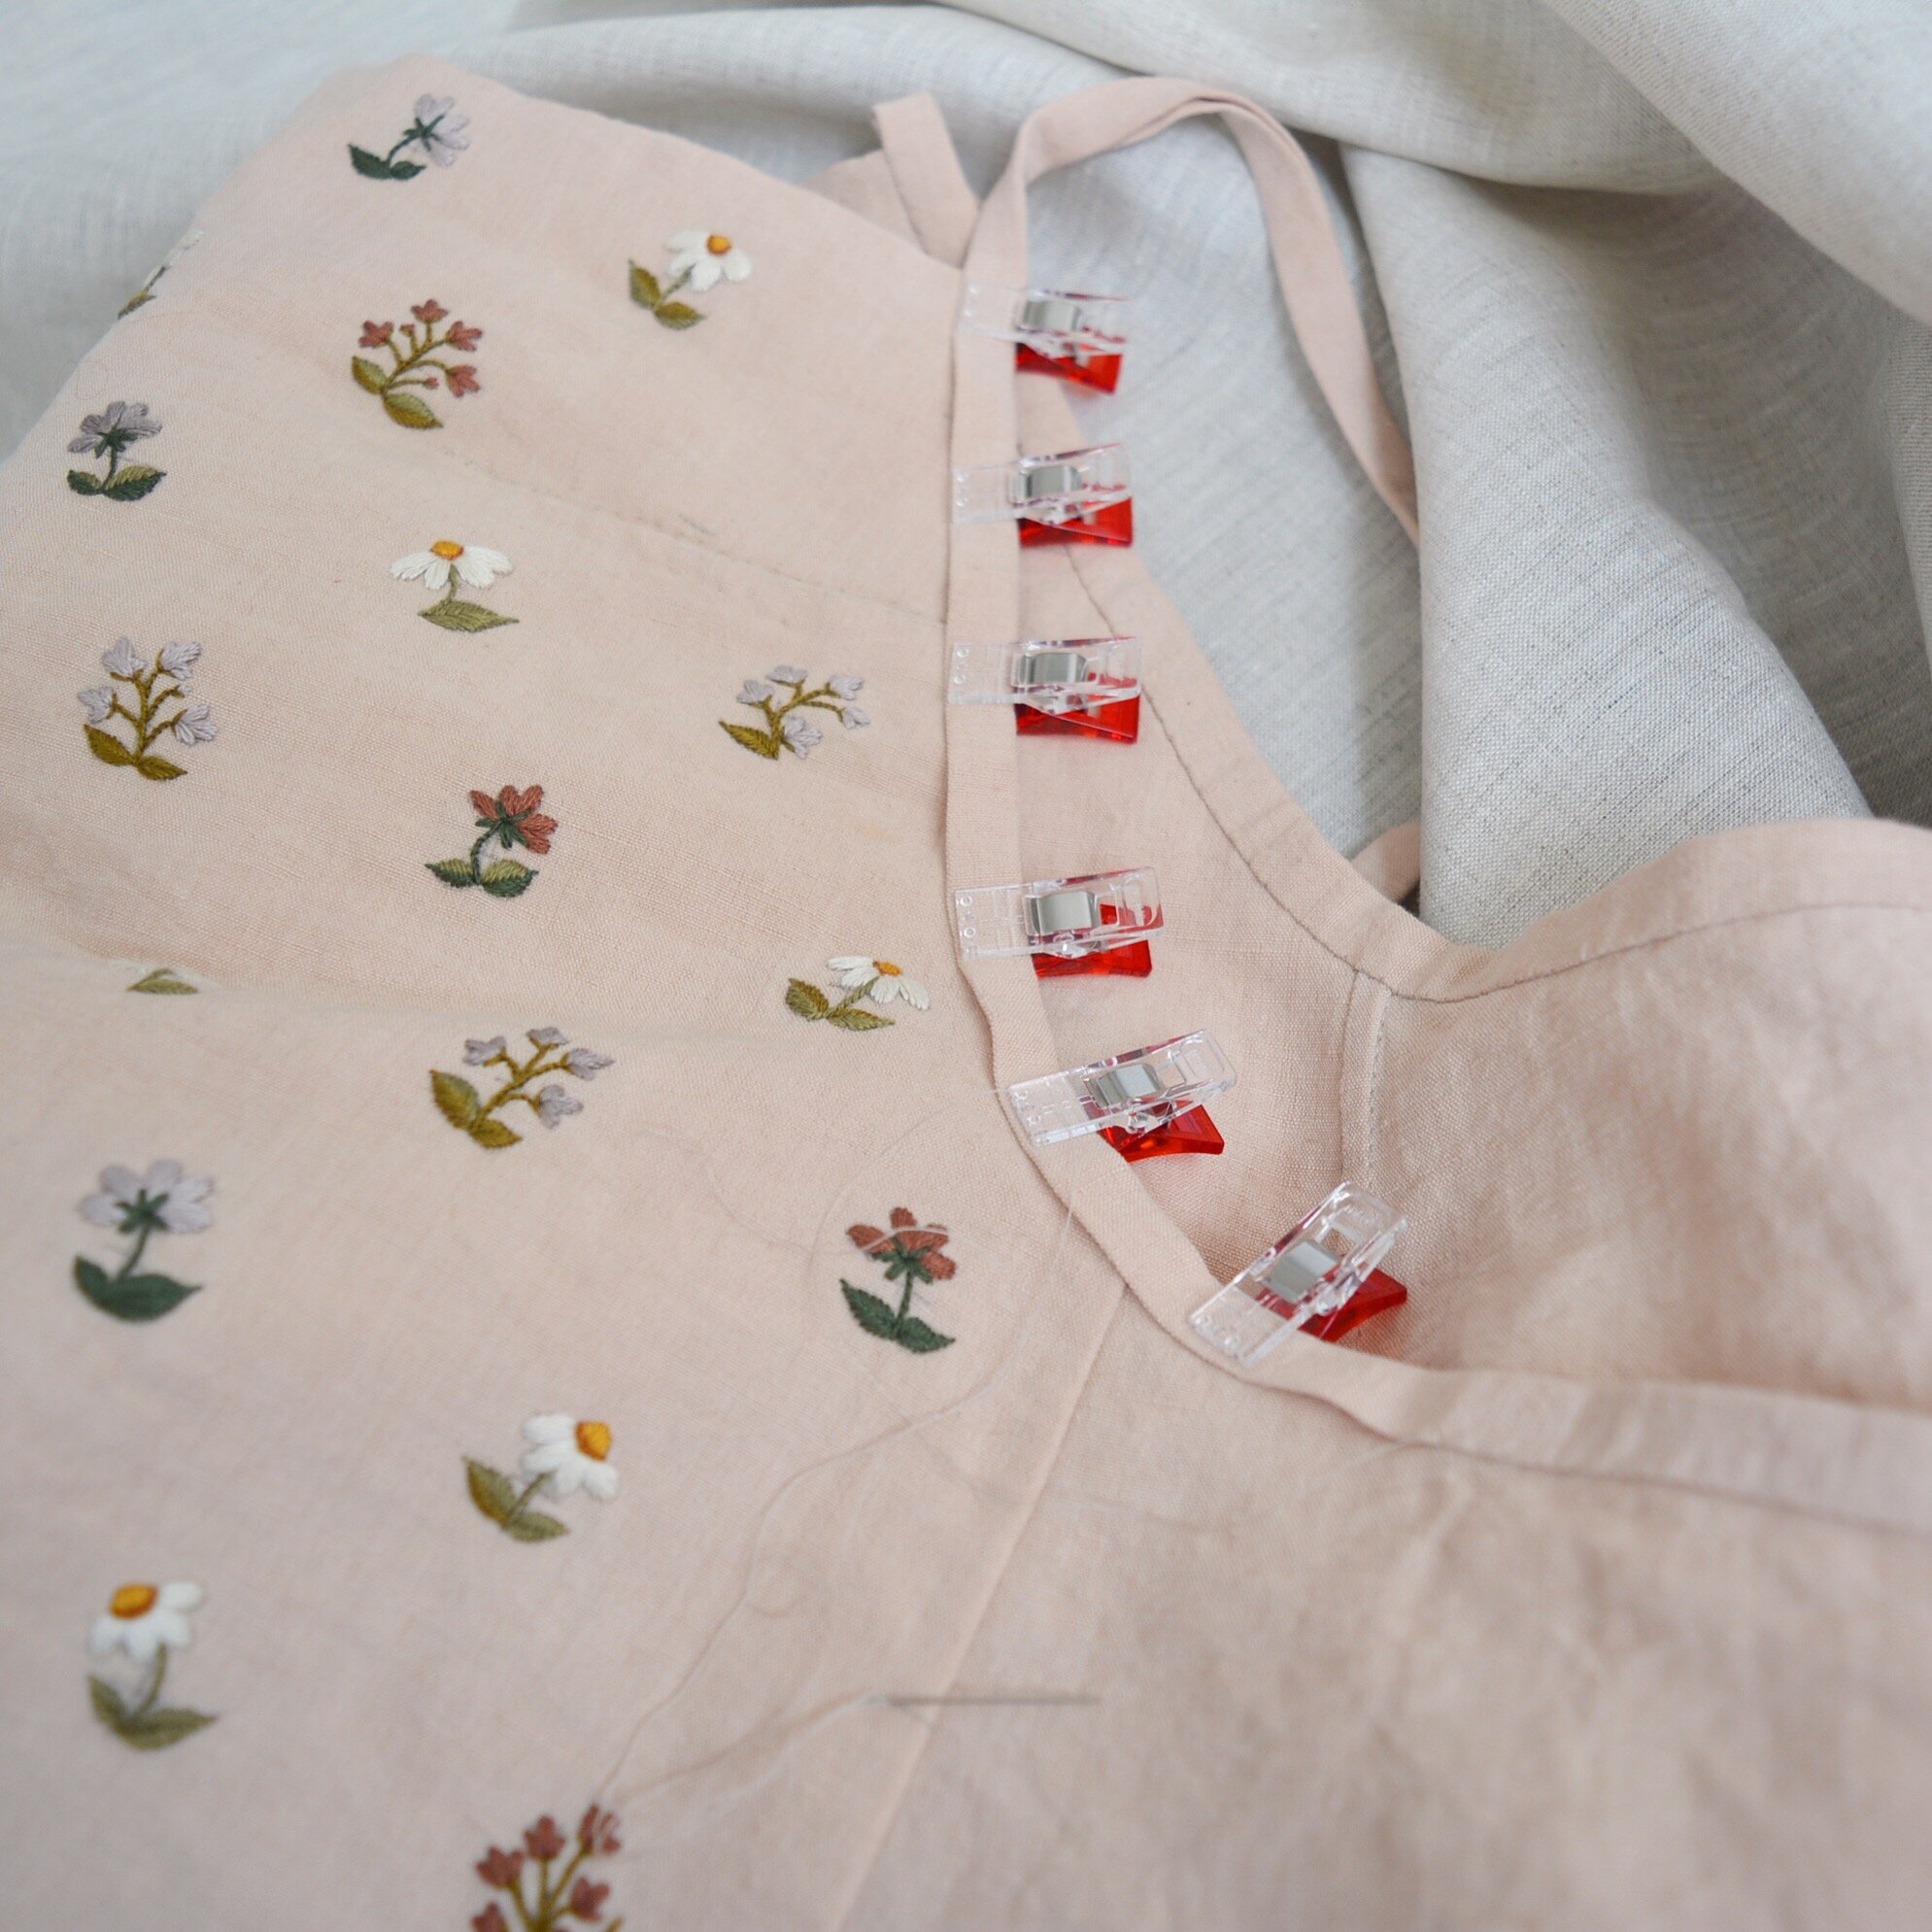
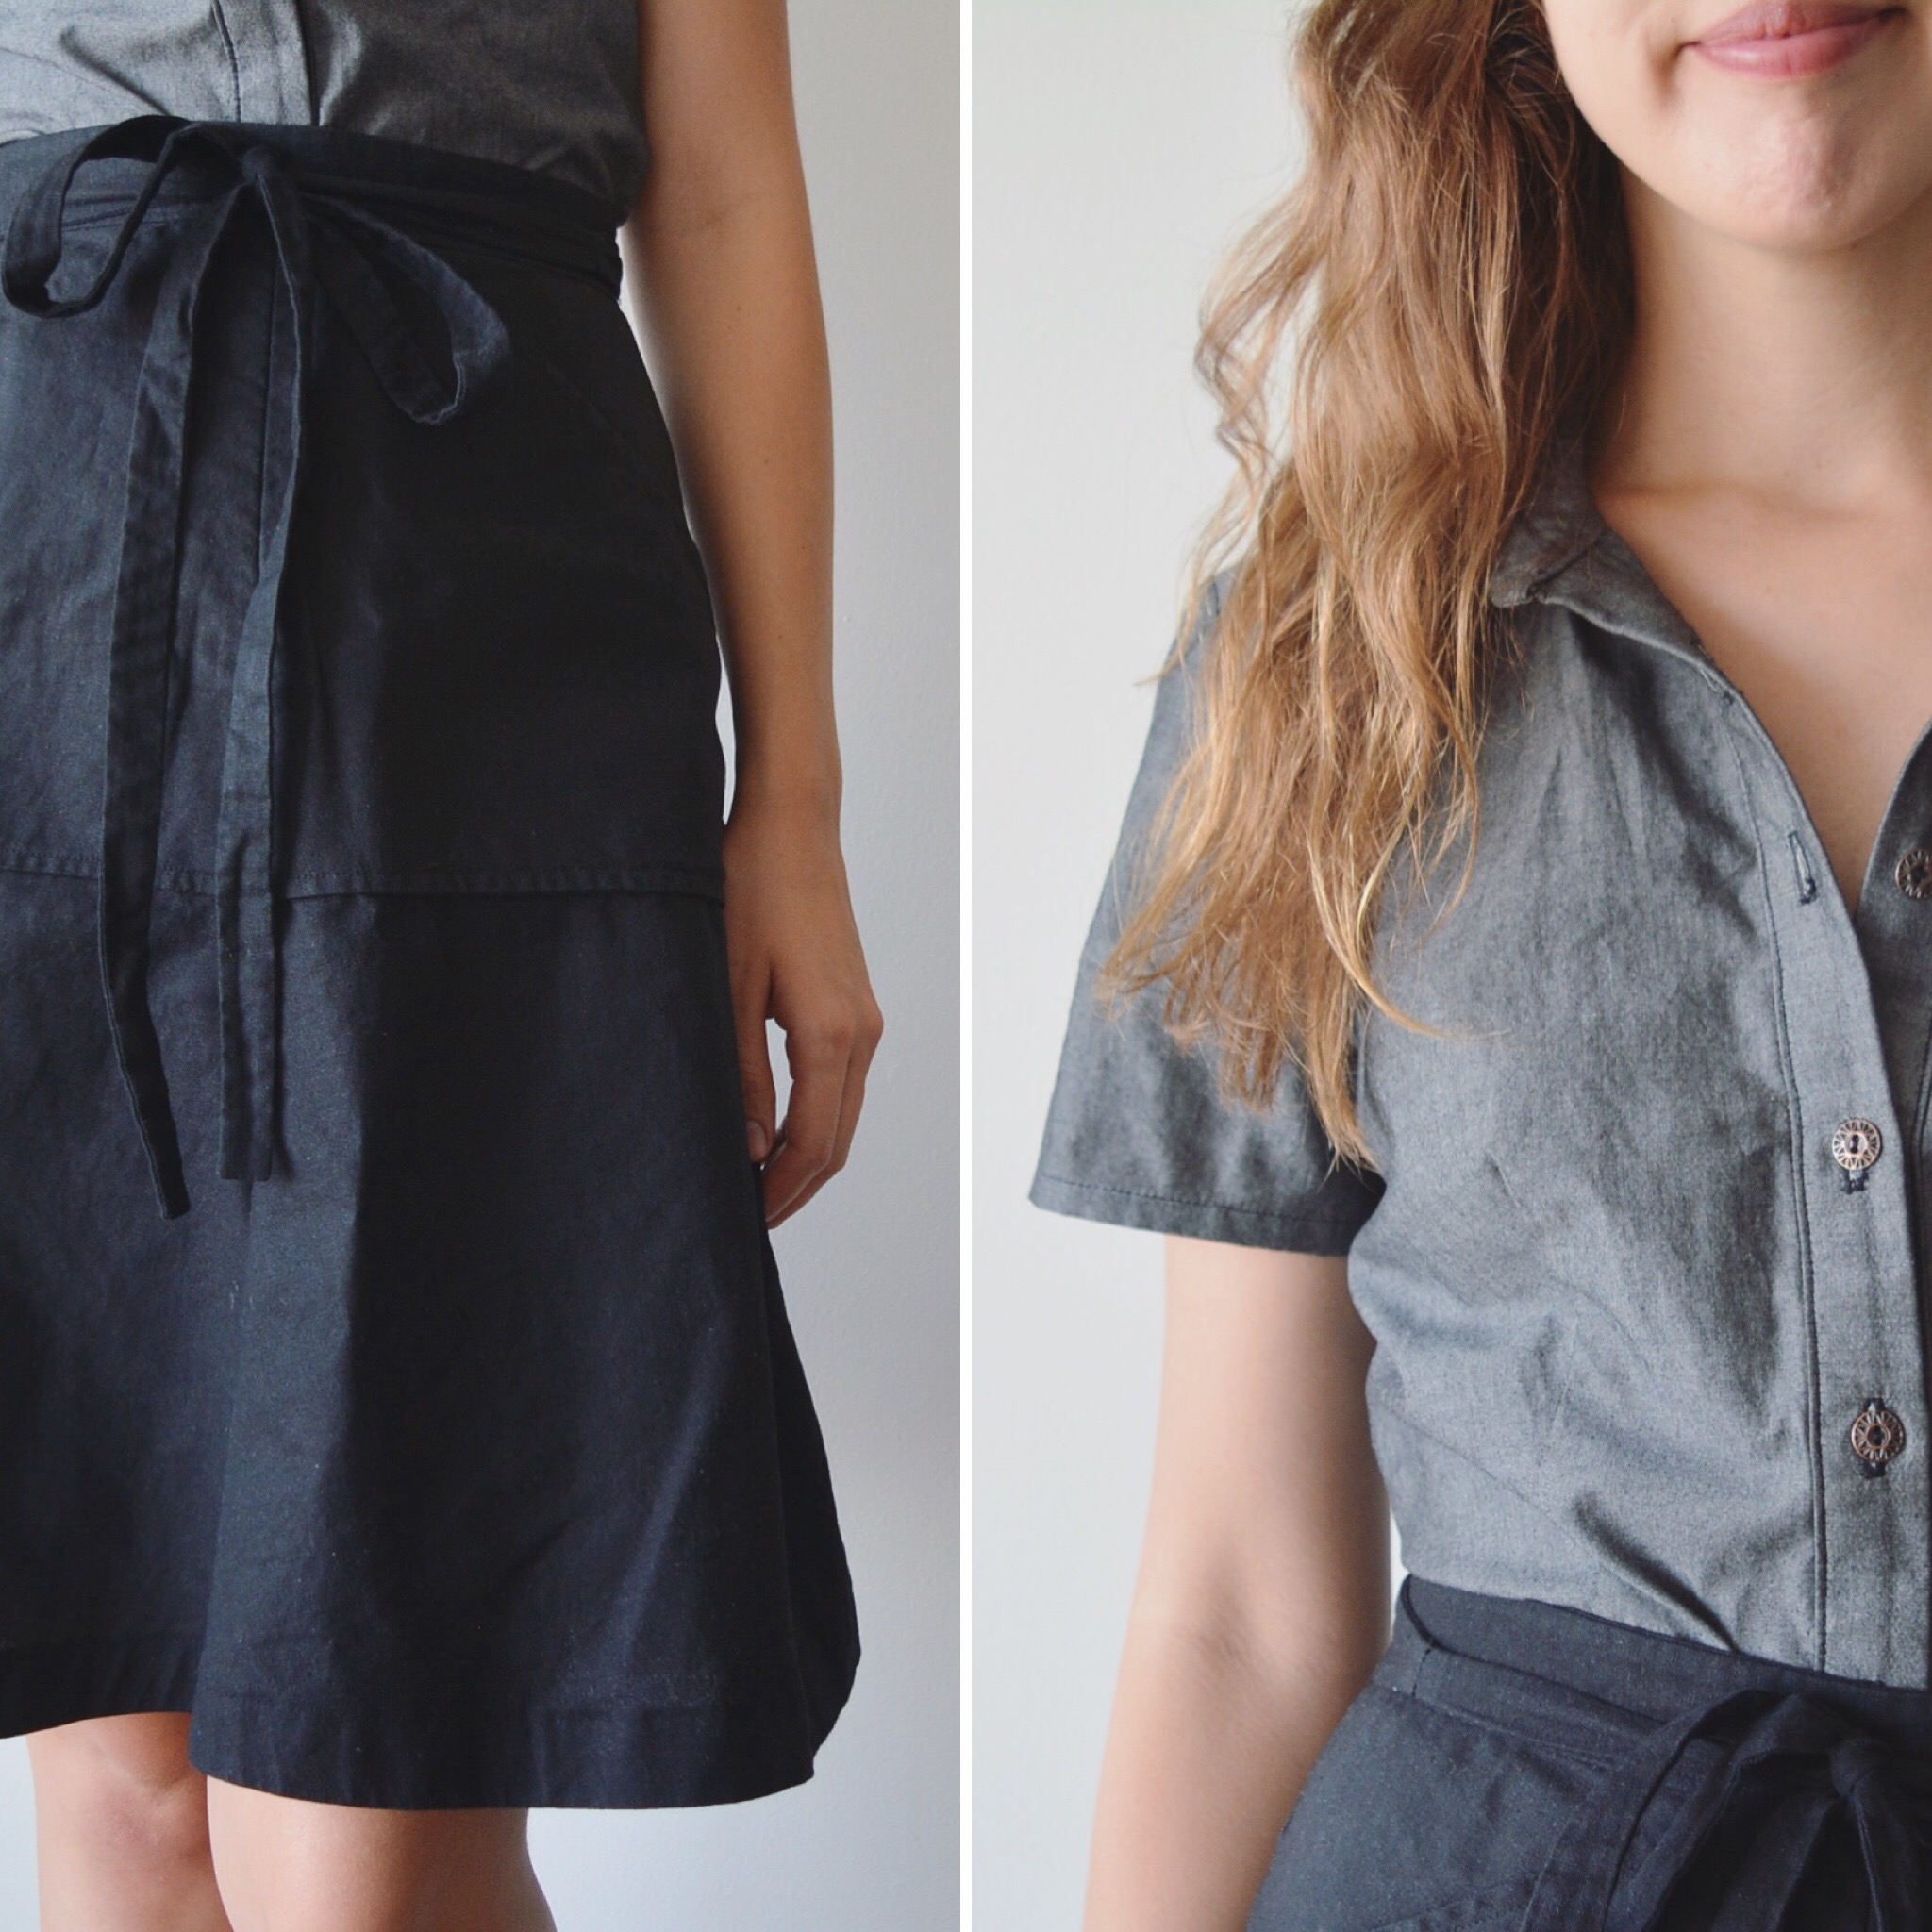
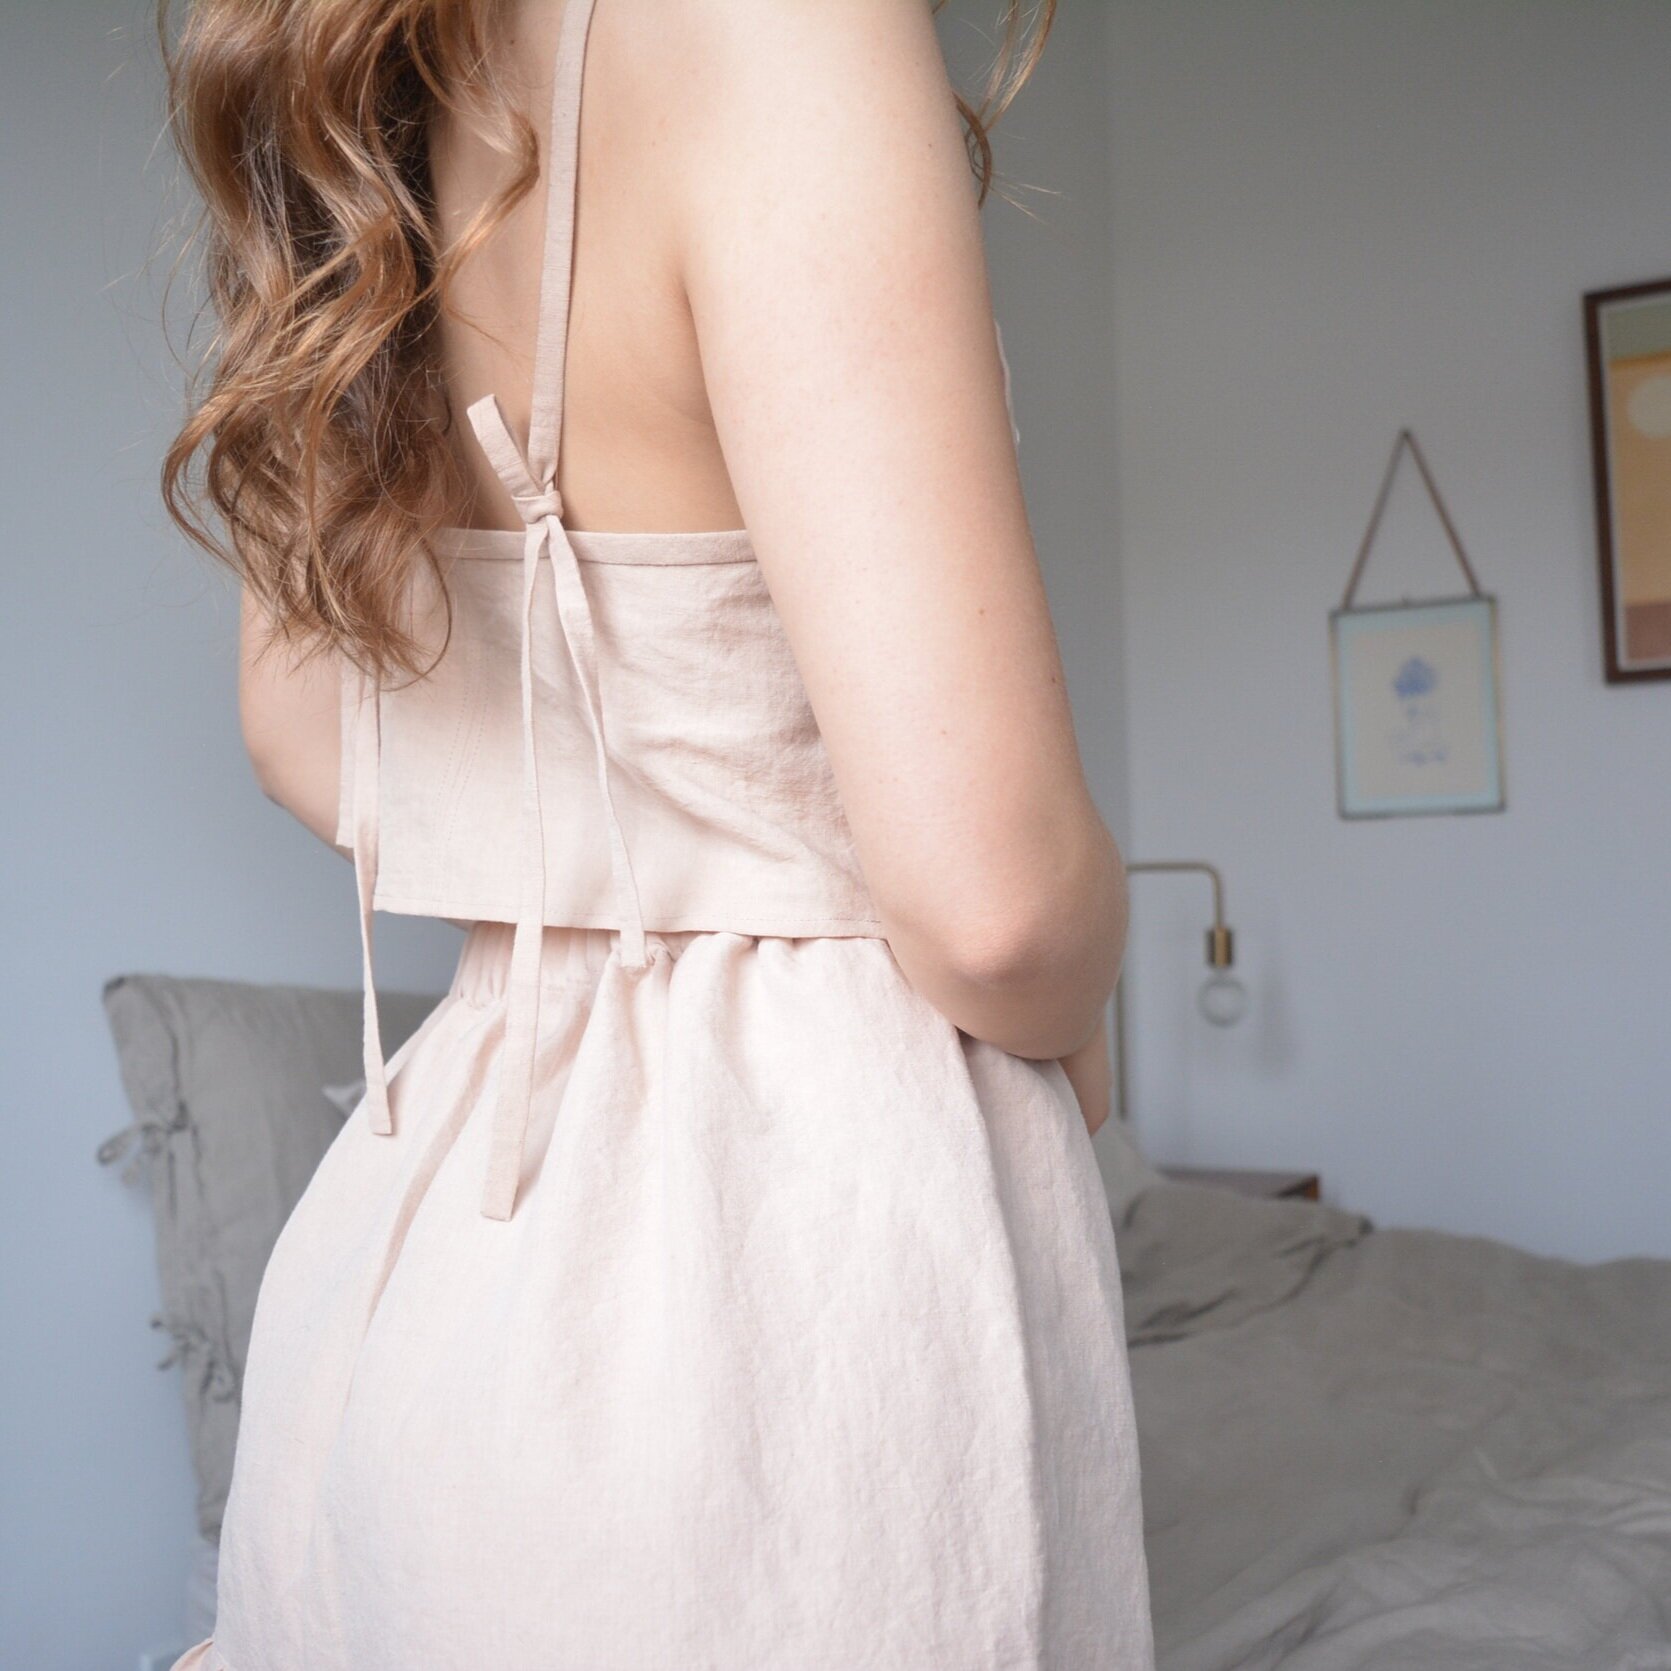
I wanted to cover the back side of the embroidery because I thought it might irritate my skin, so I lined just the front cami piece with another piece of the same pink linen. I used the flat-lining method, essentially cutting a double of the piece I wanted to line, laying them on top of one another, and from that point treating it as one single piece. Flat-lining gives you a chance to finish things really beautifully by hand, hiding stitches and seams in the lining. One of Bernadette Banner's videos explains the flat-lining process really well: linked here. I also hand finished all of the binding and straps because every time I try top-stitching fiddly bits like this on my machine it never turns out as straight or neat as I prefer.

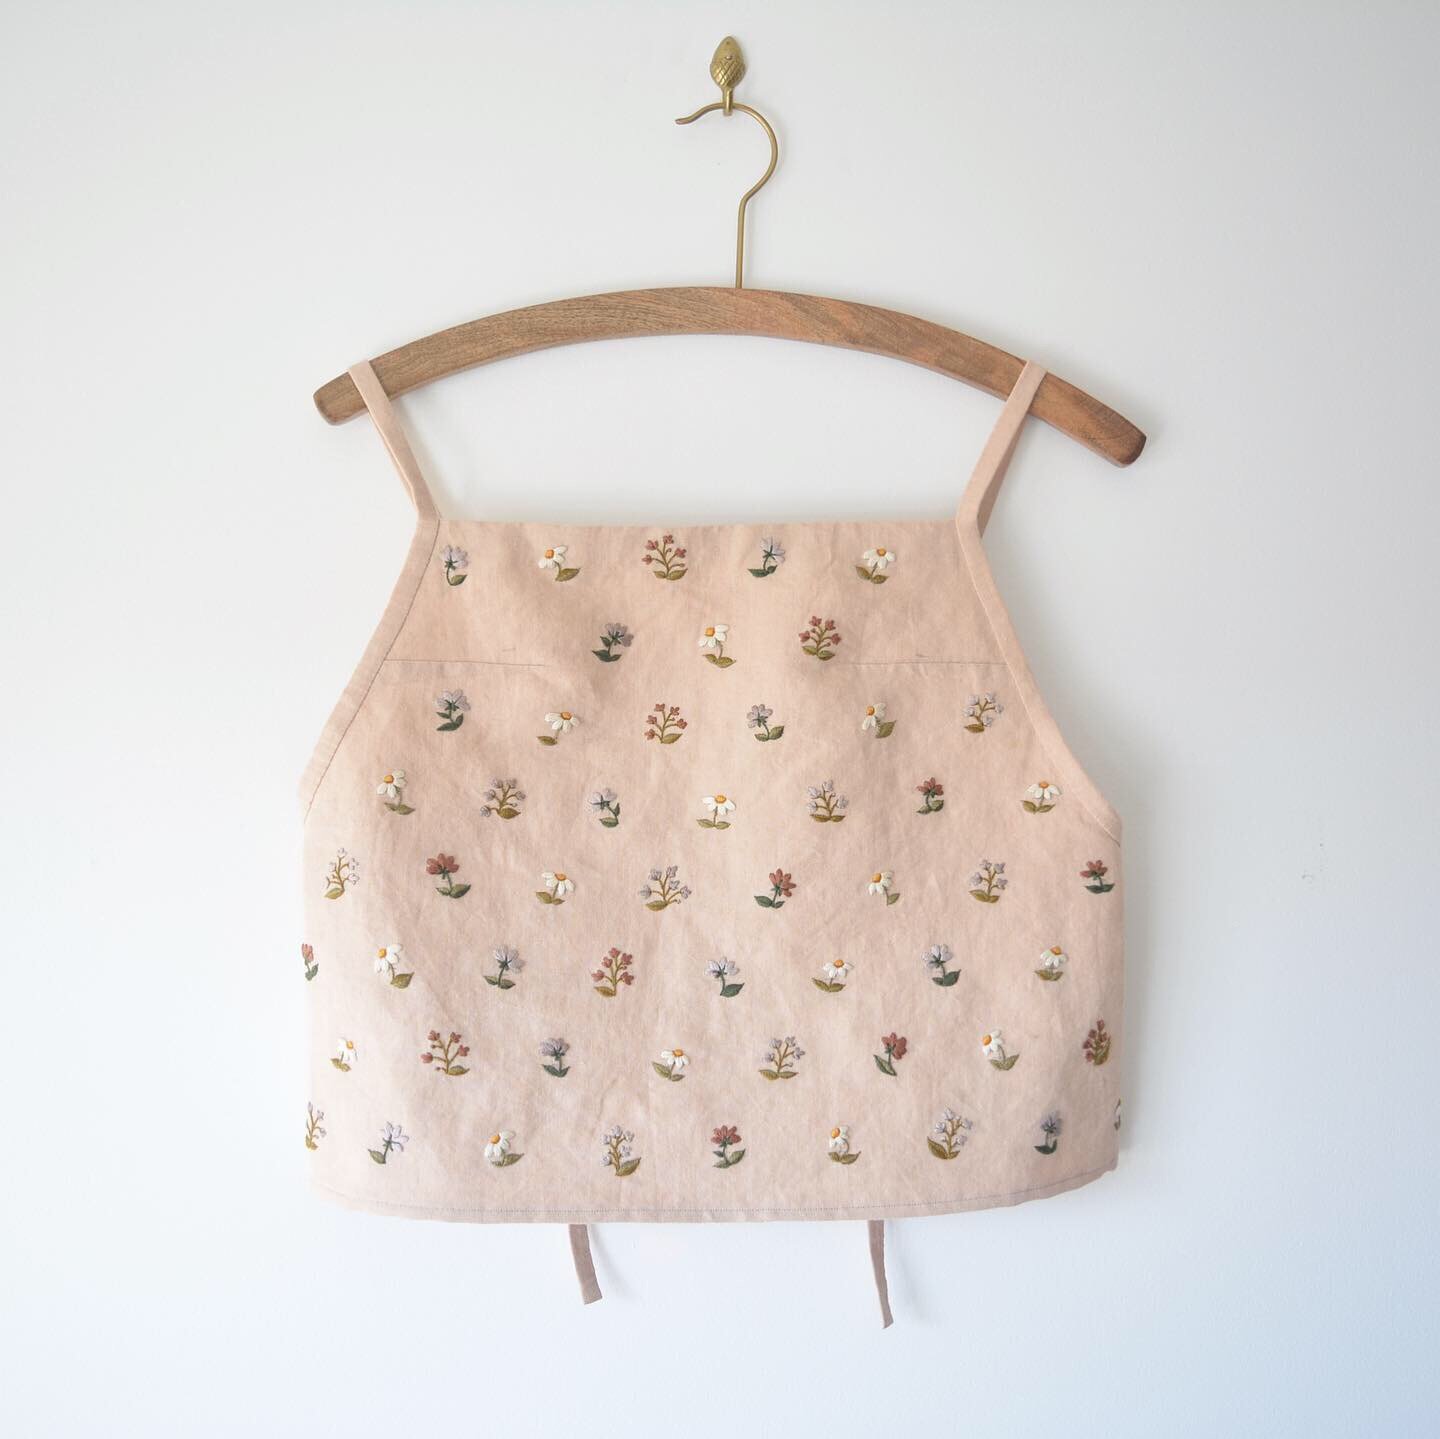
I pieced together the skirt, getting mildly frustrated by all the gathering, but it came together fairly quickly. I basted the cami to the assembled skirt because I though I might want to shorten it, and it was here when I tried it on to fit that I realized it was not quite the look I wanted. The lack of a defined waist coupled with all the volume in the skirt was just making me feel shapeless. I decided to take them apart and just hem the cami and keep it as a classic Wattlebird cami, and finish the skirt as a separate at well. The Fawn Skirt is finished with an elastic waist, which gave me the waist definition I wanted. I'm pretty happy with this solution because I feel like I will get a lot of wear out of the cami on it's own, making the garments a lot more versatile than if I just had the dress.

If I do decide to try the dress hack again it would be with a much more drape-y and flow-y fabric, and I would probably insert ties in at the waist seams so that I could cinch the waist in and tie a bow at the back. But for now I'm smitten with my outcome from this first try and looking forward to a summer in avocado pink!

Summer FO's

2017-09-04_15-17-48.jpg

FO #1: Miette Wrap Skirt in Robert Kauffman black Essex linen-cotton blend (top left)

FO #2: Short Sleeve button up shirt (Burda 6527) in a grey cotton chambray with fancy copper buttons from Button Button in Vancouver, BC (middle right)

FO #3: Indigo dyed scarf made at the Indigo Social event in Vancouver, dyed using the scrunchie method (bottom right)

FO #4: Salt marsh skirt made using hand-woven cotton from Maiwa Handprints (woven in India) and the Sat marsh Skirt pattern from the Merchant and Mills Workbook (middle left and bottom middle)

FO #5: Striped Beach Tank modified to have a low back and knit in Bernat Handicraft cotton yarn (top right)

FO #6: Palmer Cardigan knit in Brooklyn Tweed Loft (middle and bottom left)

FO #7: Indigo dyed bed sheets and pillow cases (top middle)

2017-09-06_00-02-29.jpg

Quilted Linen Tamarack Jacket

2017-04-23_14-27-58.jpg

I finished my jacket just in time to wear it a little bit before we slip into warmer weather. This project was more time consuming then any other piece I have sewn, but it wasn’t any more difficult. The only reason this jacket sat around unfinished for a little while was because I was nervous about the welt pockets, but with the step-by-step tutorial on the Grainline Studio blog there wasn’t any reason to be worried! The only thing I added was a little loop at the back so that I can hang the jacket up on a coat hook (not pictured), but otherwise I made the size 2 with no modifications. I have been wearing it daily since I finished!

Pattern: Tamarack Jacket by Grainline Studio

Outer Fabric: Robert Kauffman Essex linen cotton blend

Lining: Cotton + Steel Tulips from the Bluebird 2015 collection

FO: Beach Tank

2017-02-02_15-29-54.jpg

I just finished my first FO of 2017, the beach tank, a pattern by Jess Schreibstein. This was such a fast knit, and if I didn’t have so many WIP’s going at once I would have finished it well before February. The pattern is simple and straight forward, and the boxy tank is the exact style I want for a summer beach shirt. I’ll probably make another one, but this time a little longer for everyday wear. But what’s more perfect for summer then a cropped, boxy tank made from upcycled denim?!

The yarn I used is Wool and the Gang’s Billie Jean yarn. It’s one of their newer yarns, sustainably made from upcycled denim (pre-consumer denim waste). I found working with this yarn was similar to working with any worsted weight cotton yarn, although it did turn my fingers blue after knitting with it! Quite a bit of dye came out when blocking too (but to be fair, WATG warns that this is expected) and hopefully I won’t get blue skin when I wear the tank. Overall I’m super happy with my yarn choice and the outcome of the project! I’m looking forward to what Jess comes out with next!

2017 Sewing Goals

Last week I wrote a post up about some of the knitting I’ll be doing in 2017, but I’ve also fallen in love with sewing this year so I wanted to write a little list for my second hobby too. These two crafts go well together especially because I want to work on building a well-rounded quality wardrobe this year. So I’ll start with some garment plans I have and then this list may trickle into smaller projects I have planned and even some embroidery.

Tamarack Jacket by Grainline Studio

Tamarack Jacket by Grainline Studio

One project I’ve been wanting to make since it was released is the Tamarack Jacket by Grainline Studio. I want to get into quilting and I think this jacket would be a fun way to work on that. I’ll probably practice my quilting on some even smaller projects before the jacket, things like potholders and oven mitts.

This next sewing goal I’m sure will lead me into an entire new world of it’s own. I want to learn to make my own jeans, and I’ve already been learning so much about different types and weights of denim, and all sorts of new terms too. I was inspired by these embroidered Citizens of Humanity Jeans that I can’t afford, so I decided to embroider my own jeans. And that way the embroidery will be unique too. I was just going to buy a plain pair of jeans and do the embroidery myself, but I think this is a good chance to learn a lot of new sewing skills. So I have a couple patterns ready to go and I will update as I make more progress.

The only other garment on my mind for this year is a pajama set. I’m deciding between the Lakeside Pajamas (Grainline Studio) and the Carolyn Pajamas (Closet Case).They’re both so different and I’m sure I will eventually make both, so I guess I’m just deciding which to do first!

Some other projects include something that incorporates waxed canvas (I’m thinking the Stowe bag), a pin cushion, a fresh cover for my ironing board, and a huge embroidered map. The rest of this post is just some pictures that have inspired me lately. I obviously have a lot to learn and do this year!