The Start of an Alabama Studio Style Camisole Dress

Some links in this blog post may be affiliate links. This means if you click through and purchase the product, I earn a small commission at no additional cost to you. Thank-you.

I have been romanced by the Alabama Chanin books. I can’t remember why I checked the first one out from my library: if I went looking for it because of a photo I saw online, or if I just happened upon it. But for years now I have checked these books out regularly, completely consumed by them every time I flip through. I have been wanting to try the method: working with stretchy cotton jersey, hand stitching seams and binding, embellishing the fabric with reverse appliqué or couching. Finally this last time I took the books out I decided to just start the project. It did all seem daunting, especially because I think I was about 37 weeks pregnant when I ordered all the supplies, thinking that I would have the fabric all painted and set up for mindless hand-stitching by the time the baby arrived. Of course not!

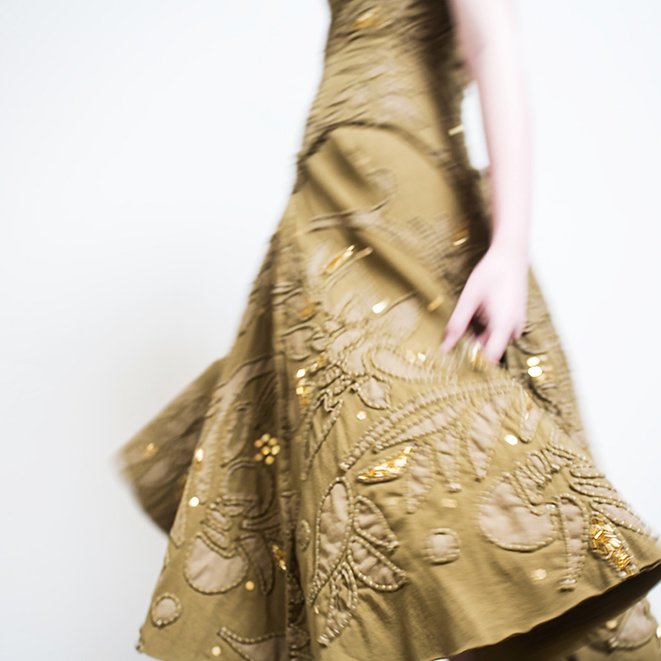
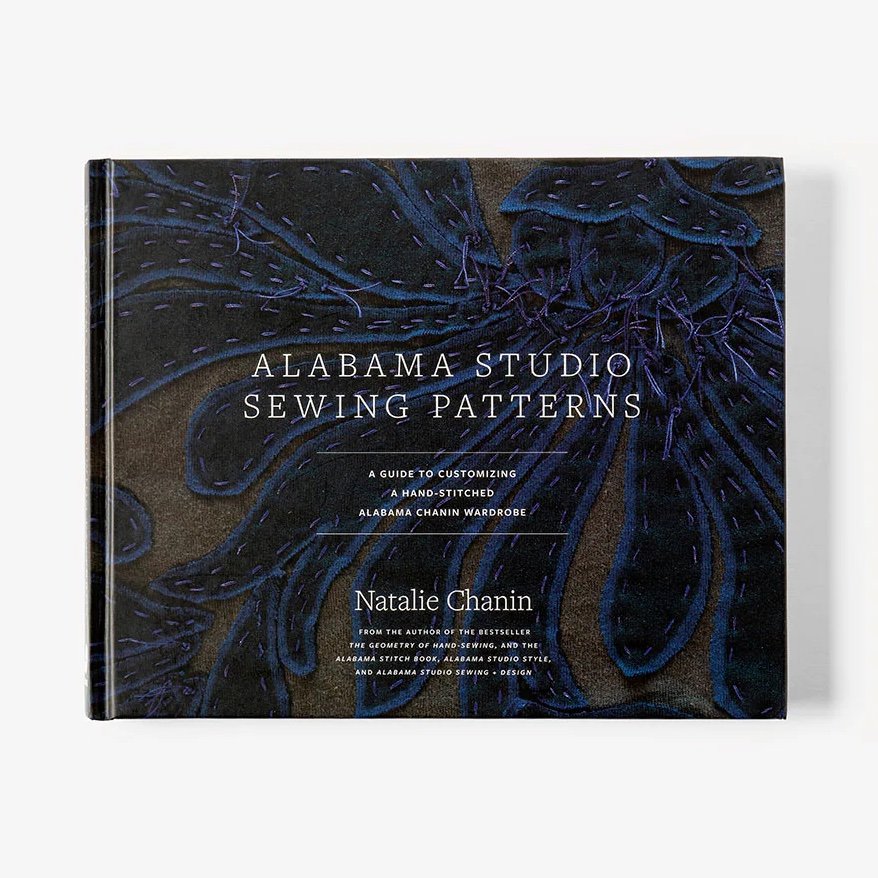
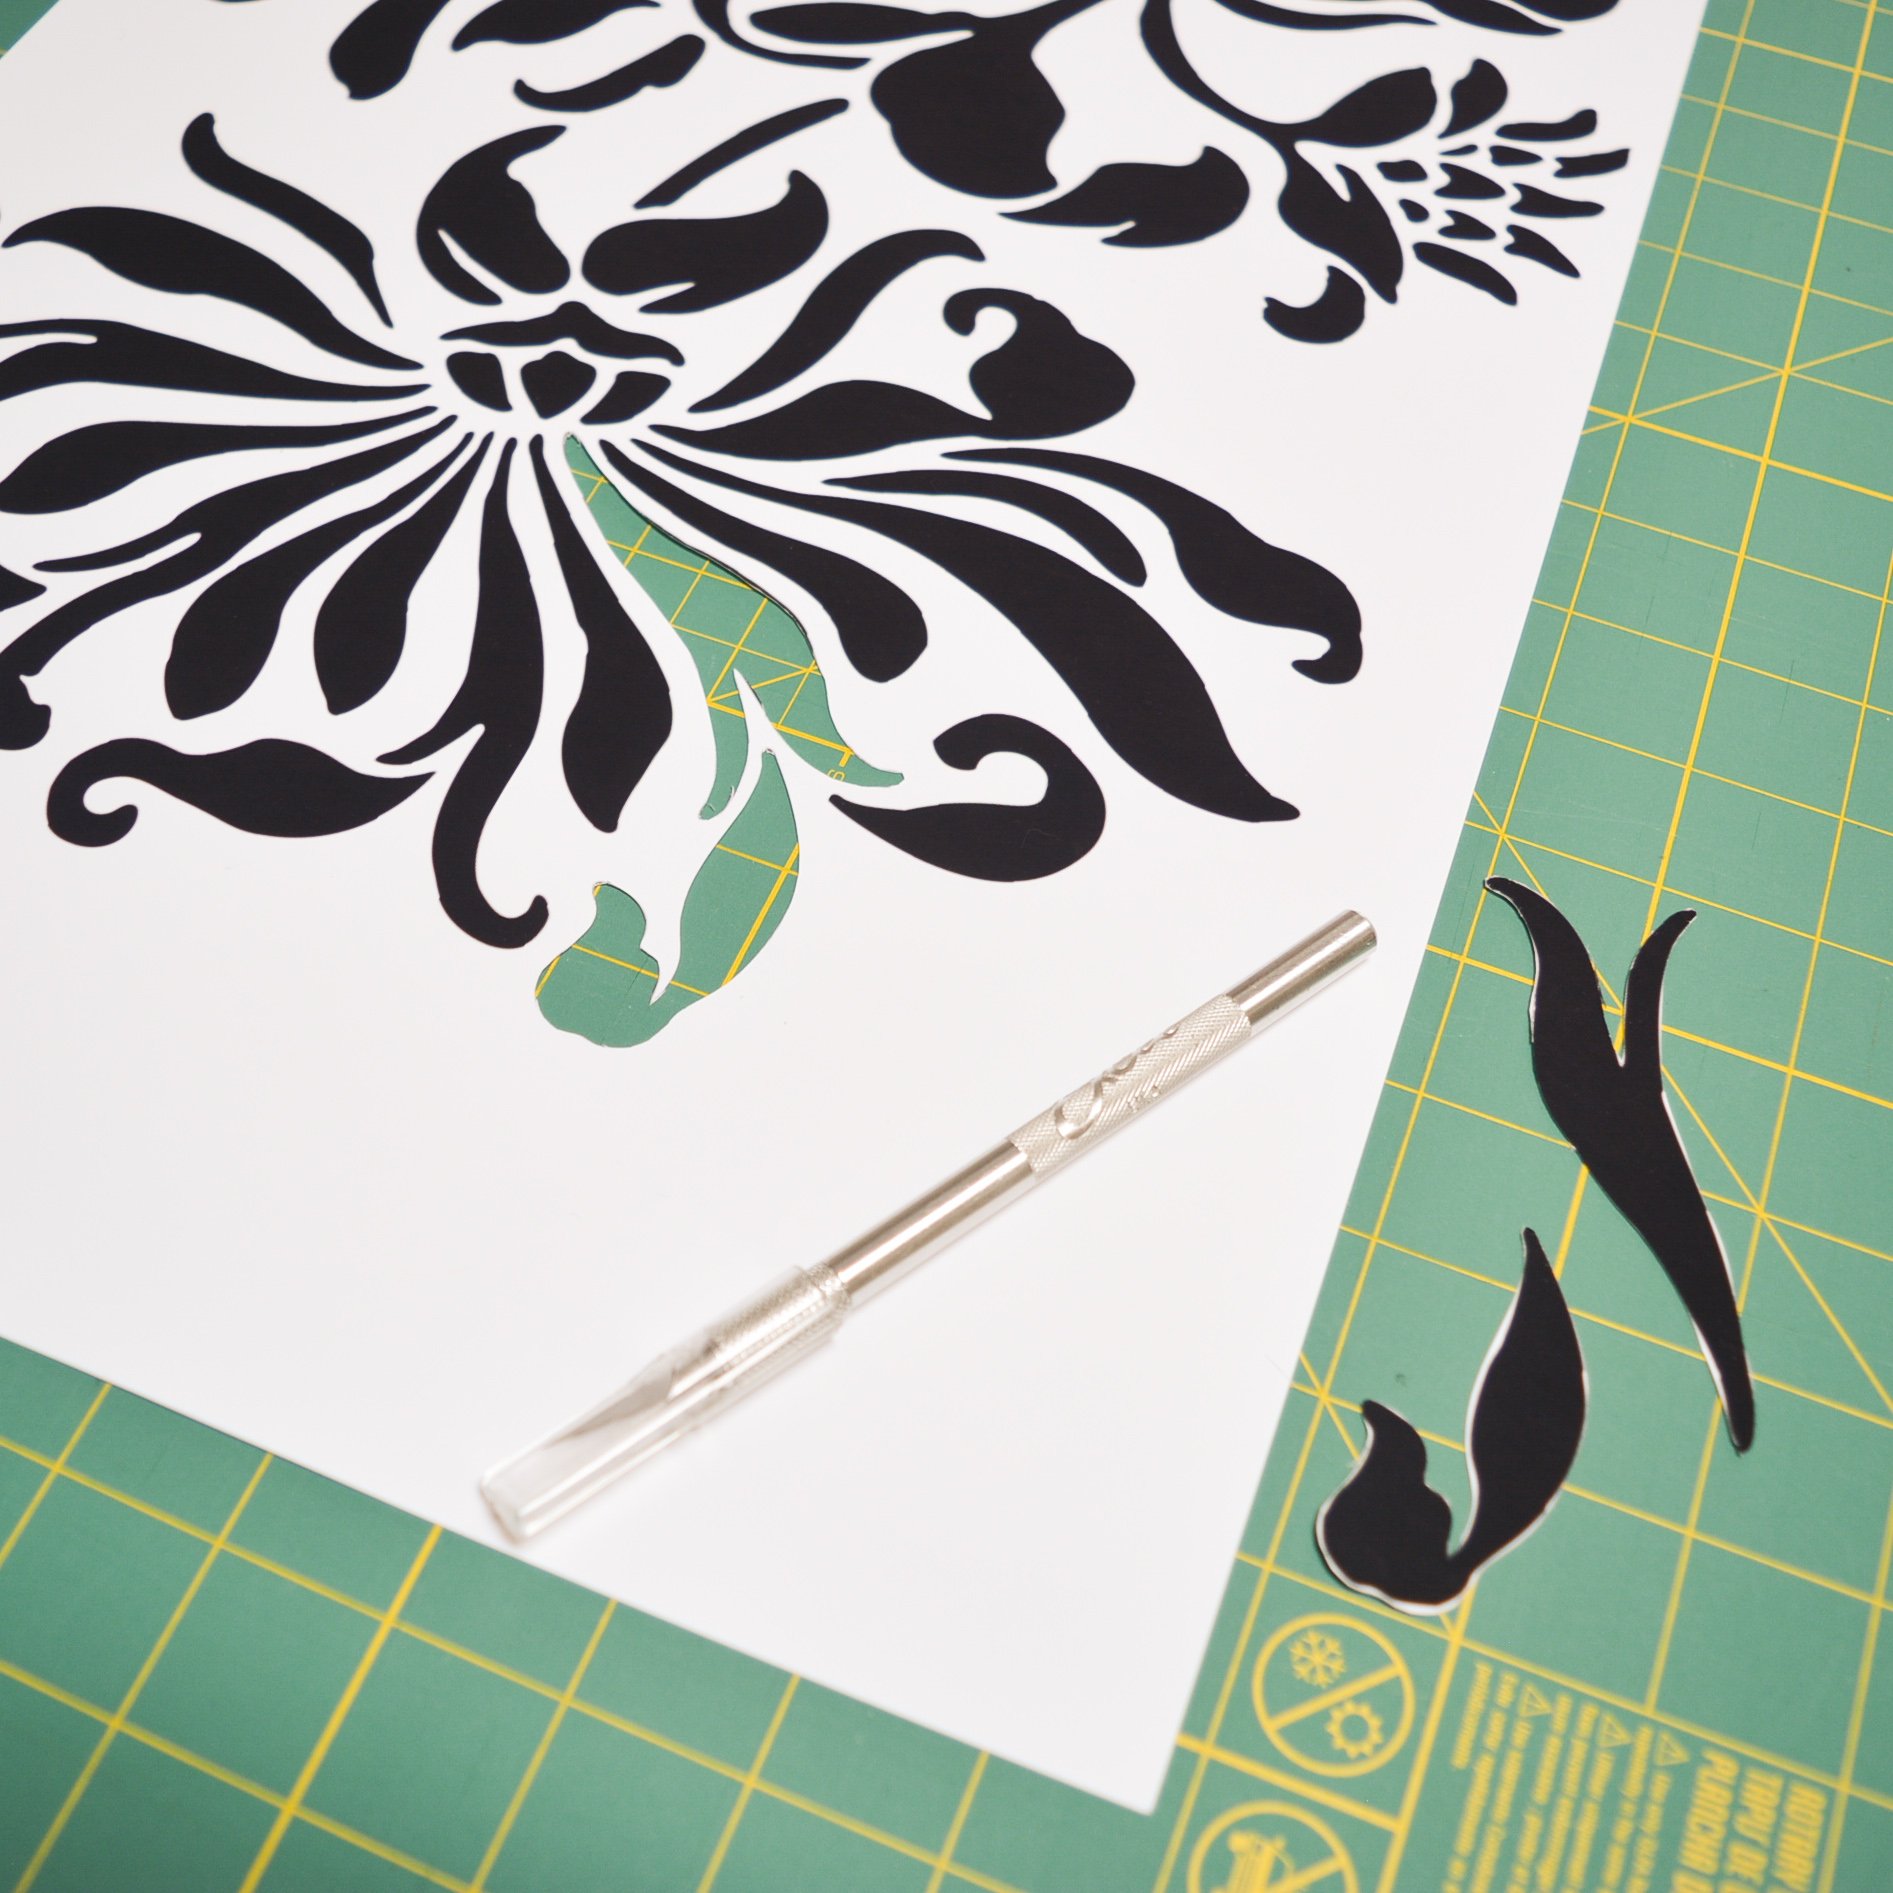
First thing was to come up with my project plan. I decided on a dress from the studio’s 29th collection as my inspiration and starting point. The most similar dress pattern in the books is called The Camisole Dress, which is a little simpler than the inspiration dress, perfect. I will be using the Magdalena Stencil. Both the dress pattern and the stencil can be found in the book Alabama Studio Sewing Patterns. The book comes with everything on a CD, so I downloaded what I needed and sent the sewing pattern off to Sew YYZ to be printed to scale (she does this for $5!), and I printed the stencil on card-stock using my home printer. My printer at home can print larger 13”x19” paper, and the card stock was perfect because I could just cut the stencil out directly using a utility knife and I was ready to paint. Although I did simplify the stencil a little before printing, so that I would have less to cut and an easier time embellishing.

I live in Canada, so ordering materials from the studio was just not really an option for my budget after I worked out the cost with shipping and duties. I luckily have access to the books from my library, so that helps with the cost of the pattern & stencil. I wanted to find a source for similar fabric on this side of the border, and places around my own city for getting most of the other supplies I needed. My main priority for matching the fabric was to find one with a similar weight. I couldn’t find anything in a similar range of colours, but I did find a perfect jersey that came un-dyed. This 200 GSM organic cotton jersey from Montloup is what I went with. It is such a beautiful heavy jersey, it just added the extra step to my project of dyeing the fabric.

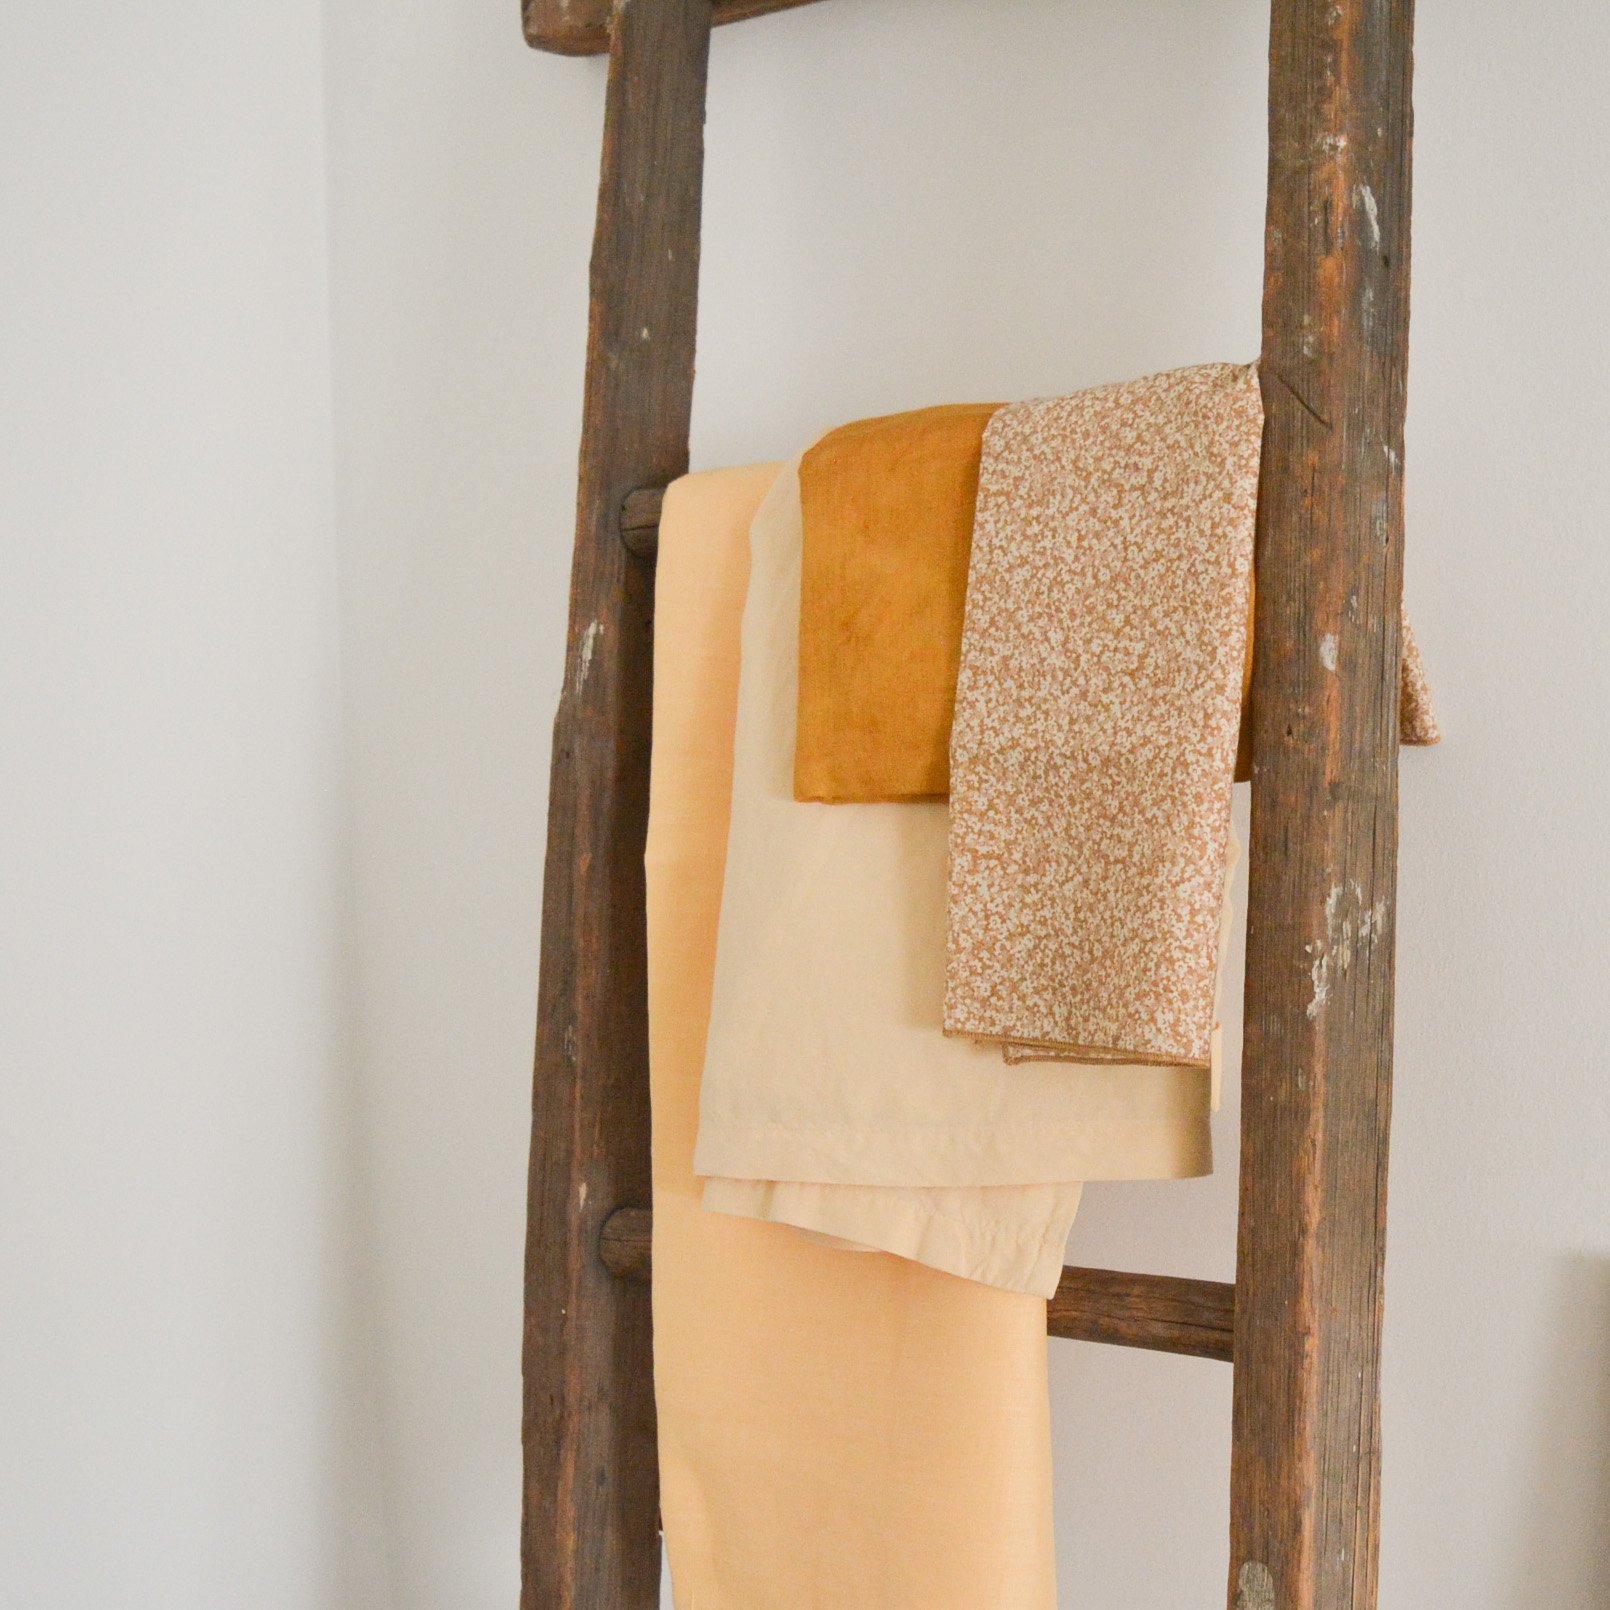
For fabric dye I decided to go with Jacquard Procion MX Fabric Dye. From everything I read online, this is a great colourfast and lightfast option. This was actually quite a stressful part of the prep work for this project. I was trying to mimic the inspiration dress I had saved, so I was mixing dye colours and then trying to over-dye when it didn’t turn out quite right. I was also trying to dye 6 yards of the jersey (3 for the lining and 3 for the main layer), which got heavy! I ended up with a green and a sort of dull mustard yellow, and decided to use the green as my main fabric and stray from my inspiration photo a little bit. The dull mustard yellow will be the lining of the dress.

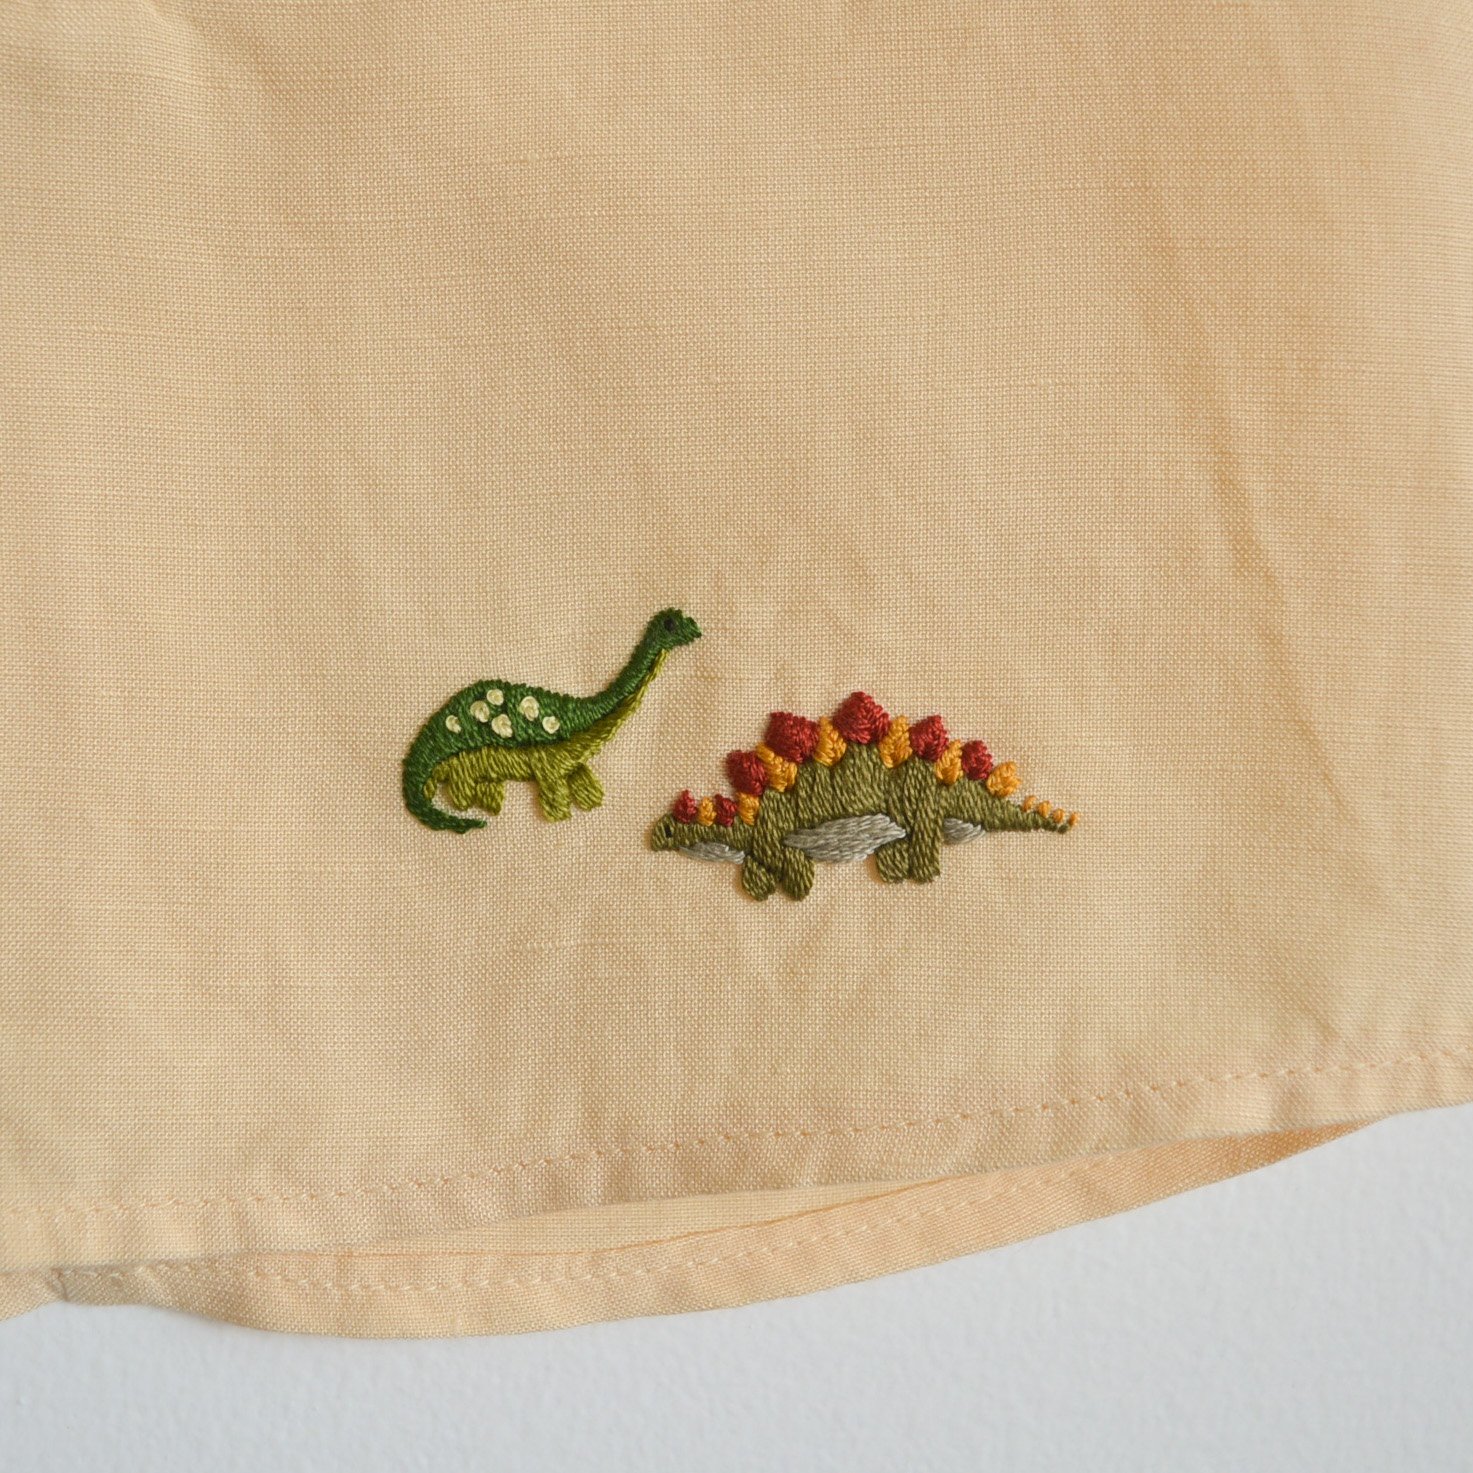
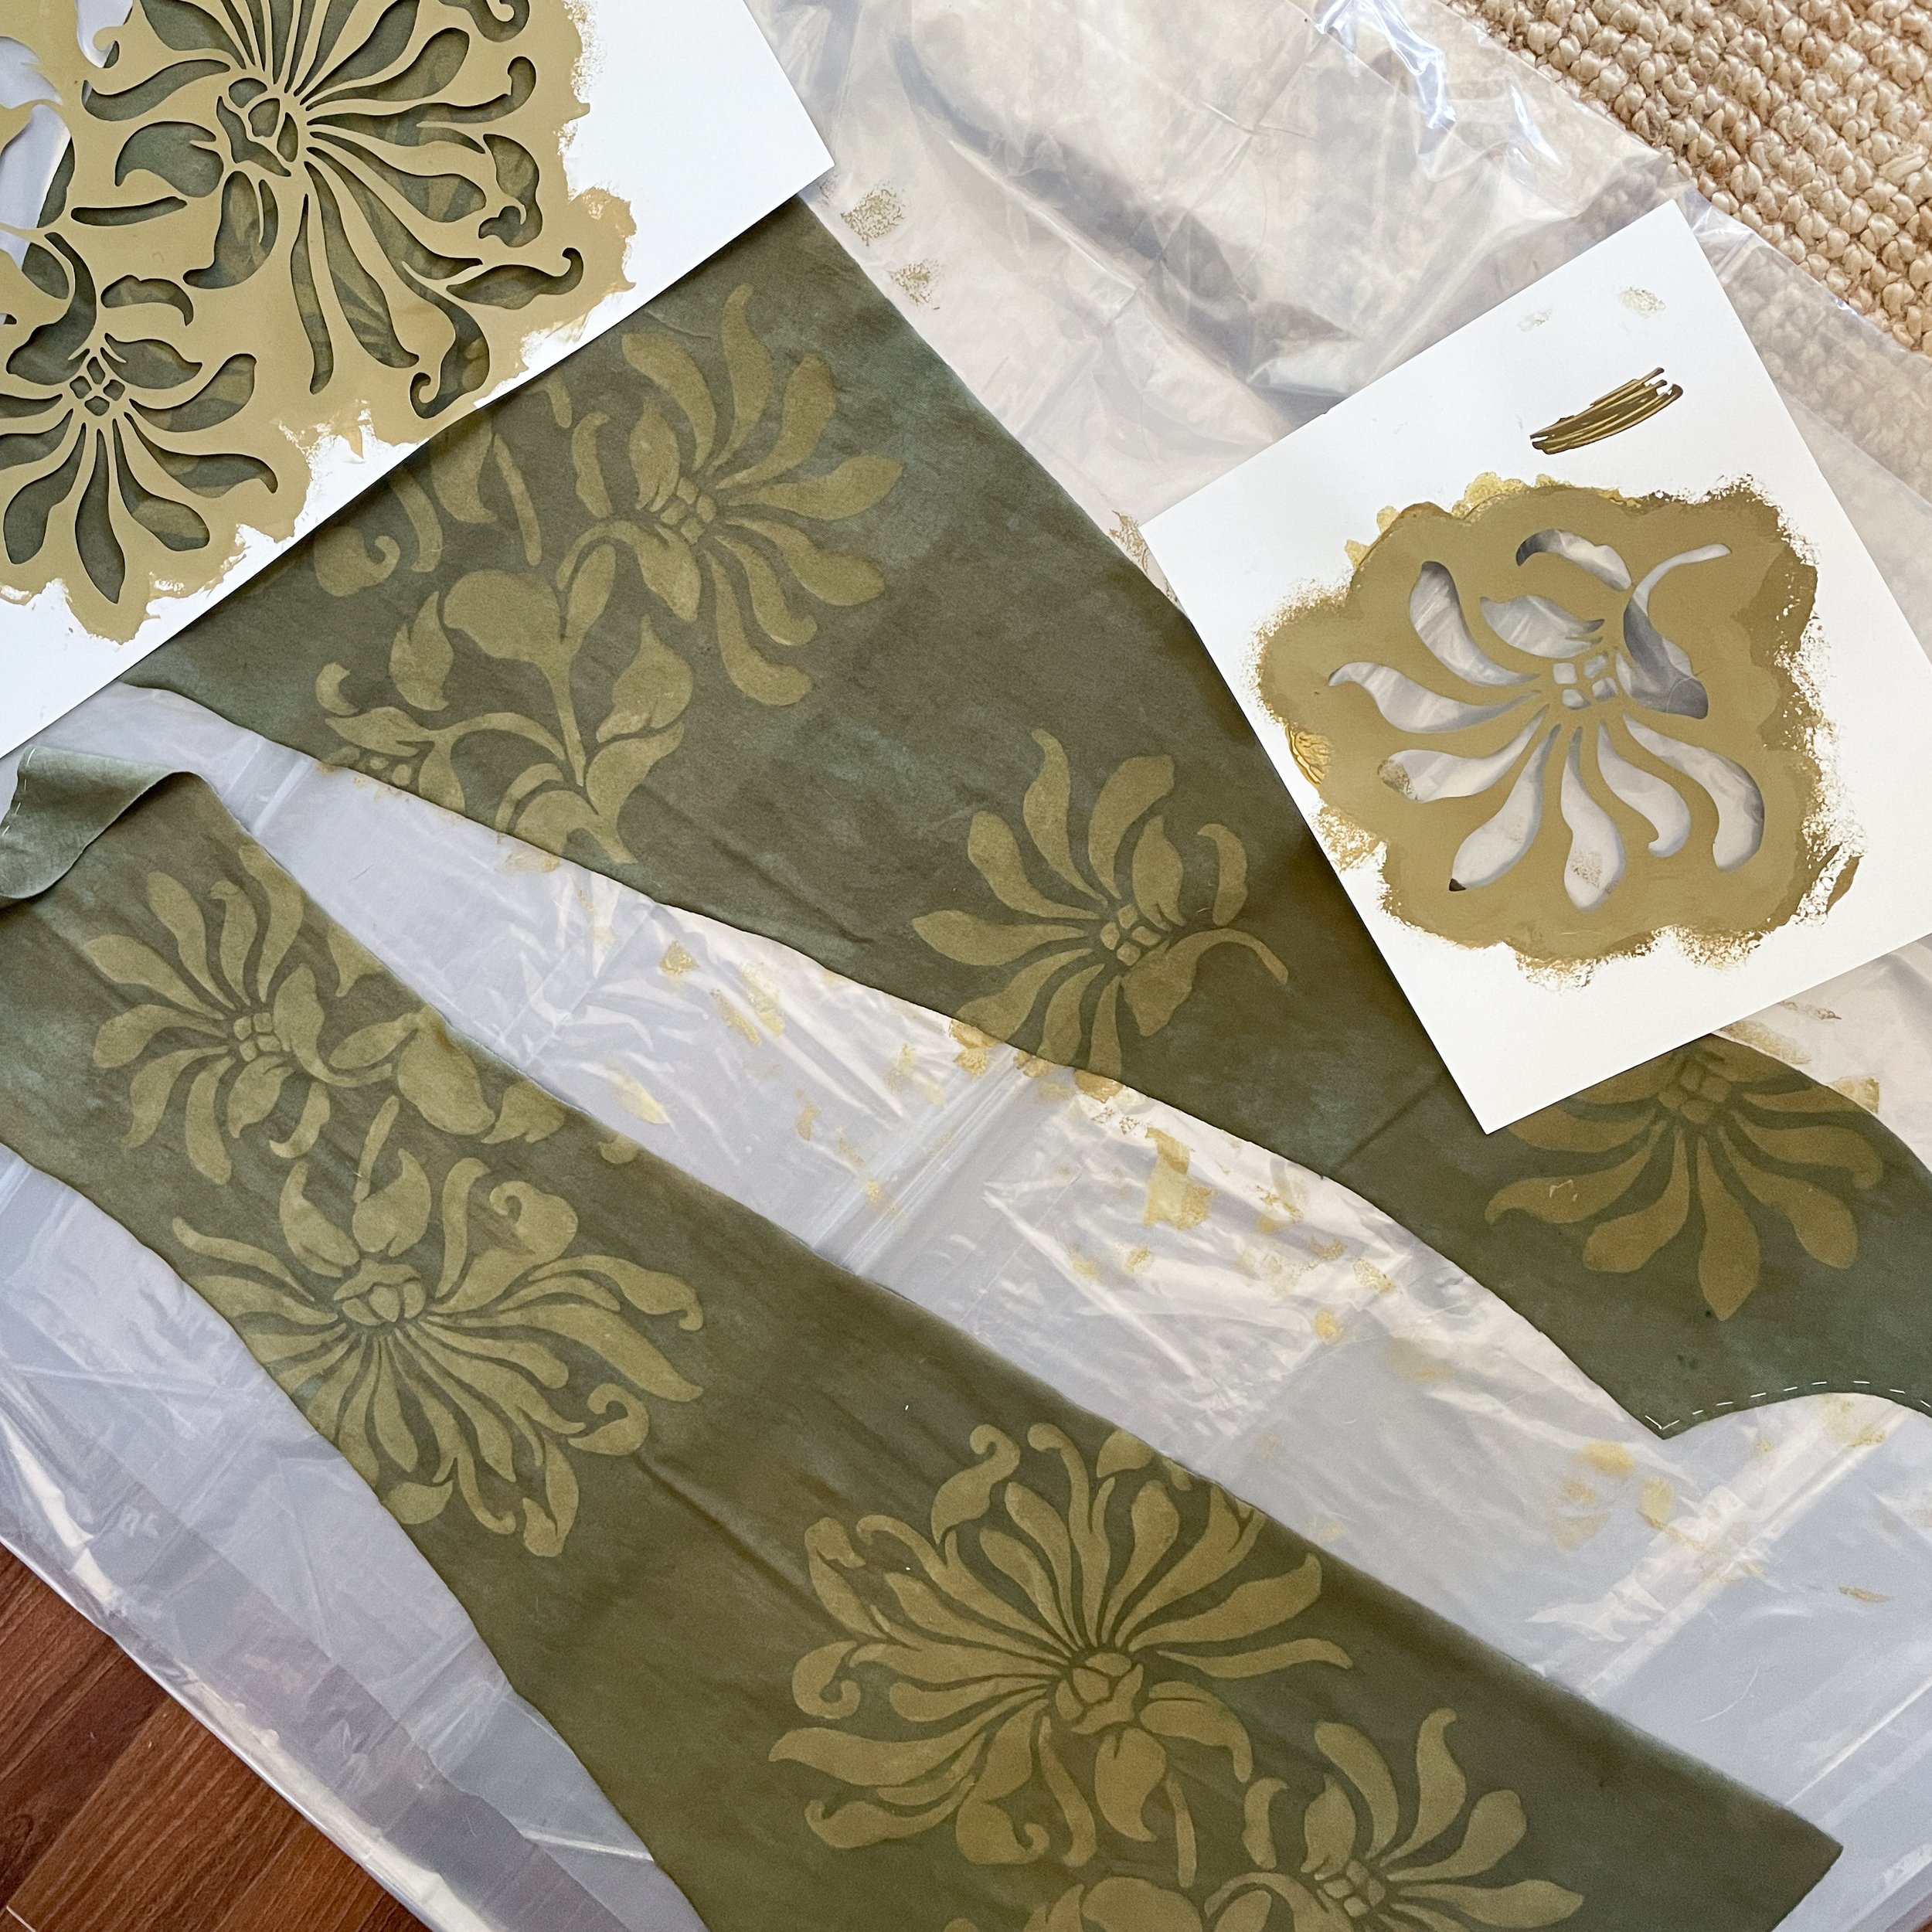
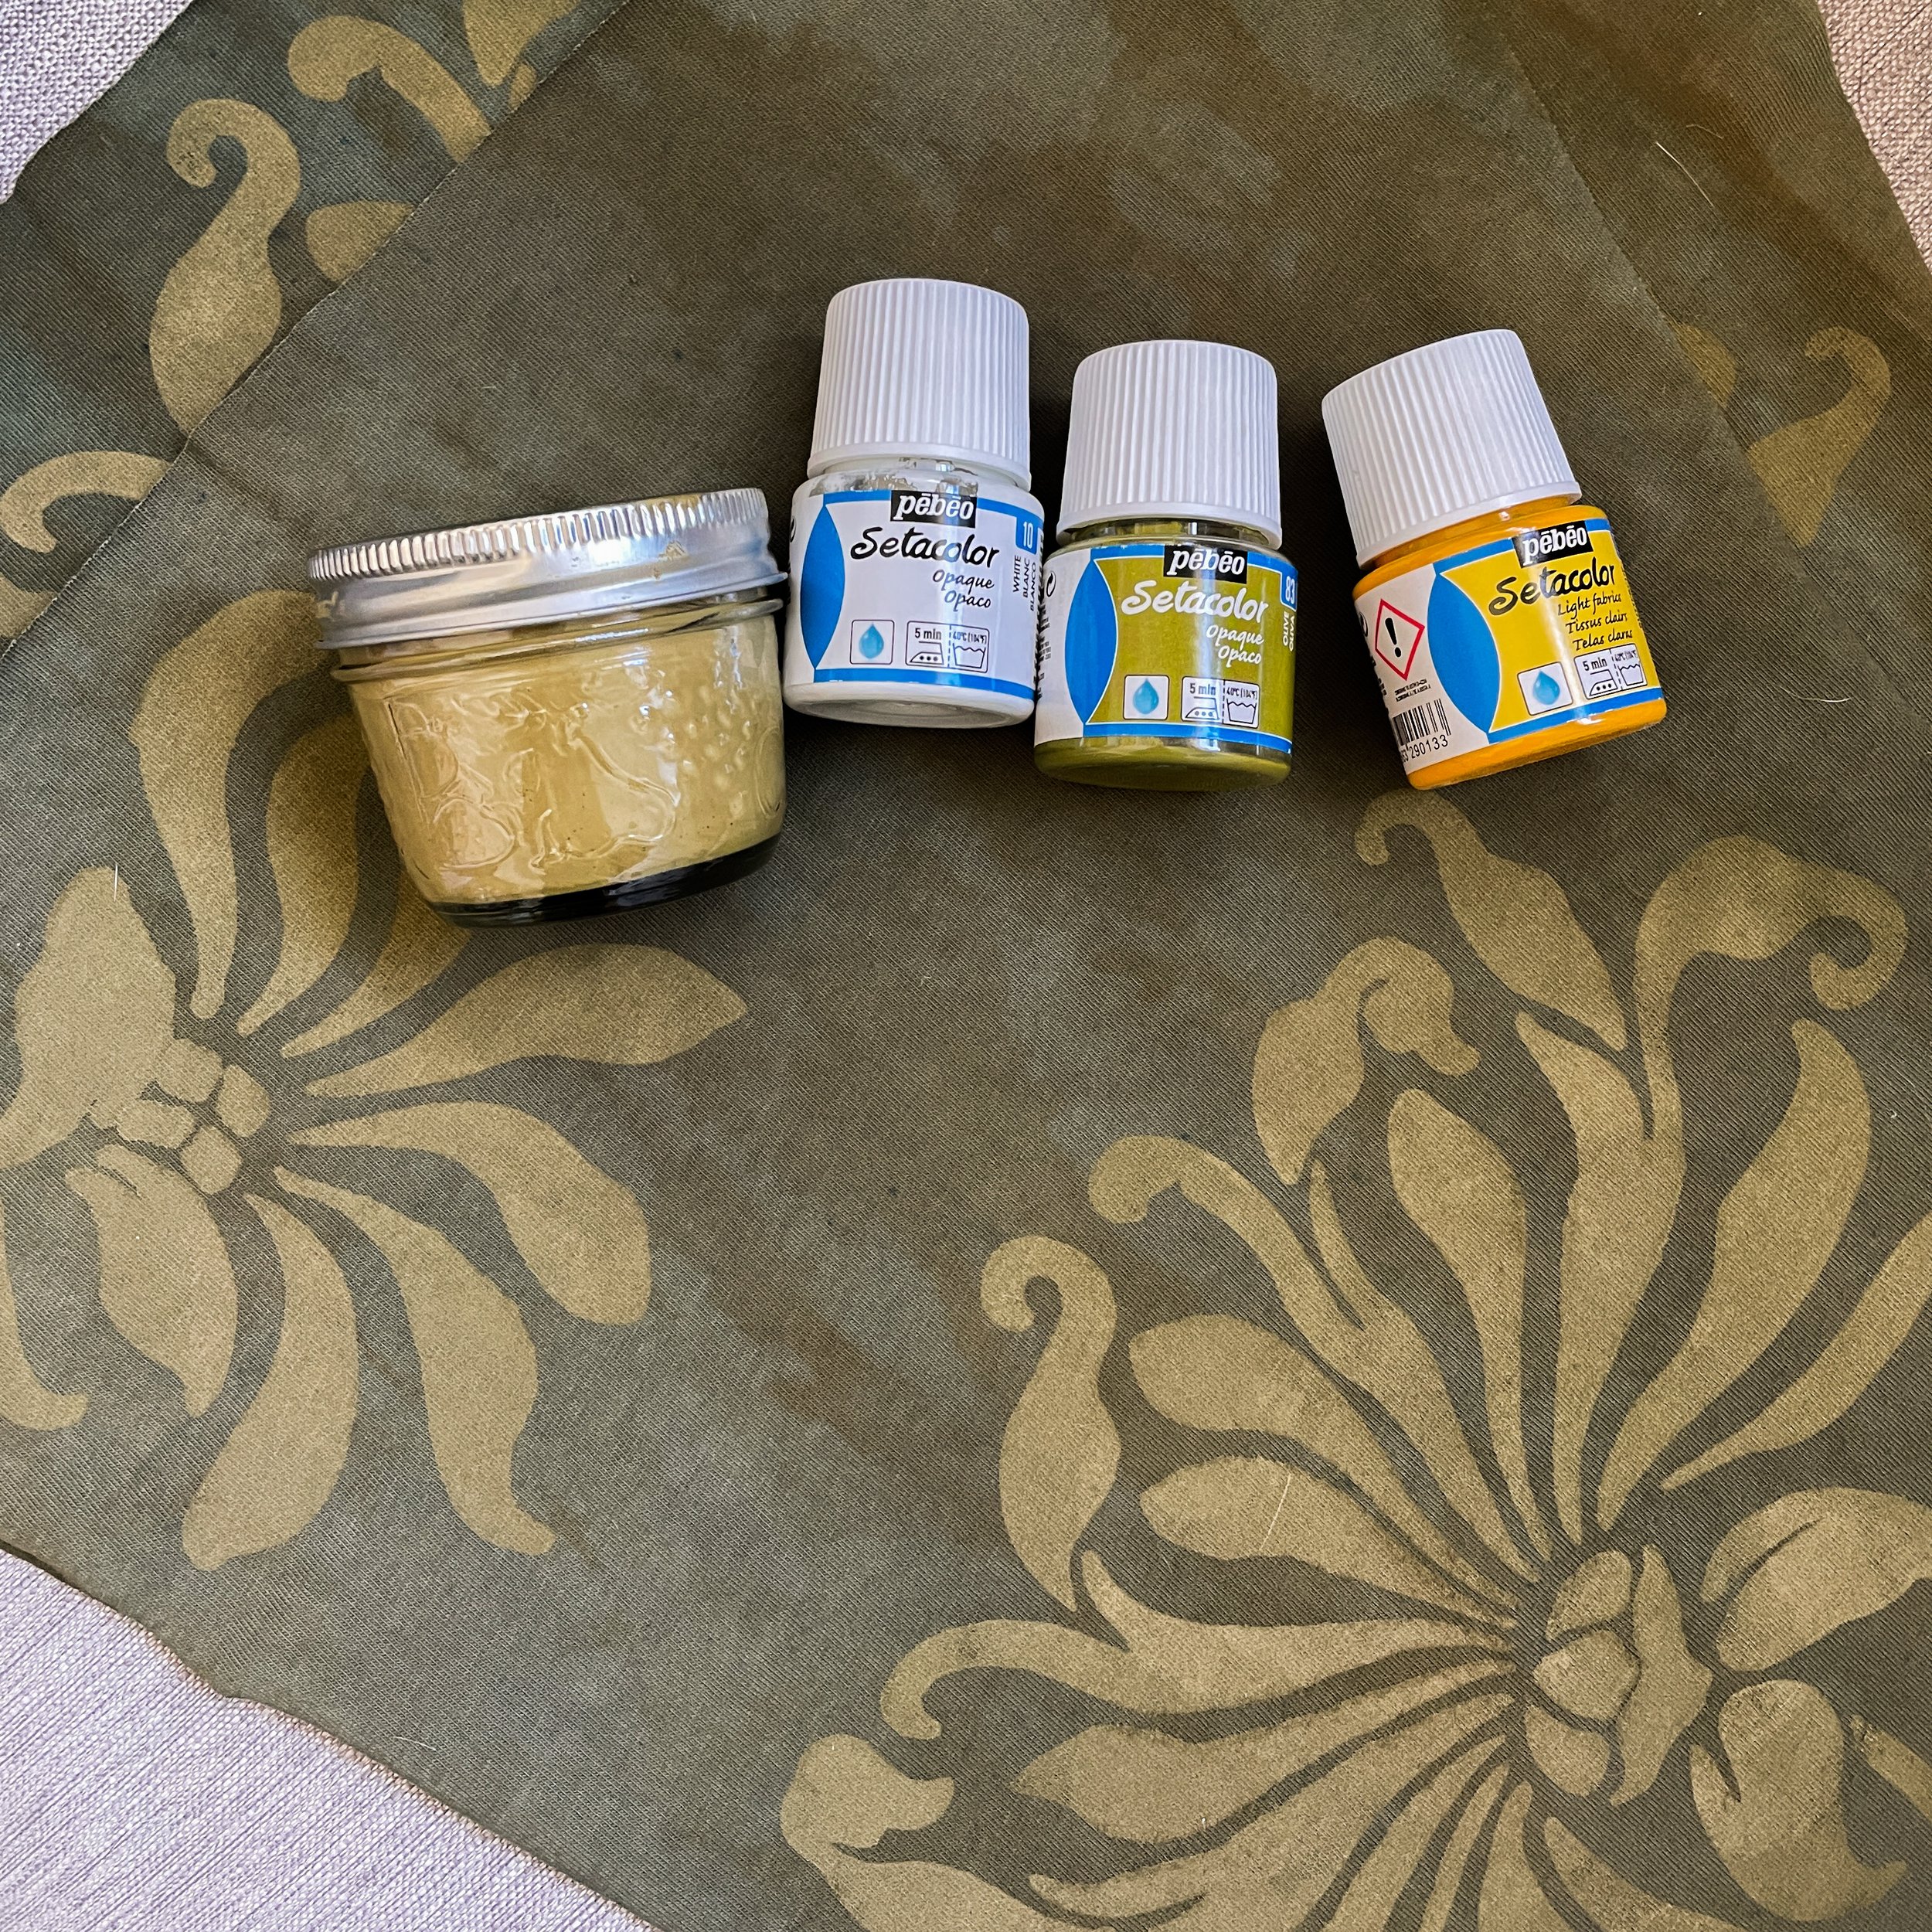
For fabric paint I chose the Pebeo Setacolor Opaque fabric paints. I created a custom blend out of white, brown, olive green, and buttercup. I was really happy with this and the subtle look of it on the green fabric. I did a couple swatches with the paint and after a lot of frustration with spray bottles I had success with a simple craft sponge! This part of the project felt like the biggest hurdle to me. Once I got a swatch I liked with a method I could handle I felt so much better about everything. I could finally start what I knew would be my favourite part, the actual sewing!

I tried a couple different techniques on my dress swatch. I am pretty set on using couching as my embellishment method, so I tried out different threads, and using chain stitch on the smaller elements of the stencil. The Alabama Studio books recommend using 1/2” strips of jersey for the couching but I preferred the look of thinner 1/4” strips. I also decided to use DMC #829 cotton floss to stitch the couching strips down, using 3 out of the 6 strands of thread. I tested one seam on my swatch and then bound the entire thing the way that the neck hole and arm holes of the dress will be bound. For the binding I preferred the look of 1” binding strips, but otherwise I did the seams and the binding as the book instructs. I’m not sure if I will end up cutting out the middle of the leaves to expose the lining fabric, but I do like the look of it on the swatch so that’s an option!

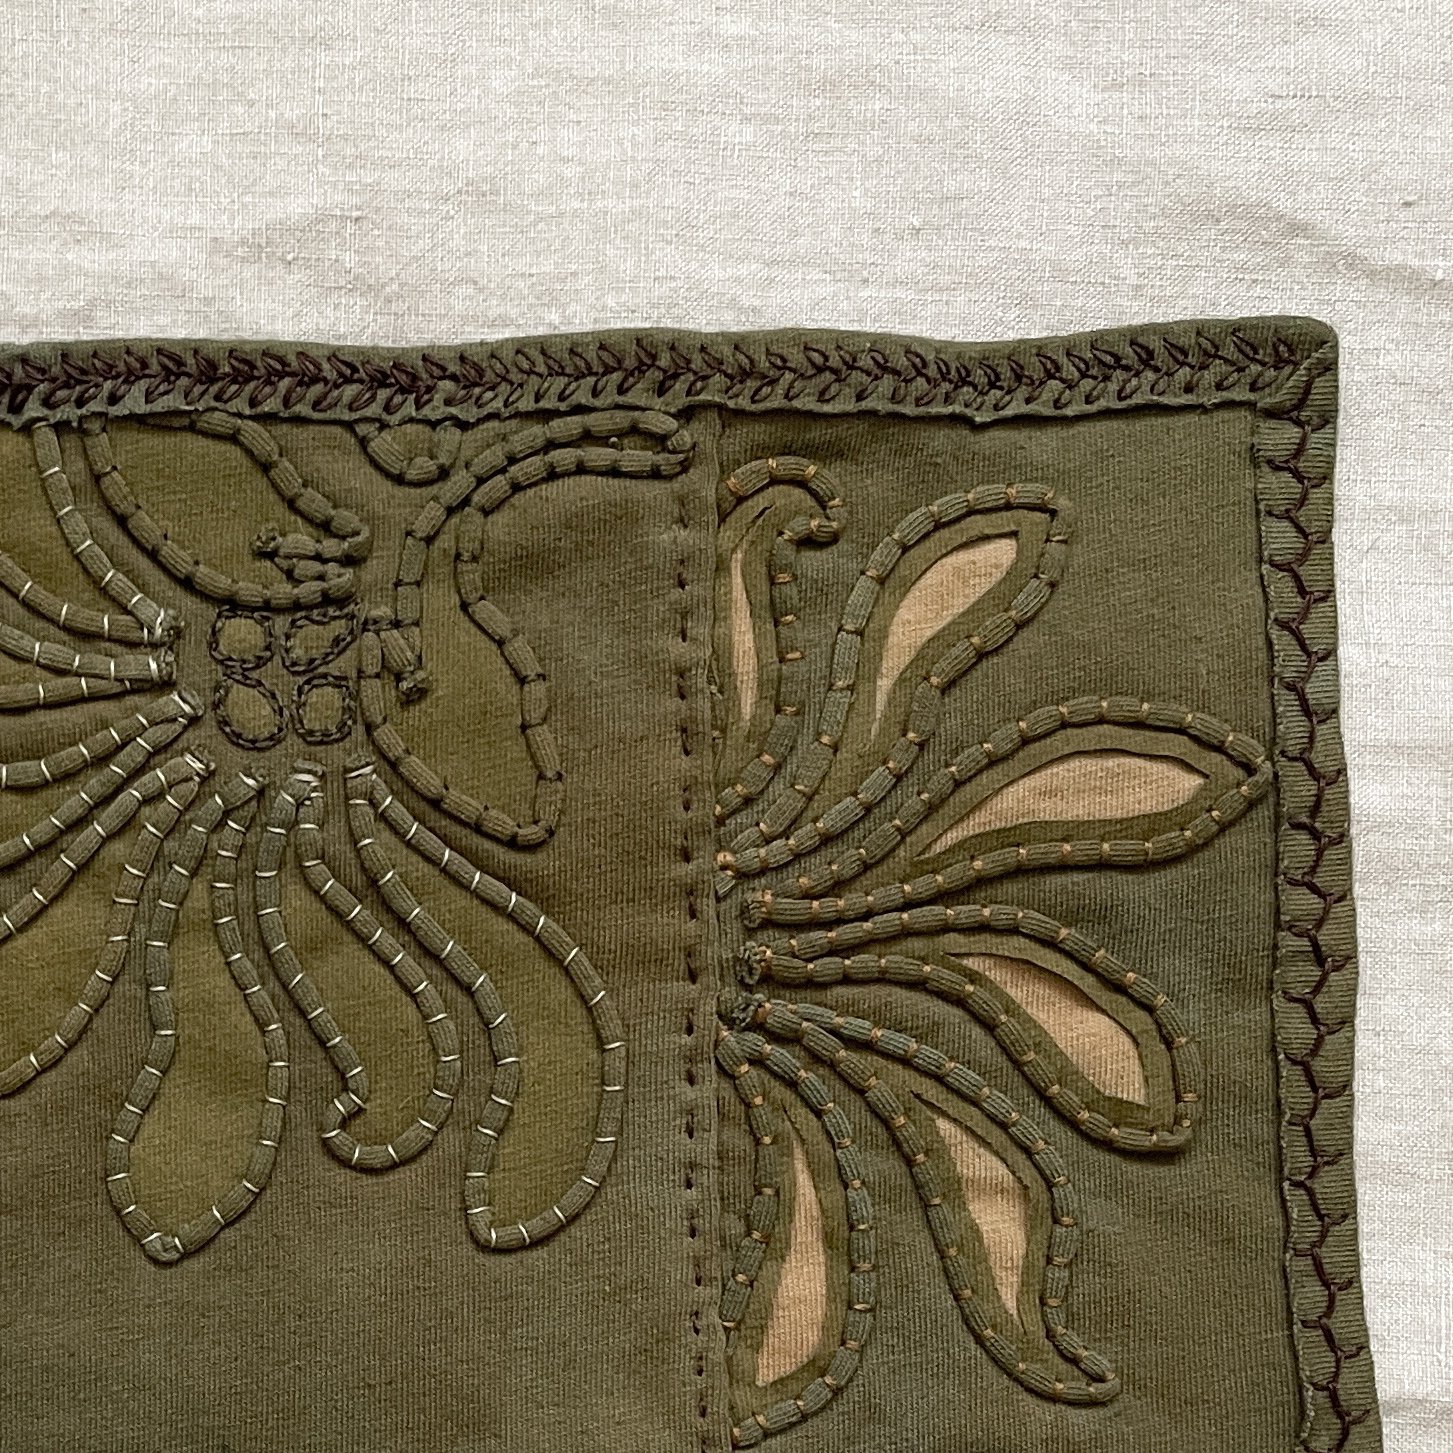
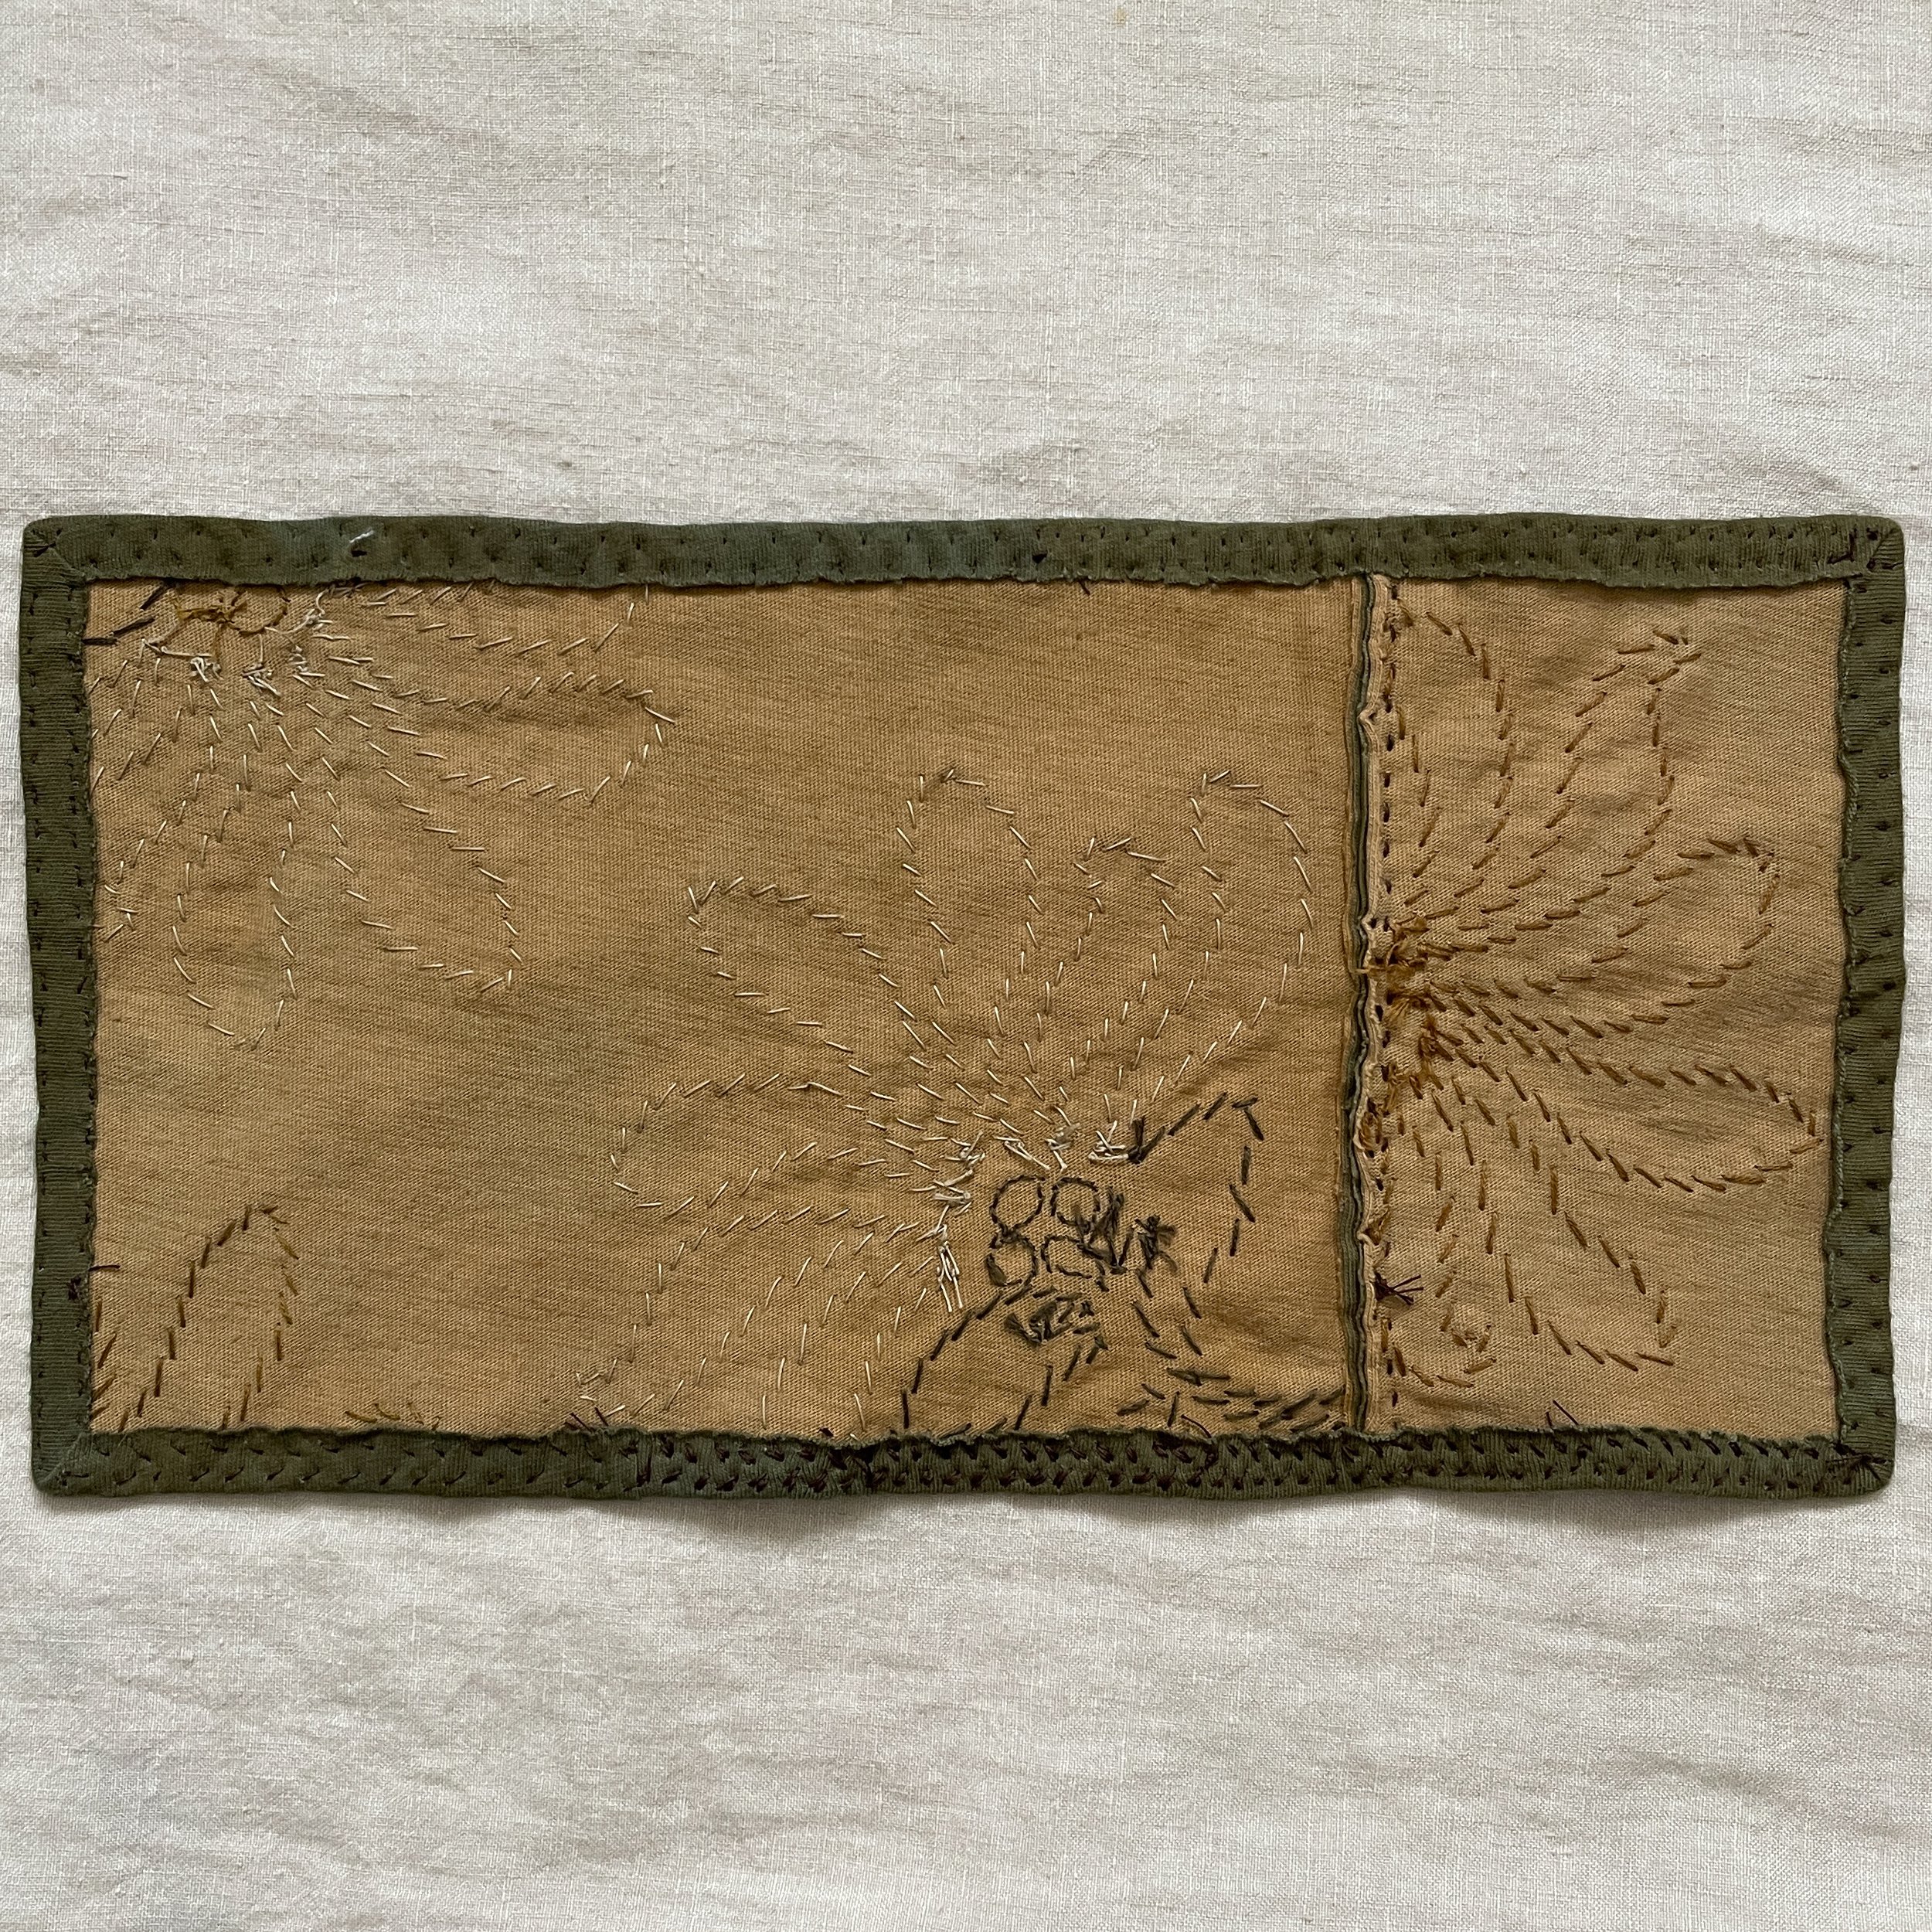
I absolutely love this swatch. It has such a nice weight and handle to it and I am so excited to finally be getting started on this dress. As I write this I have already cut out all my dress pieces, painted the design on them, and basted the main fabric to the lining. I have just started on all the couching and it is exactly the time-consuming sewing project I was excited about. I will share more soon!

A Quilted Fanny Pack from Scraps

Some links in this blog post may be affiliate links. This means if you click through and purchase the product, I earn a small commission at no additional cost to you. Thank-you.

My first big project post-baby is finished! I have seen so many bags and coats around Instagram made from recycled old quilts and I love the look. I always check the thift store bedding section for pretty quilts that have seen better days but I never really find anything in colours that I like, so I decided to do my own piecework and quilting to make this project. And I think it’s giving vintage vibes! It was also a great project to use up leftover scraps I had in my stash.

I was so motivated to get this project finished quickly because I felt like it would fit so perfectly into my life as a new Mom. I just had my first baby and getting out of the house each day has been so important for my sanity. The only thing that holds me back when my husband isn’t home is that we live in a walk-up apartment, a.k.a. no elevator to get the stroller downstairs! So I have been getting comfortable with baby-wearing, and I thought how great would it be to make going on a walk completely hands free with a wearable diaper bag. So this fanny pack is designed to be my essential diaper bag for short walks around the neighbourhood. It doesn’t have room for everything our main diaper bag has packed, but it fits a couple diapers, wipes, a nursing cover, and a spit cloth. I feel pretty good leaving for a couple hours with the baby and the pup knowing I have the basics packed.

I designed the pattern for the fanny pack (also sometimes called a bum bag, cute!) myself. I planned for a bag that was a little bigger than most fanny packs to comfortably fit the diapers and wipes. I tried to be so meticulous when making the pattern but in the end my numbers were off and I had to sort of fudge it anyways. The bag ended up being an inch shorter then planned, but it still fits what I need it to. Kudo’s to all those bag pattern designers out there! Getting it perfect is tough.

I won’t be sharing the pattern because like I mentioned the numbers weren’t quite right, but I’ll share the basic process I used and you could probably use this process with another fanny pack pattern. For each pattern piece I cut three pieces: an outer piece, a batting piece, and a lining piece. For the front and side pieces I used a quilt block pattern, and then cut the finished piecework down to size. The quilt block pattern I used is called the honeymoon square, and you can find free instructions for it here. After cutting the three pieces out I would make a quilt sandwich and use a simple running stitch with thicker thread to hand quilt them together. Going back I would make each piece slightly bigger then needed and then trim them down to size after quilting, because the quilting scews the pieces a little. I also wish I would have added a layer of interfacing to each quilt sandwich, to give the bag a bit more structure. A note on the zippers: I inserted these in the usual way before making the quilt sandwich for that correponding piece. Once I had all my quilt sandwiches ready I assembled the bag, and finished the seams on the inside with some colourful binding. I love the inside of this bag just as much as the outside because of this beautiful finish!

The bag was made completely with things I had in my stash so I don’t have too many links for you. The fabric is mostly linen scraps I had from Maiwa, some of it naturally dyed by me for earlier projects. The floral fabric is a Liberty Tana Lawn I have lined up for another project, so I snuck a little bit from that. The cotton quilt batting (affiliate link) was extra from my Tamarack jacket project (a 2017 project!). As for the hardware I had the zippers, webbing, and buckle in my stash. I usually pick these types of things up from Dressew, which is a sewing store in my city.

This was the absolute perfect first project for me, as it has fit right into my life and made this one aspect of motherhood a breeze! For the moment I am not even using a purse, it’s just a fanny pack everyday for me for the foreseeable future. And I’m not mad about it!

An Up-cycled Dinosaur Embroidered Baby Shirt

Some links in this blog post may be affiliate links. This means if you click through and purchase the product, I earn a small commission at no additional cost to you. Thank-you.

My first make for our coming baby boy! Right away when friends and family started finding out that we were expecting I started getting asked if I I’m planning on making all of my baby’s clothes, and I always have to answer that I’m definitely not! I spend so much time on each piece that I make, so I end up only completing a handful of projects a year, and that just won’t work for a growing baby. But I have been excited to make a couple special things to welcome him into the world. It’s one of the things that has been helping me to relax and prepare mentally.

So my first make has been a little butter yellow henley style t-shirt, embroidered with the sweetest little dinosaurs. The fabric I used is from a shirt I thrifted a few months ago that I didn’t love the fit of. Unfortunately the thrift store near me decided to permanently keep their change rooms closed after they closed them in 2020, and sometimes it’s hard to get the sense of how something will fit by just holding it up. I missed the exchange period and so I wanted to upcycle the shirt into something I would get to use. The fabric is a linen rayon blend, it’s very soft, and it was just enough to cut a baby shirt from.

I used a PDF pattern I found on Etsy: the Miguel Shirt from a shop called costurinha sewing patterns. The pattern includes a long and short sleeve option, and sizes for baby’s and kids. I made this one in the smallest size, the 3 month size, but I’m hoping to get some more use from this pattern in the future. I think a colour-blocked version of it would be really fun as well. The only change I ended up making to the pattern was to add a seam down the back piece. I was using that shirt I thrifted, so I didn’t have enough fabric to cut the entire back piece as one, but I actually love the seam. I don’t think it looks out of place at all and it was what got me thinking about that colour-blocked version.

The dinosaur embroidery pattern is from the Love Embroidery magazine, originally printed in issue 15, but after that issue they added it to their free pattern archive online. I’ll link to the pattern below, which is a design for the magazine by Jessie Newton. It was such a quick and easy one for such a cute touch to this shirt. I used one of my favourite methods for transferring the pattern: I traced it with pencil onto some water soluble sew-on interfacing (affiliate link), and then basted that interfacing onto the shirt before stitching. The interfacing just rinses away when you are done stitching.

I ironed this little shirt before taking these pictures but honestly that will be the last time this ever gets ironed. It was so finicky of course! And really I think with linen wrinkles are just a part of the look. I’ve linked everything relevant below, and I can’t wait to share a photo of my little one wearing this when he arrives!

Links:

Miguel Shirt Pattern: costurinha sewing patterns

Little Dinosaurs Embroidery Pattern by Jessie Newton: Love Embroidery Magazine

Wash-away sew-on interfacing (affiliate link)

My Handmade Wedding Dress: Part 2

Wedding Photos by Isle + Oak Photography

Some links in this blog post may be affiliate links. This means if you click through and purchase the product, I earn a small commission at no additional cost to you. Thank-you.

So nearing a year after my wedding I should probably wrap up recording all the details of this project! I posted a Part 1 (which you can click here to read) where I talked about the materials and supplies I was using, the design sketches, embroidery samples and the mock-up of the dress. I’m going to wrap up everything else in this blog post, which mainly includes the embroidery on the silk organza, hand sewing the dress, and then some final photos from the wedding!

The embroidery motifs I came up with were all pretty fast to stitch, and the little beaded starbursts were really fast and satisfying to stitch onto the organza as well. I think what ended up being more time consuming (and maybe it just felt like that because it wasn’t that thrilling to do), was all of the tracing! I had a little sheet of the 9 motifs I was using, and I traced those onto a paper copy of the dress pattern where I wanted the embroidery to be. I tried to place everything randomly and kept flipping and rotating the motif’s so that they would look a little more unplanned. I then traced these arrangements onto a water soluble interfacing (affiliate link) which I then basted onto my organza fabric for stitching. But once I got to this point and had all of my pieces prepared for stitching I felt like I started to breeze through the actual embroidery.

Wedding Photos by Isle + Oak Photography

The silk organza was going to be the top layer of my dress, so I couldn’t start actually putting the dress together until all of that was done. This made me a little nervous because we were getting closer and closer to the wedding and I didn’t actually have anything coming together that looked wearable! This was the point when I basically had to ditch the sleeves. I had everything else embroidered, and I had just started on the organza for the sleeves, and my anxiety started getting the better of me. I needed to start constructing this dress! I decided that I would make the sleeveless version of the Lune Dress and if I had time before the wedding I would make some detachable sleeves for it (spoiler: I didn’t have time for them!).

Sewing the dress itself took many, many hours. I talked in Part 1 about how I would be entirely hand-sewing this dress. The fabric was just too delicate to risk running through my machine, especially with all the time-consuming embroidery already done. Also, because the organza is sheer, you can also see the seam finishings from the outside, so I wanted them to be very neatly whip-stitched. The dress was three layers overall: the organza over layer, the silk charmeuse main layer, and a silk habotai lining layer. Looking back I wish I would have machine sewn the lining layer to knock a couple days off the construction of the dress, but I think I just got into a mindset that the entire thing had to be hand sewn. By that point for the lining I was just hand sewing to say I did it.

Anyways it all came together and I am really happy with the overall look of it and with the details of the dress. The hem ended up surprising me a little bit in the best way. It almost flares out a little bit where I sewed it, reminding me of a flower shape, which makes this wedding dress feel straight out of a fairy garden scene.

This definitely tops my list of projects I am most proud of in my life. From how much time went into it, to everything new I tried and learned, to the way I felt when wearing it, I just couln’t have imagined a better outcome! I hope you enjoy the photos and I hope this post inspires you to try something just a little bit bigger than you think you can handle, you might surprise yourself!

I also ended up using the piece of embroidery that I had started for the sleeves before I decided to scrap the sleeve idea. We framed a couple of our wedding photos for a photo wall in our apartment, and so to complement the arrangement I framed the embroidery piece in a vintage frame I ordered from Etsy. It looks like I cut a piece of the dress for framing but really the dress is still completely intact and stored away!

This dress, along with a couple of my other projects were featured in Issue 36 of Love Embroidery Magazine. You can order the magazine here.

Some other related links:

Wedding Dress Part 1: Planning, Mock-up, and Embroidery Samples

Our Wedding Photographers: Isle + Oak Photography

Silk Organza Fabric: Maiwa

Silk Charmeuse Fabric: Rokko Fabrics

Silk Habotai Lining Fabric: Maiwa

Beads: Beadworks on Granville Island

Embroidery Thread: DMC Six-Strand Embroidery Floss (affiliate link)

Interfacing: Wash-away water-soluble interfacing (affiliate link)

Dress Sewing Pattern: Lune Dress by French Poetry

Vintage Oval Frame: Carter & Wainwright on Etsy

Hinterland Dress Pattern Review

I just finished my winter black and white plaid Hinterland Dress. It’s machine sewn and hand finished, so it ended up taking me a couple months to make, although a large part of why is that I really slow down my crafting come winter, we will call it a form of hibernation! I do a lot more relaxing and I work at a slower pace. I also took a little break from it around Christmas to make a couple new ornaments for the tree. But with it being finished around half way through January that still gives me lots of time to wear it while the weather is still cold.

The fabric is a light to medium weight cotton plaid, with one side being a brushed cotton so the inside feels like a soft pair of pyjamas. I bought it at one of the fabric stores here in Vancouver, Dressew. It’s called Urban Homestead Gatherings Woven Plaid for Moda, and it looks like right now Dressew still has some available so I will link to that below. I chose some simple black horn buttons, and overall kept this one pretty simple as I didn’t really think embroidery would look good on top of the busy plaid print.

I didn’t change much about the pattern, just a couple elements from the machine method to the hand-sewing method (gathers, buttonholes, neckline binding, and the hem). I also changed the placement of the waist tie to be closer to the centre back. I have a couple dresses that use the waist tie method that the pattern uses (sewing the waist ties directly into the dresses side seams), and I find it pulls on those seams in an unflattering way. Also when you wash the dress with those long ties they can get tangled up with your other laundry. So adding some tie loops that you can thread a long waist tie through solves the laundry issue, and moving those tie loops in a little solves the pulling at the side seams.

Sizing wise I went with a size 6 on top and a size 10 for the skirt which worked perfectly for my pear-shaped body. I also added 4 inches to the length of the dresses skirt piece. I absolutely love this pattern and all the different variations it includes and I’m excited to make a linen one next for summer.

Plaid Hinterland Dress

And this photo above pretty much shows how I’ve been styling the Hinterland Dress! With warm wool tights and my favourite vintage boots. I add a wool sweater and a winter coat before I head out and I am very warm all day!

Some links you might find helpful: