
Cross Stitch your Clothes!
/Some links in this blog post may be affiliate links. This means if you click through and purchase the product, I earn a small commission at no additional cost to you. Thank-you.
As an avid sewer and multidisciplinary crafter, I almost never cross stitch on aida or evenweave. I prefer working on fabrics that I can sew into clothes more easily, as cross stitch is usually just one element of a project I’m working on. I also love cross stitching directly on store bought and thrifted items of clothing. Today I’m going to share with you some methods I use for doing this.


I won’t cover all the basics here. If you have never done cross stitch before, it would probably be a good idea to read through a beginner tutorial or watch a couple videos on YouTube. I think this blog post by Cutesy Crafts covers the basics. Then you can come back here and get my extra tips and recommendations for stitching on other fabrics like t-shirts and denim.


Before I get into the different methods, I want to share a couple important tips up front. These tips apply to all the methods and I don’t want them to get lost in the information below. First, watch your tension when stitching! When you are making your little x’s, make sure you do not pull the threads too tight. You want the threads laying flat against the fabric, but they should still have a bit of ‘spring’ to them. Or another word to describe it is to make sure the threads have some ‘loft’. If you pull your threads even the slightest bit too snug, your fabric will pucker, especially if you are stitching stretchy fabrics like t-shirts and sweaters.
Another tip is to be careful when you are using a hoop for this type of cross stitch. Usually you stretch your fabric in the hoop so that it is nice and snug, almost like a drum. You can still do this if you are stitching on something like a cotton canvas tote bag, but if you are stitching on stretchy t-shirt fabrics, I do not recommend pulling tight. I try to keep the fabric in the hoop at the same tension it would be when I’m wearing it. This will help to keep your stitches from puckering the fabric.
One last tip for stitching clothes is to make sure your thread ends are woven in well. I do not use knots when stitching, but rather weave each end in back and forth three times on the wrong side of my project. I have never had a thread come loose in the wash doing it this way! Here are some photos of the back of my work. You can see that I weave threads back and forth in all different directions. It looks a little messy, but it’s very secure.


Method 1 - Water-soluble canvas grid
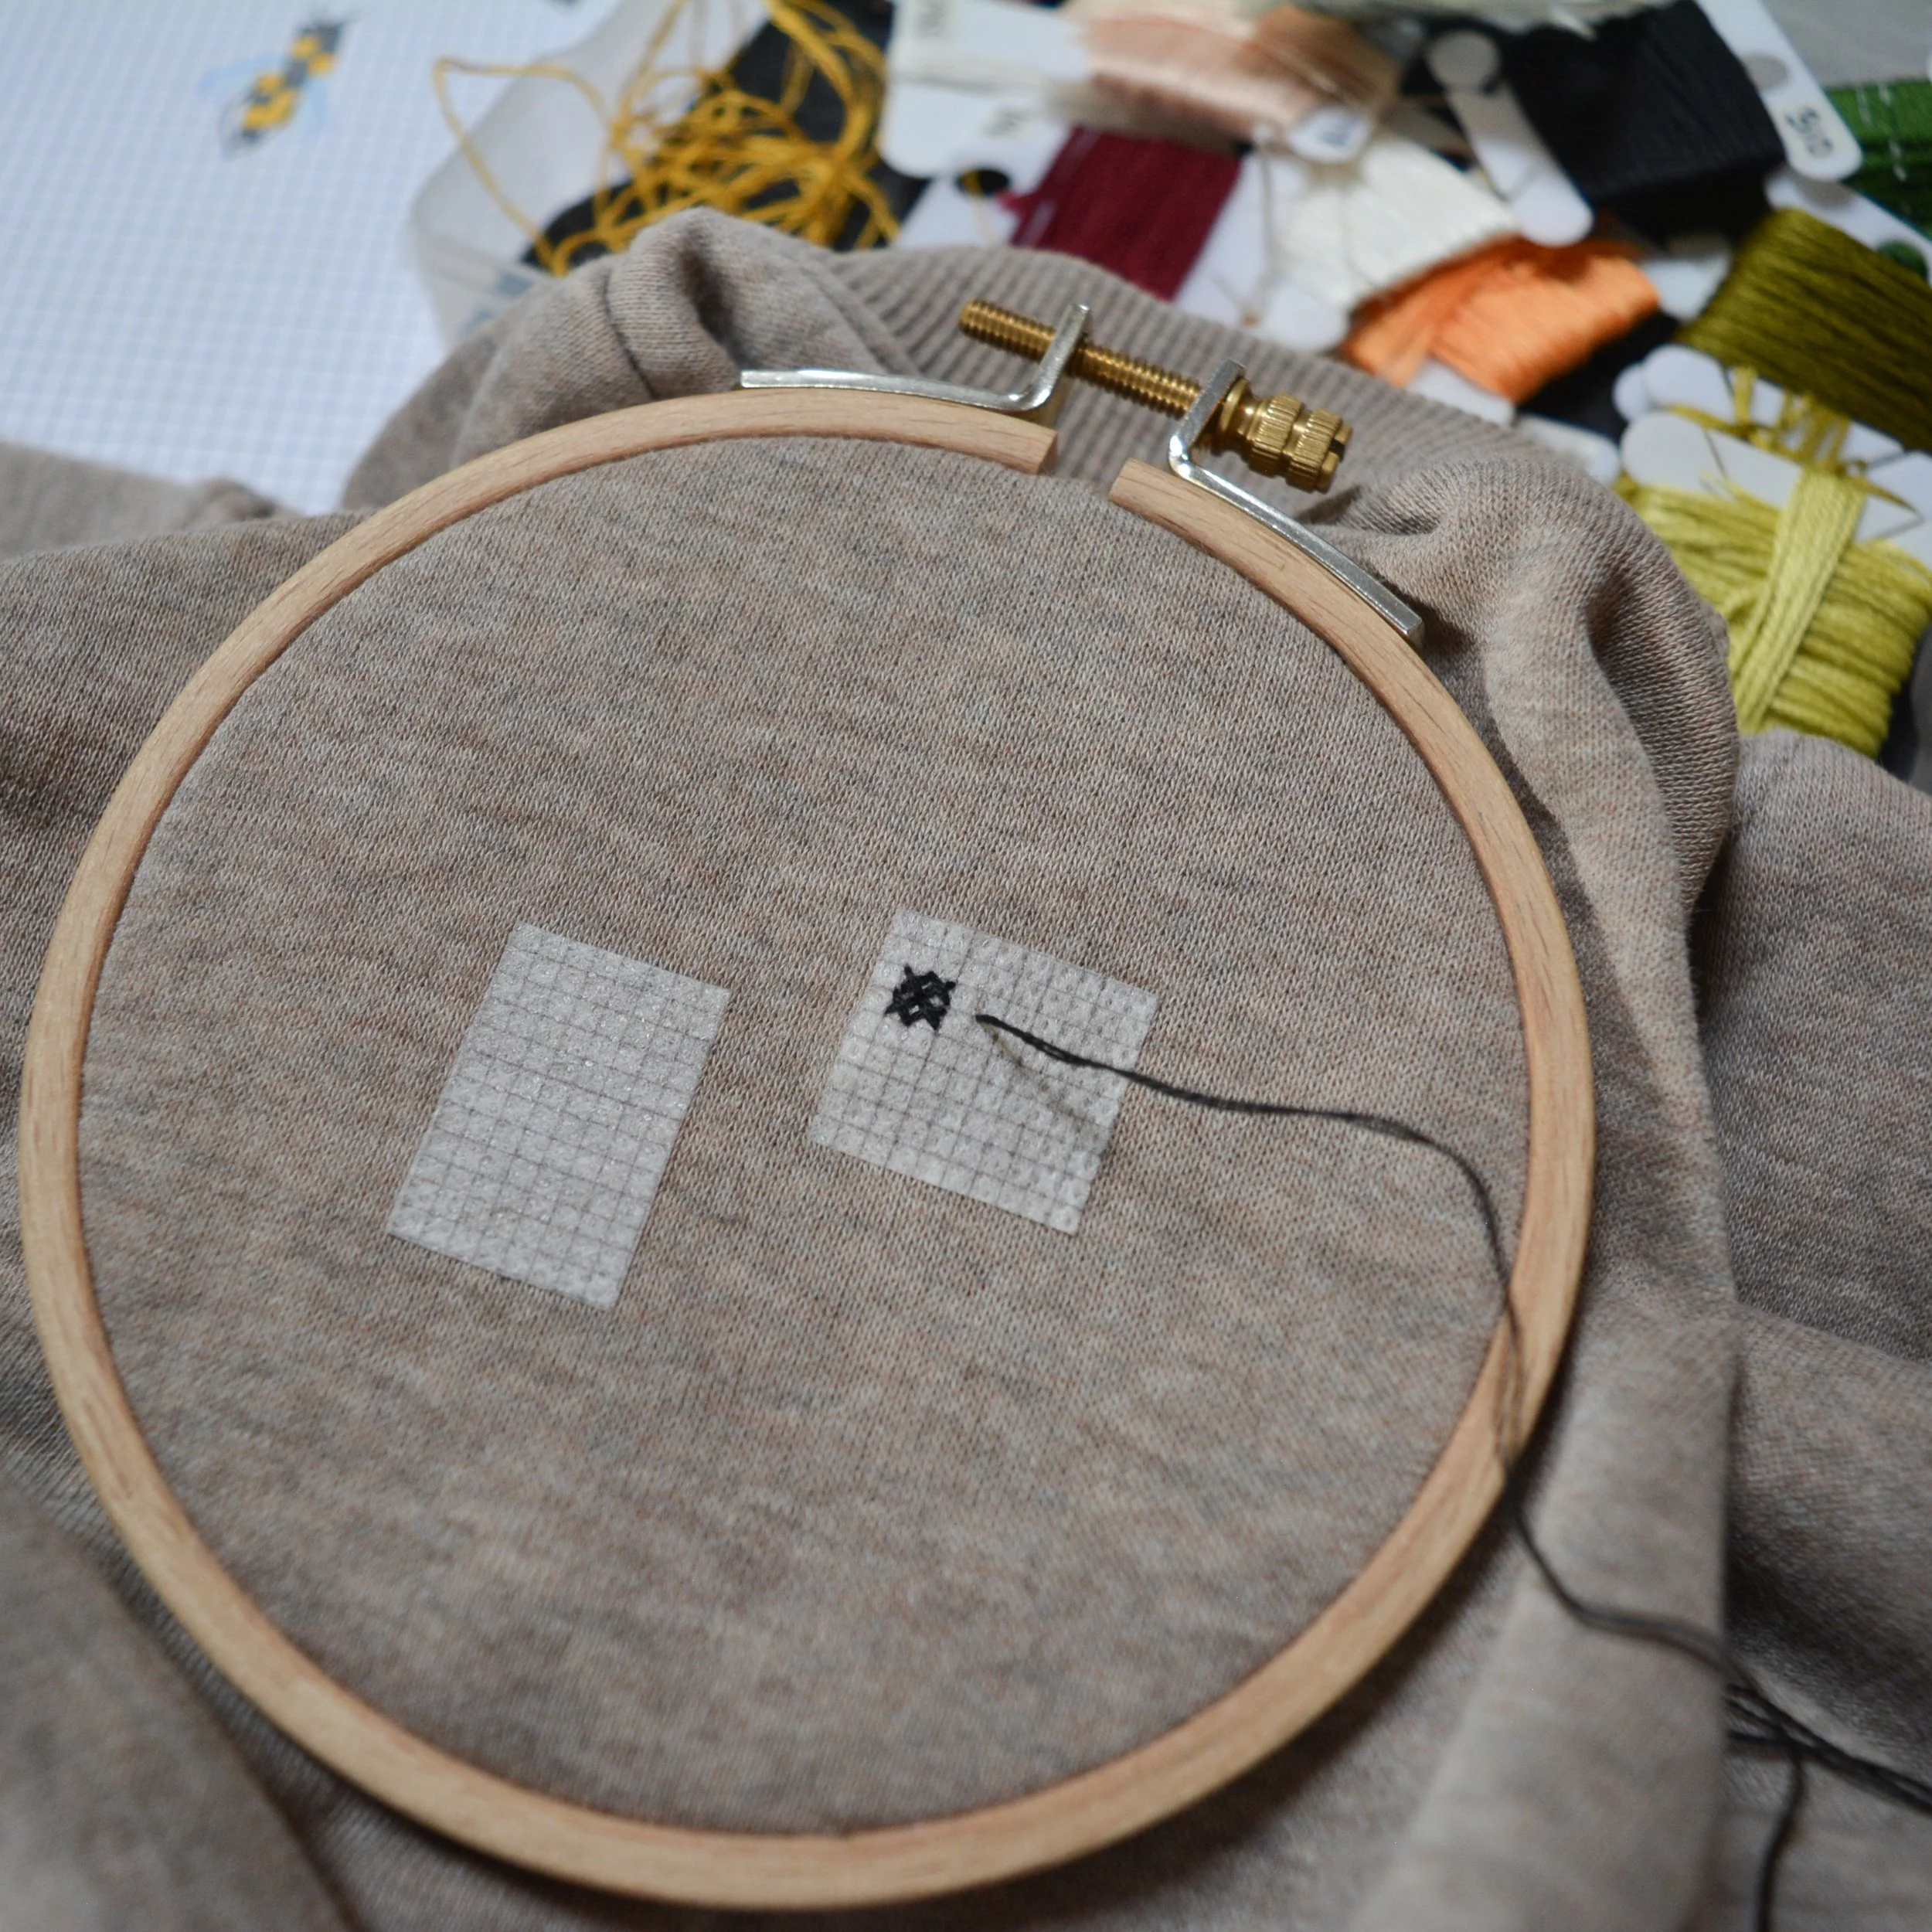
I’m going to start with this method because it’s the one I use most often. I use a water soluble canvas from the DMC brand. You just cut out the amount you need, baste it onto your fabric with long running stitches, and then cross stitch as usual. Once you are done stitching: cut your basting threads, and soak your project in warm water for about 15 minutes. The only downside is that I can only find this product in a 14 count grid (that means 14 stitches per inch). It can also be cumbersome to baste it onto your fabric. My top tip for this is to put a hard surface between the layers where you will be stitching (I use my acrylic quilting ruler). This will ensure you don’t stitch through more than one layer of fabric. Also, baste your grid onto your project first, then add the embroidery hoop if you are using one.
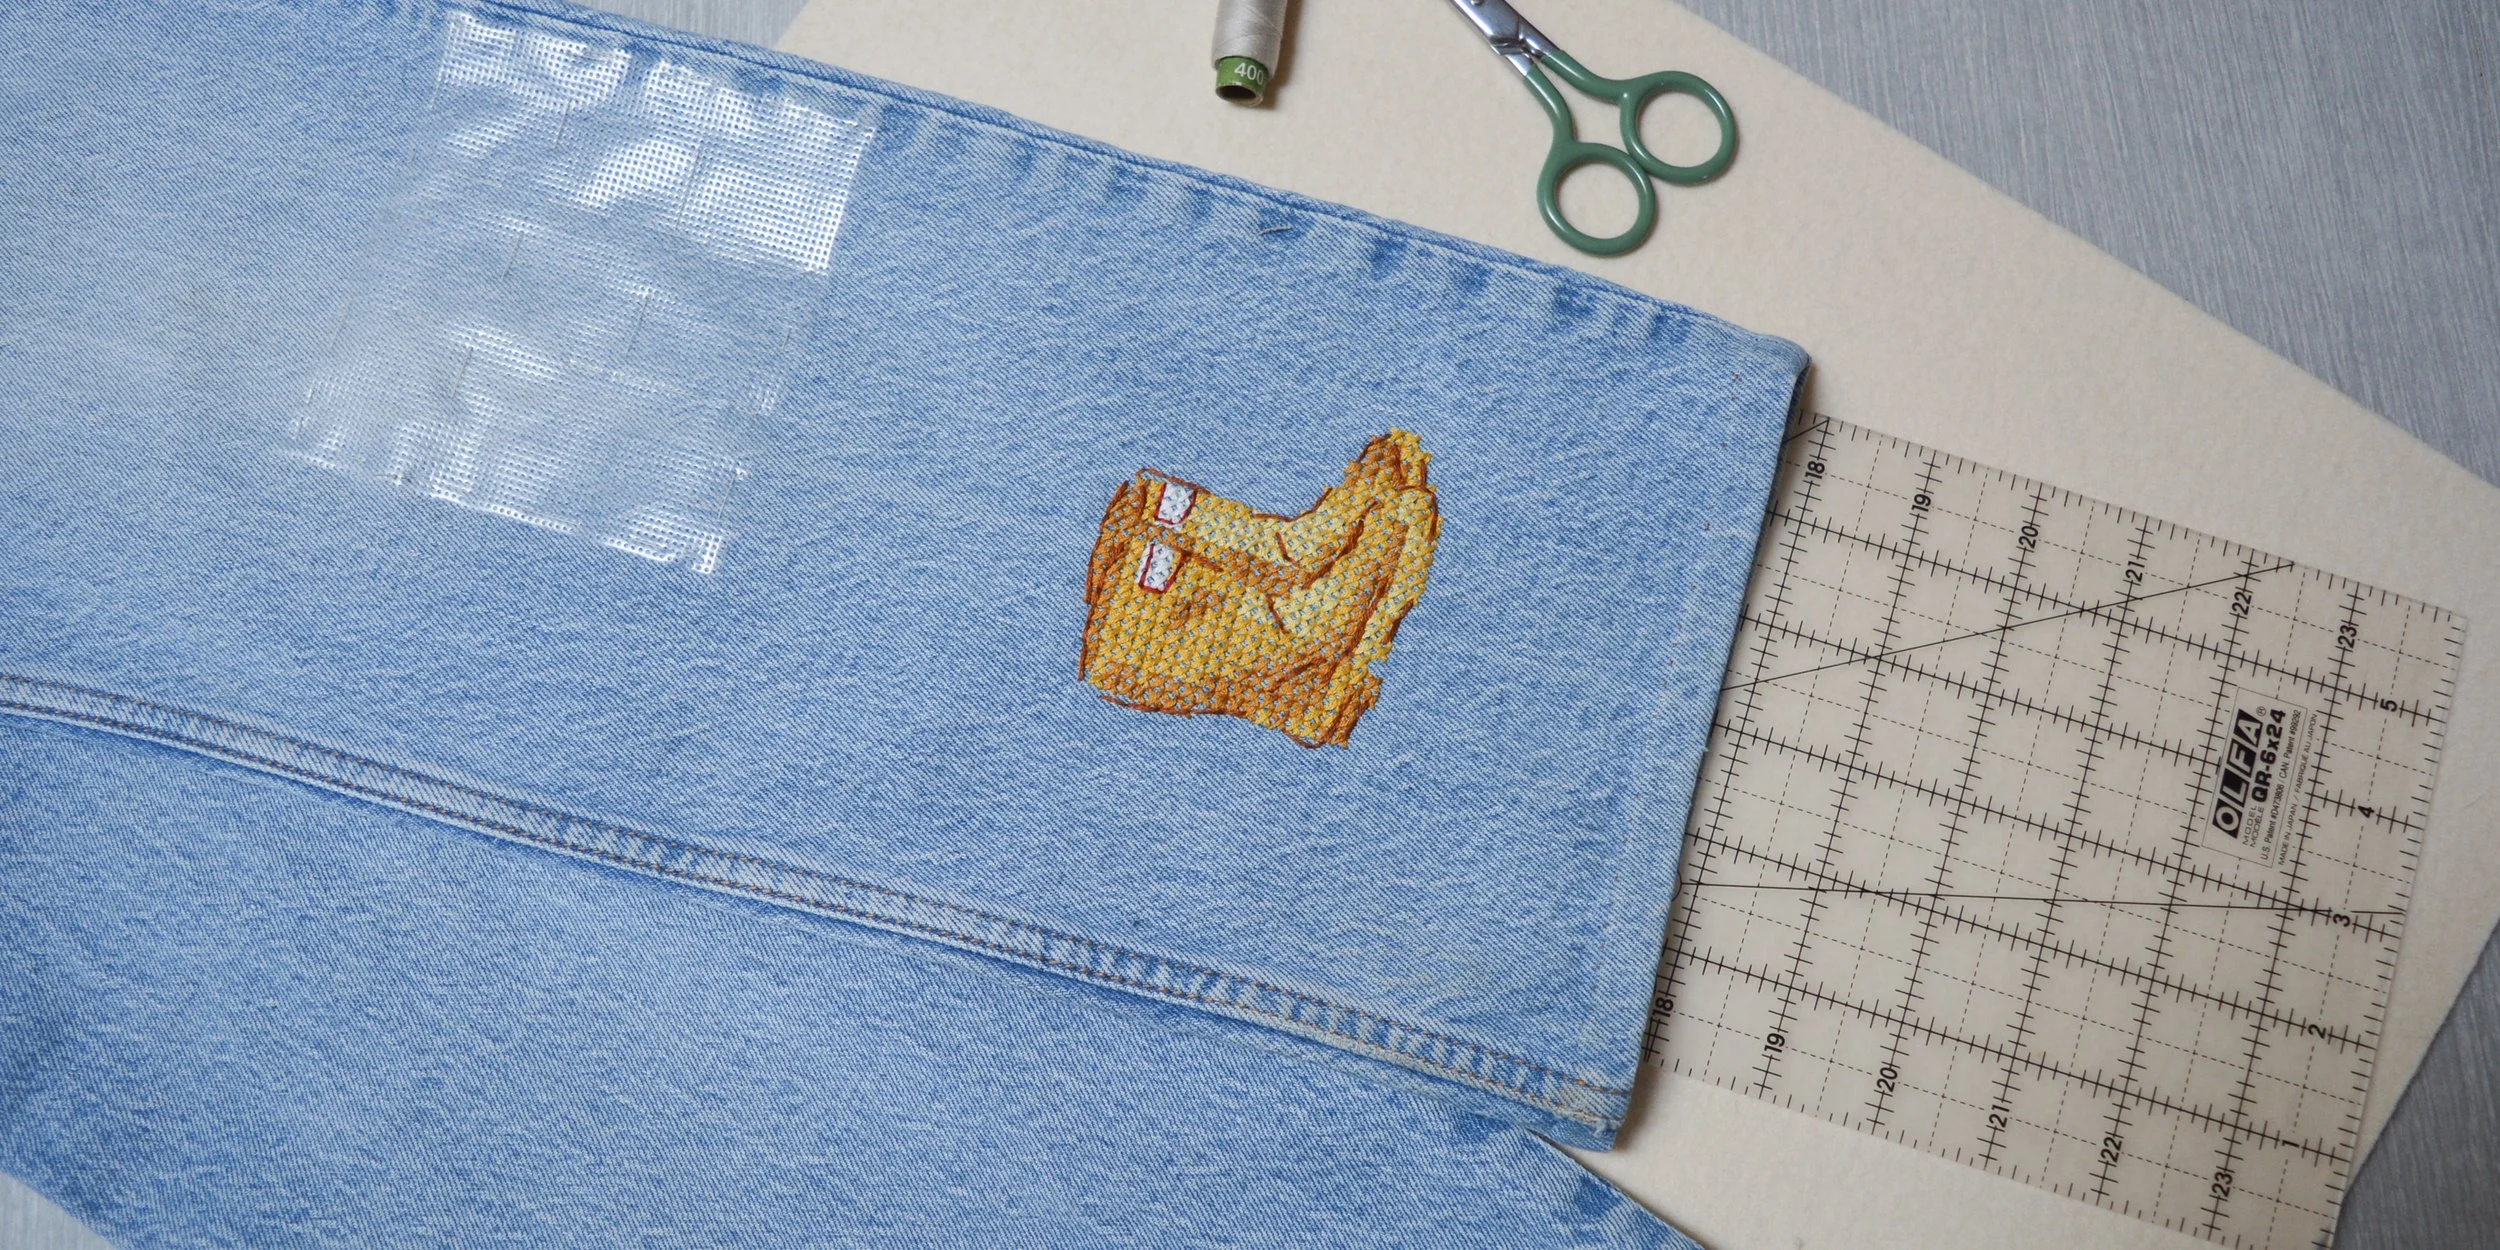
I used this method to make my garden pants. The canvas is 14 count, but I stitched over 4 squares as 1, so my motifs are essentially done on a 7 count grid. This bigger grid made for pretty quick stitching. When stitching on denim I don’t use a hoop, as the fabric is already nice and stiff and easy to hold onto. Sometimes stitching blue jeans can be tricky, as it’s hard to easily access all parts of the fabric, but I think it’s worth it! In the photos below you can see that I have taken my interfacing out of its original packaging, and I store it in a waterproof Ziploc bag.


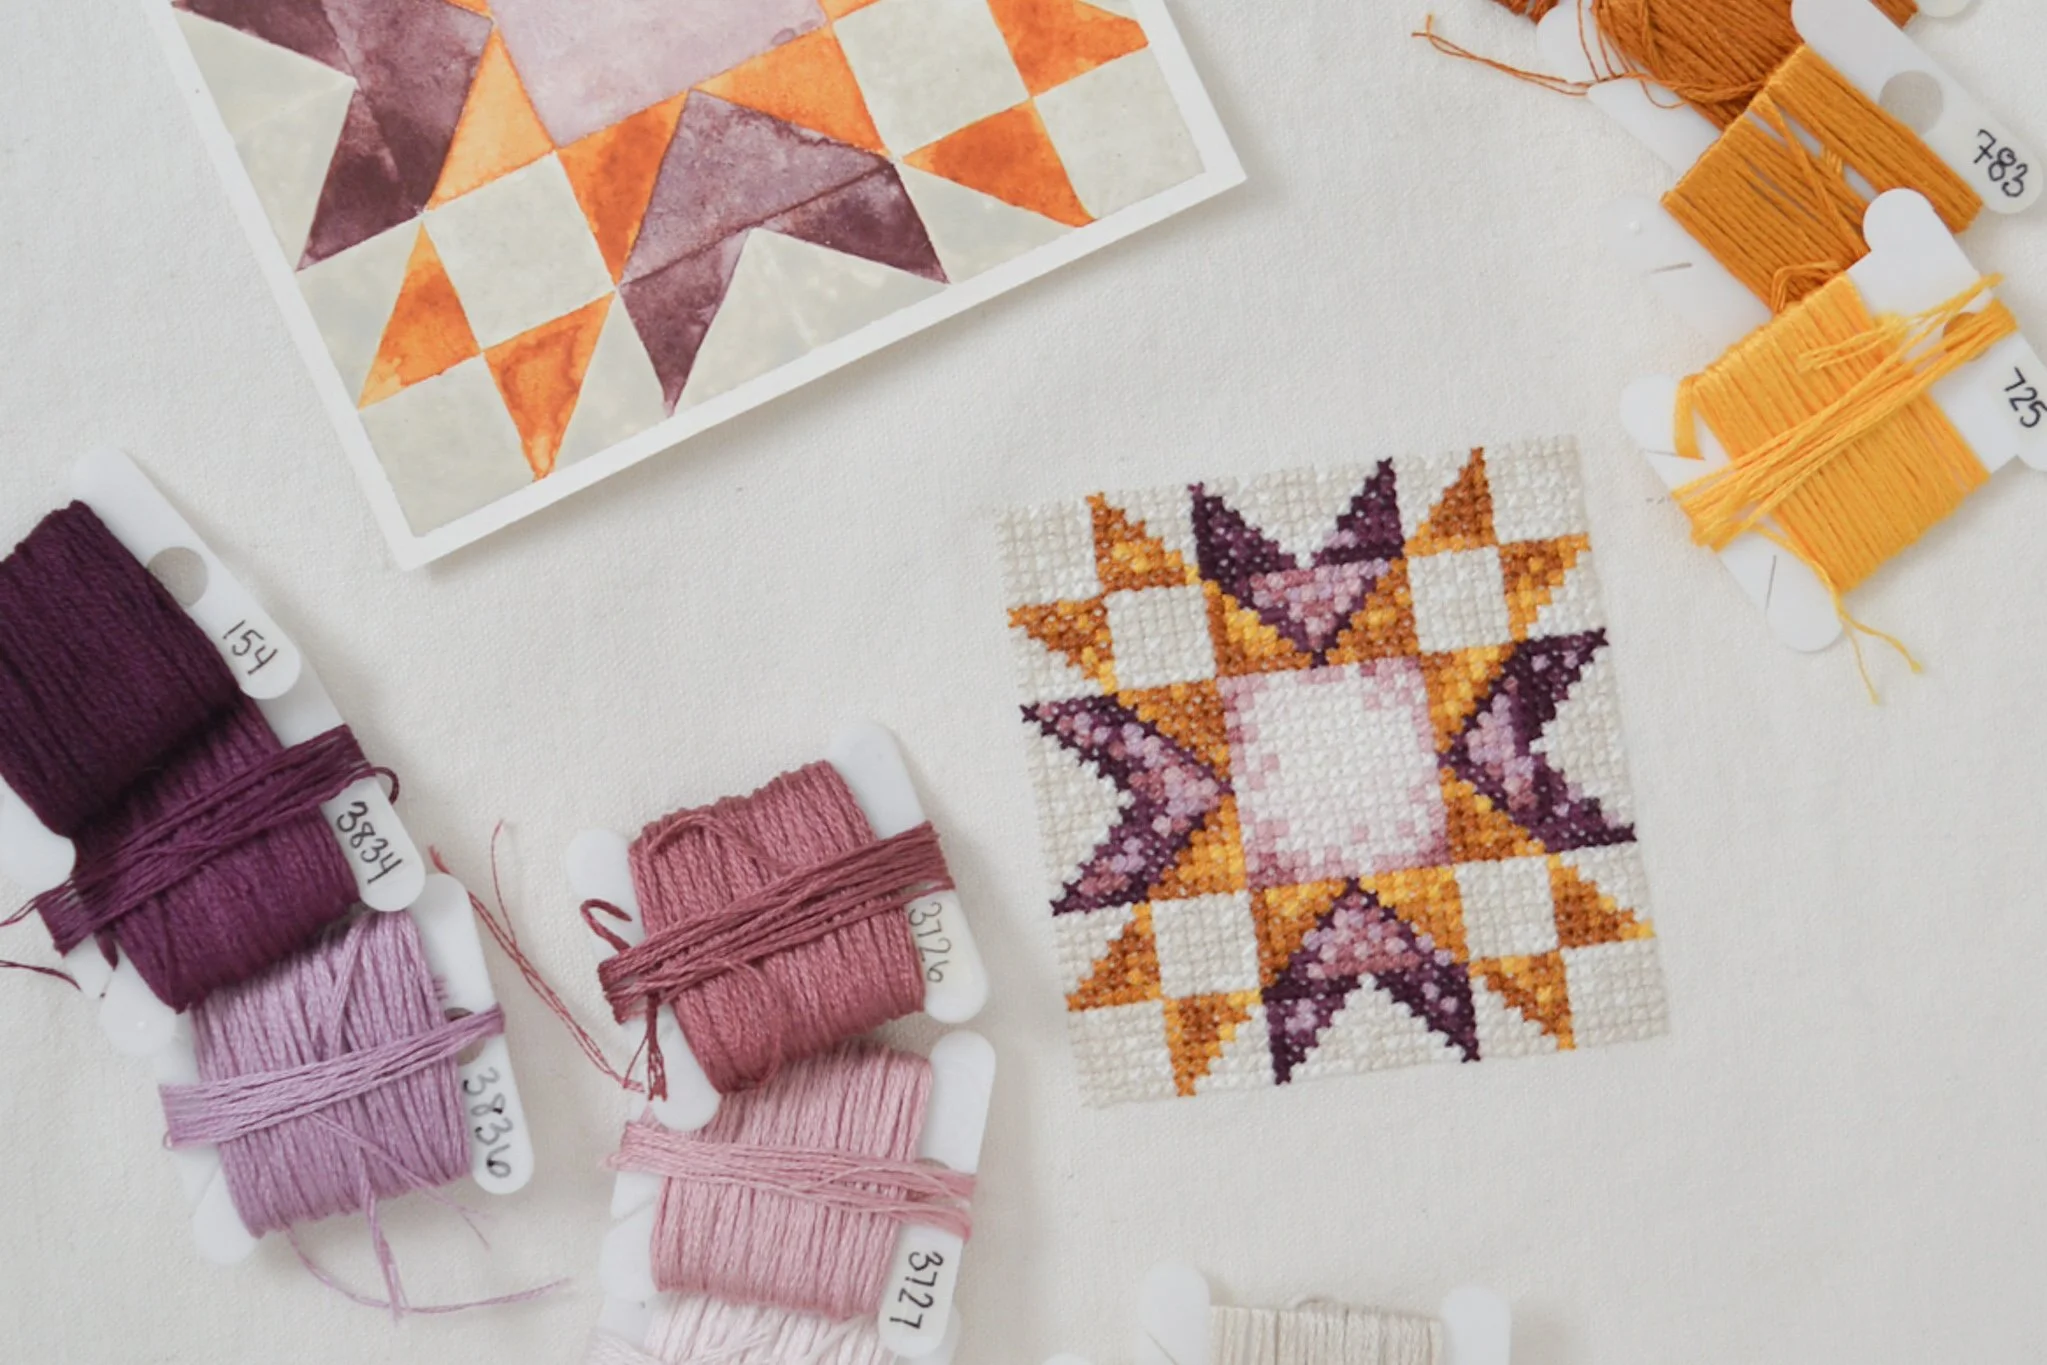
I also used the water-soluble grid to stitch this quilt square pattern onto a piece of woven canvas. This method is my favourite as I find I get the neatest looking stitches with this product. It only comes in the one size (14ct.), but that size works really well for my needs.
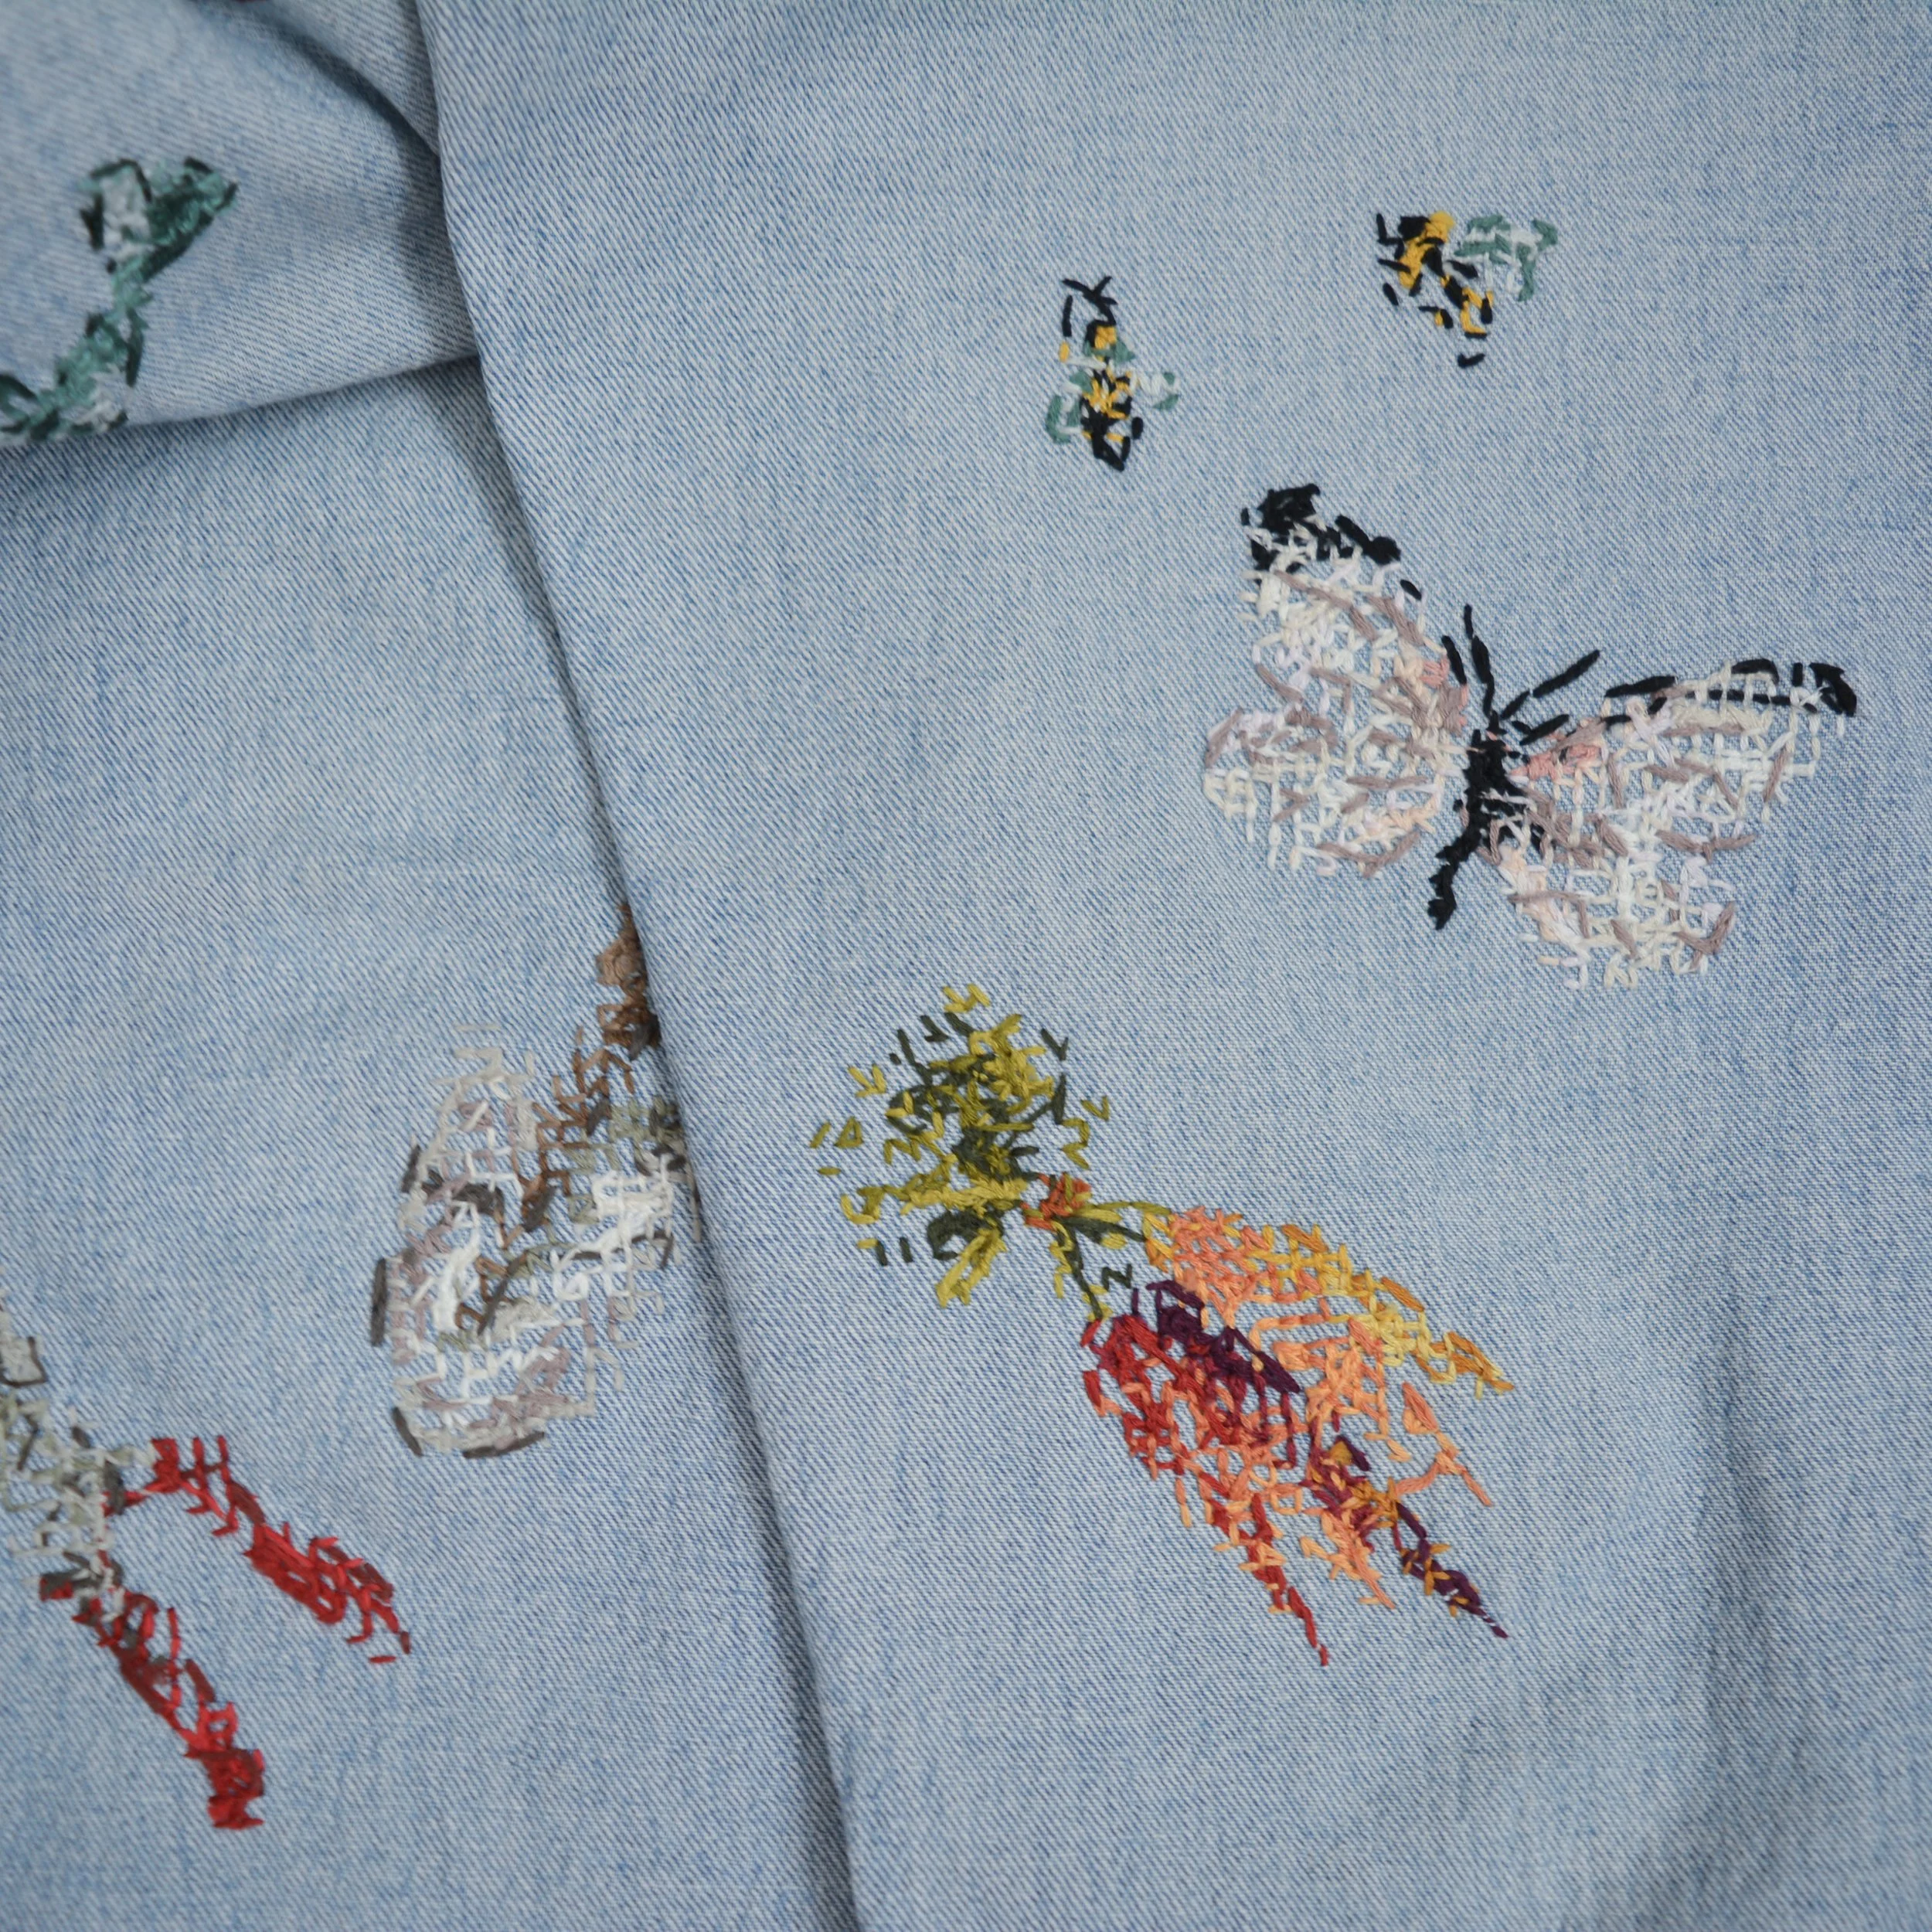
One last project using this method is a moth stitched onto indigo dyed linen.


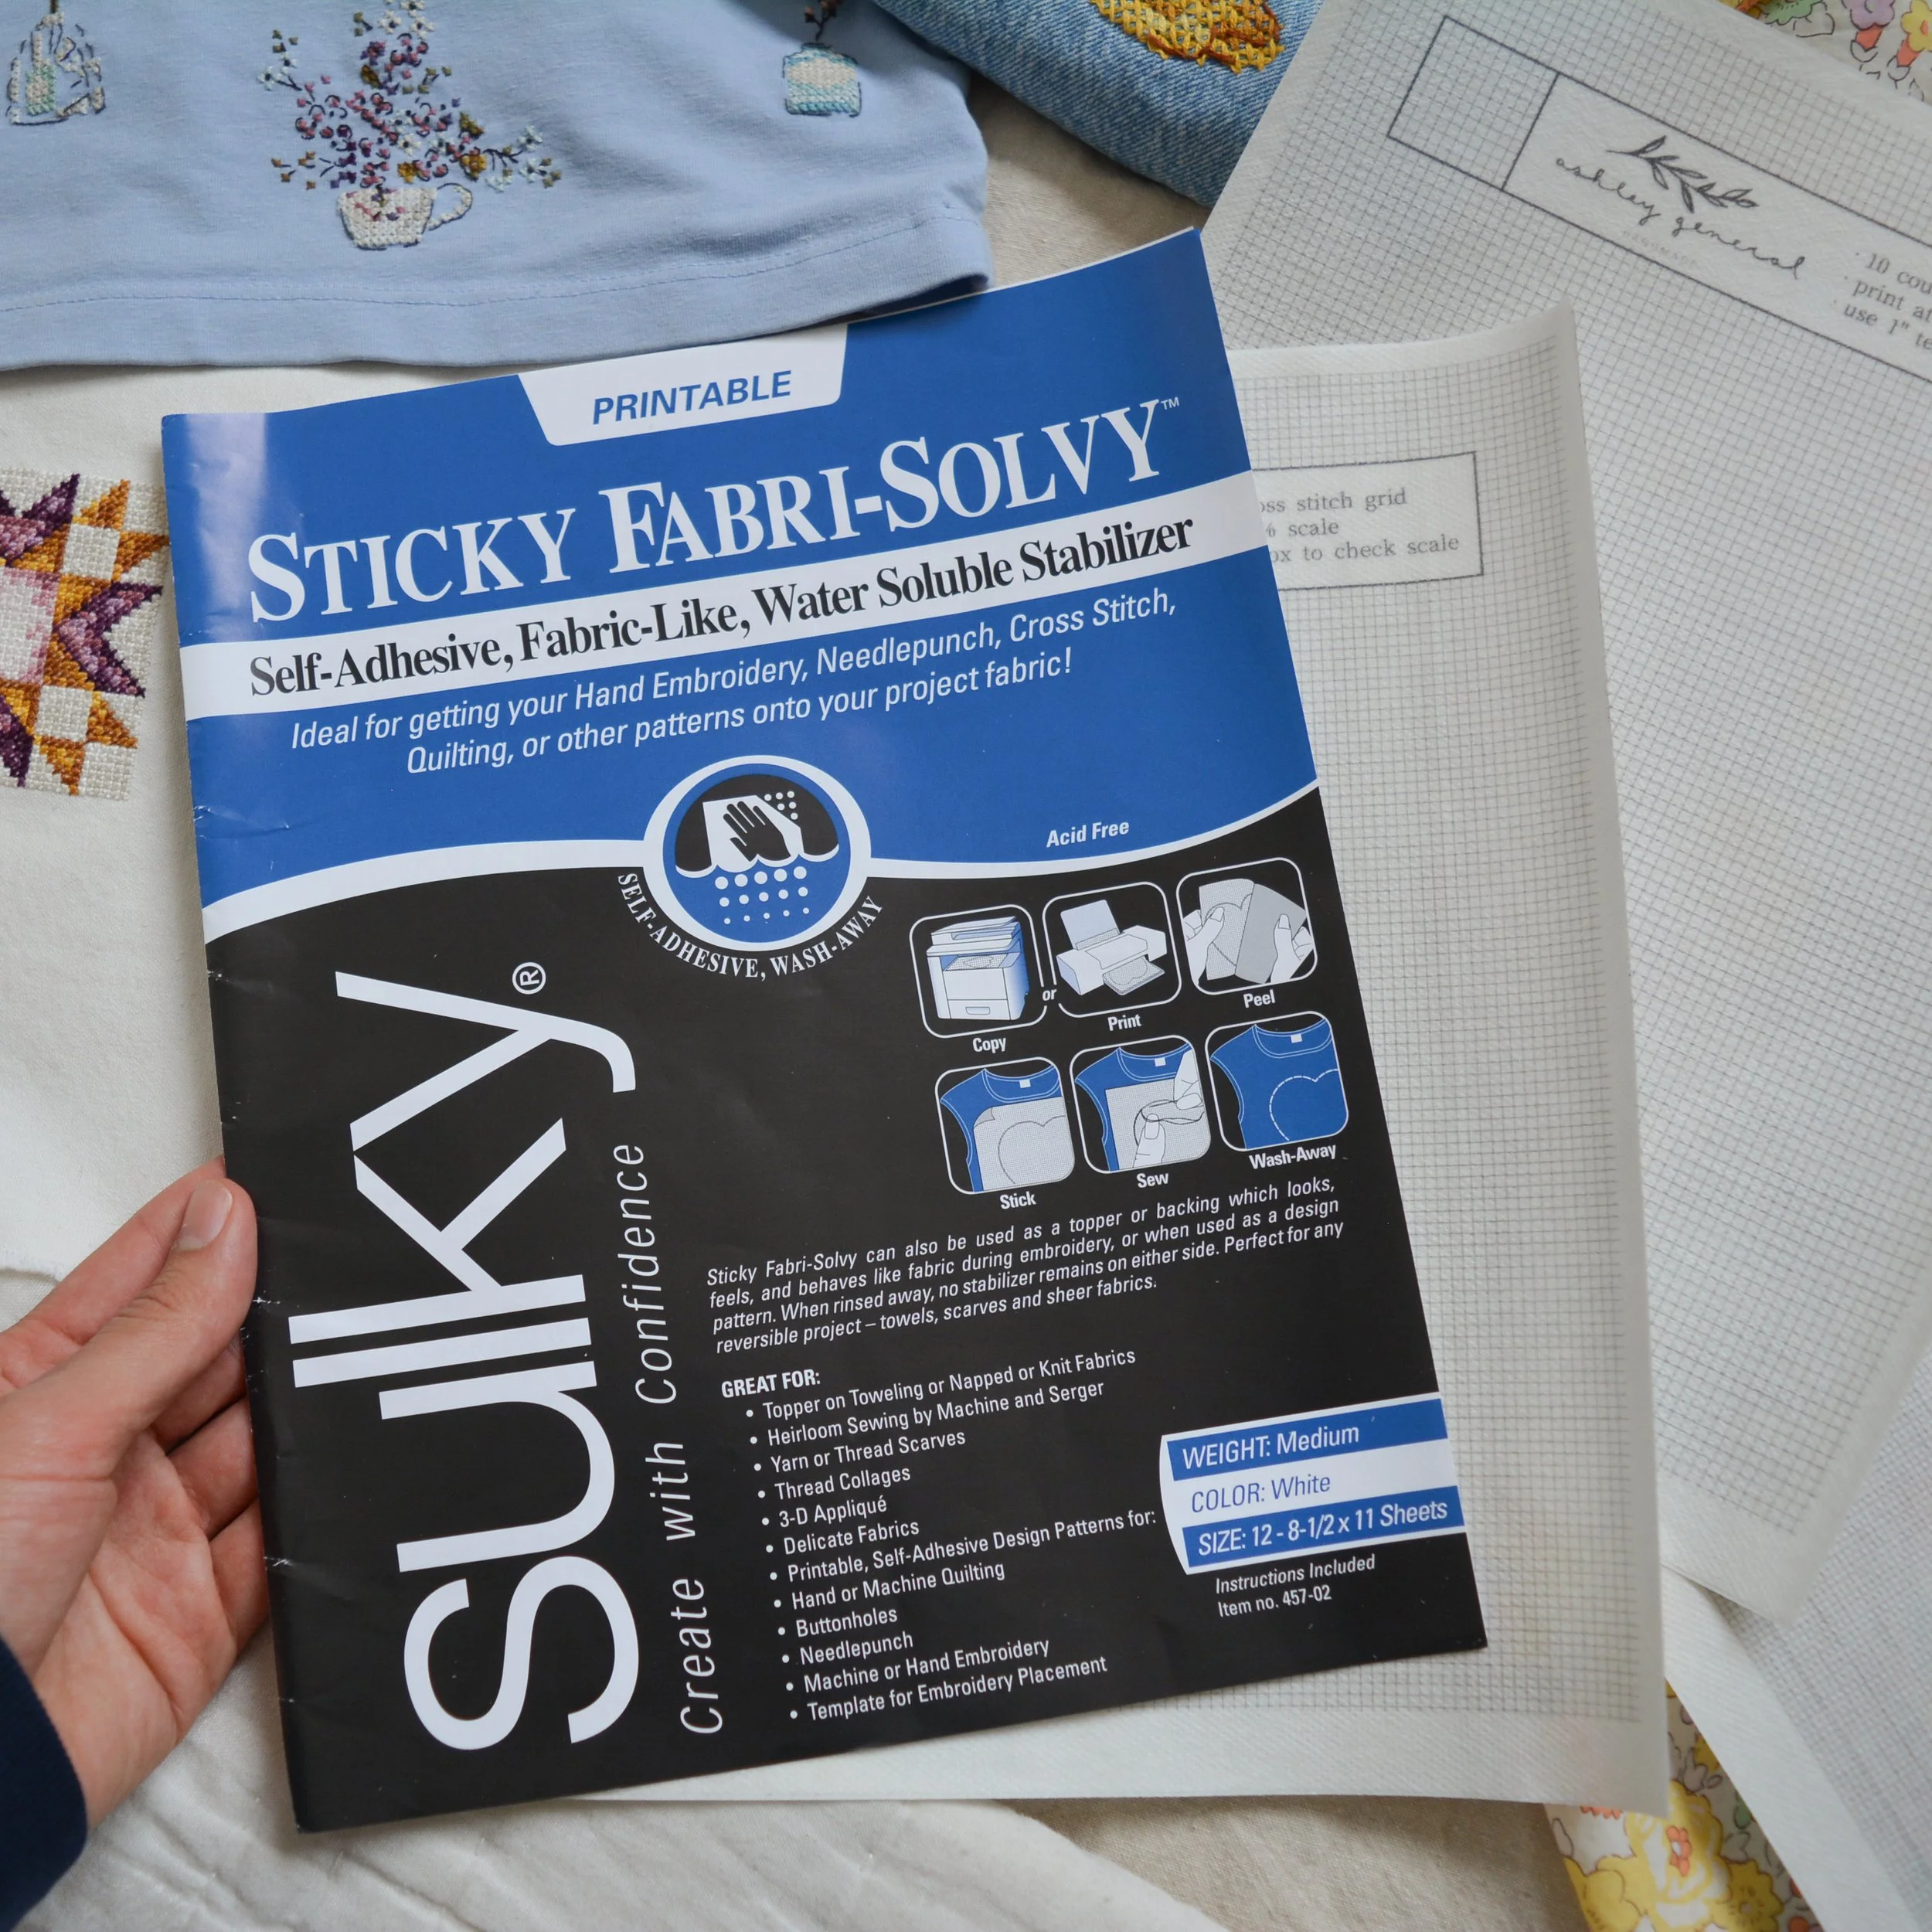
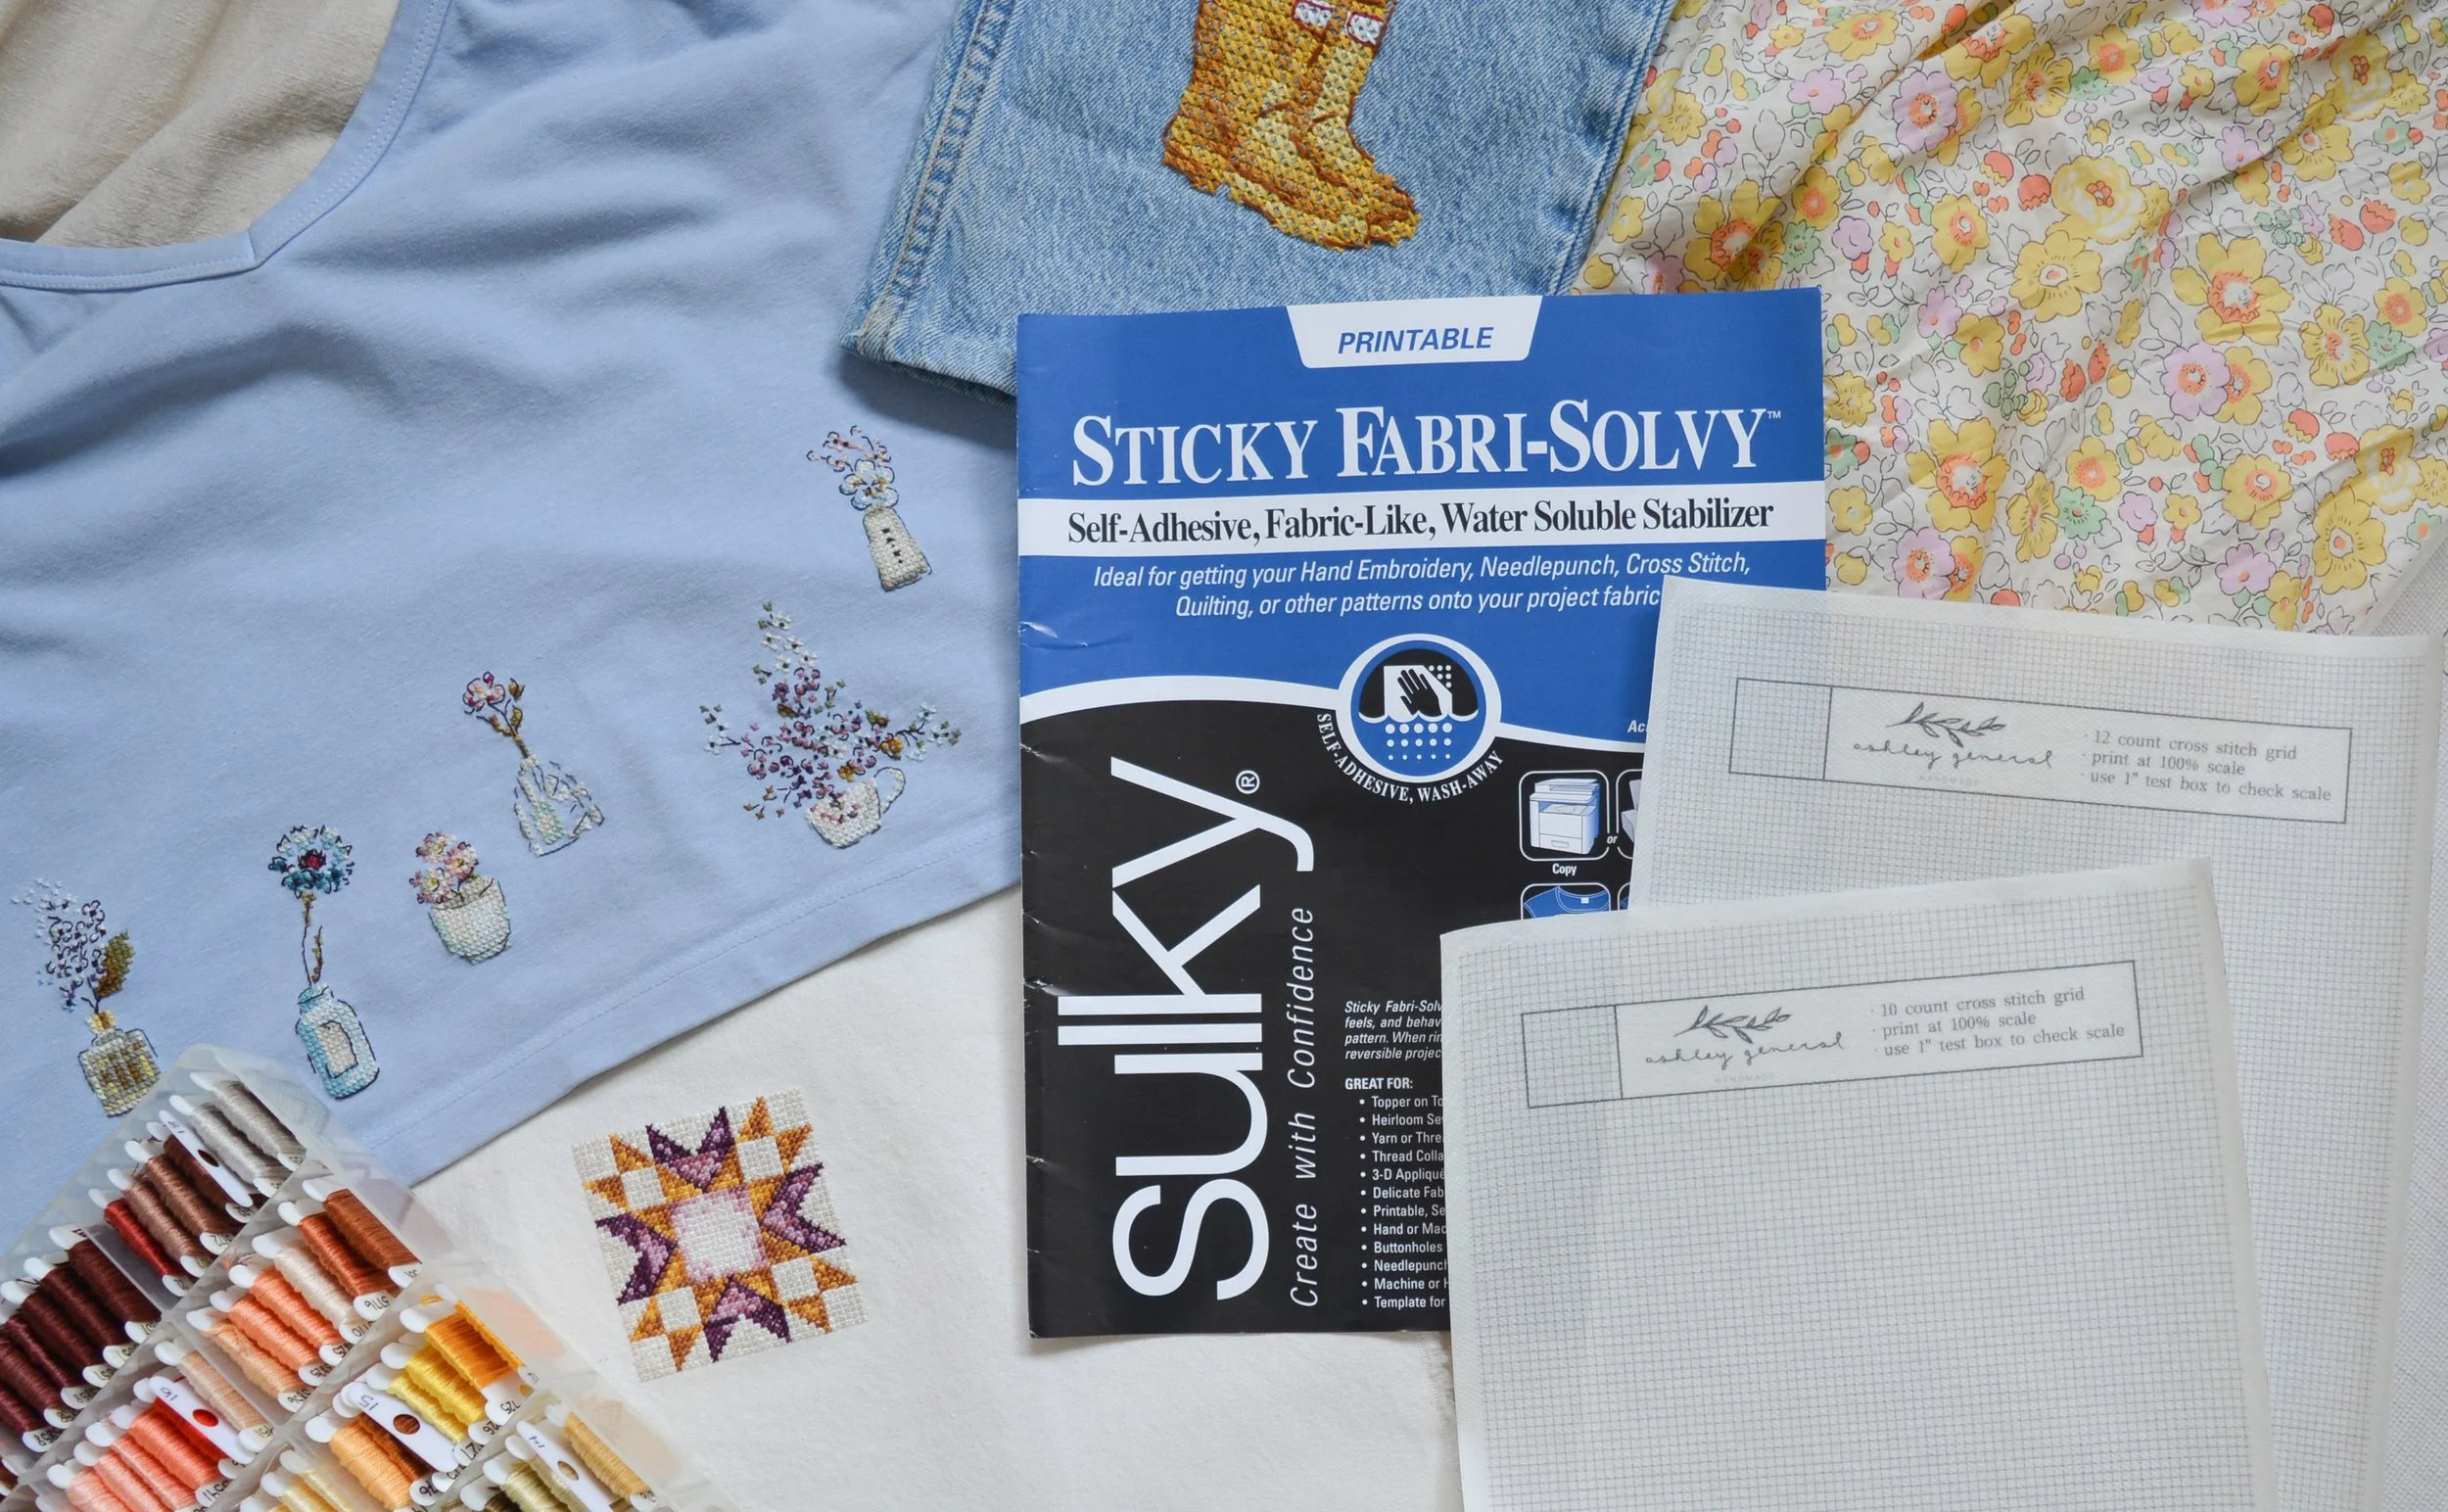
Method 2 - Sulky Stick-n-Stitch with printed grid
Another good option is to make your own cross stitch grid “stickers”. Sulky has a product called Sulky Stick’n Stitch, which is a water soluble interfacing that sticks onto your fabric. You can print anything you like onto this interfacing using a home printer! So I just print a grid onto the interfacing using the ‘draft’ setting on my printer, and then cut out the size of the piece I need. You now have a cross stitch sticker that will wash away when you are done stitching.


I created PDF files with grids in every popular size for you to print onto your interfacing. You can find those here. Just make sure you print the grid at “100% scale” when selecting your printer preferences.
Note about this interfacing: Sulky Stick’n Stich is the exact same product as Sulky Sticky Fabri-solvy. The company brands the product in two different ways, trying to appeal to both home sewists and hand embroiderers. Remember, these come blank! You need to print the grid on yourself using the PDF files I linked.
A note about Sulky: There are cases online complaining about the printer ink transferring to the fabric when using this product. Make sure to follow all the advice given by the company to avoid this. Always change your printer setting to “draft” or “light ink” before printing onto this interfacing. To remove, first rinse project under running water to get the majority of the interfacing off. Then you can soak your project in warm, soapy water. And my added safeguard is to use a colour catcher sheet (I use Shout brand) when soaking the project. If some ink does transfer, Sulky recommends using a stain remover (like Spray N’Wash).
I find this method is most popular with beginners and kids. The set up is so simple and satisfying!
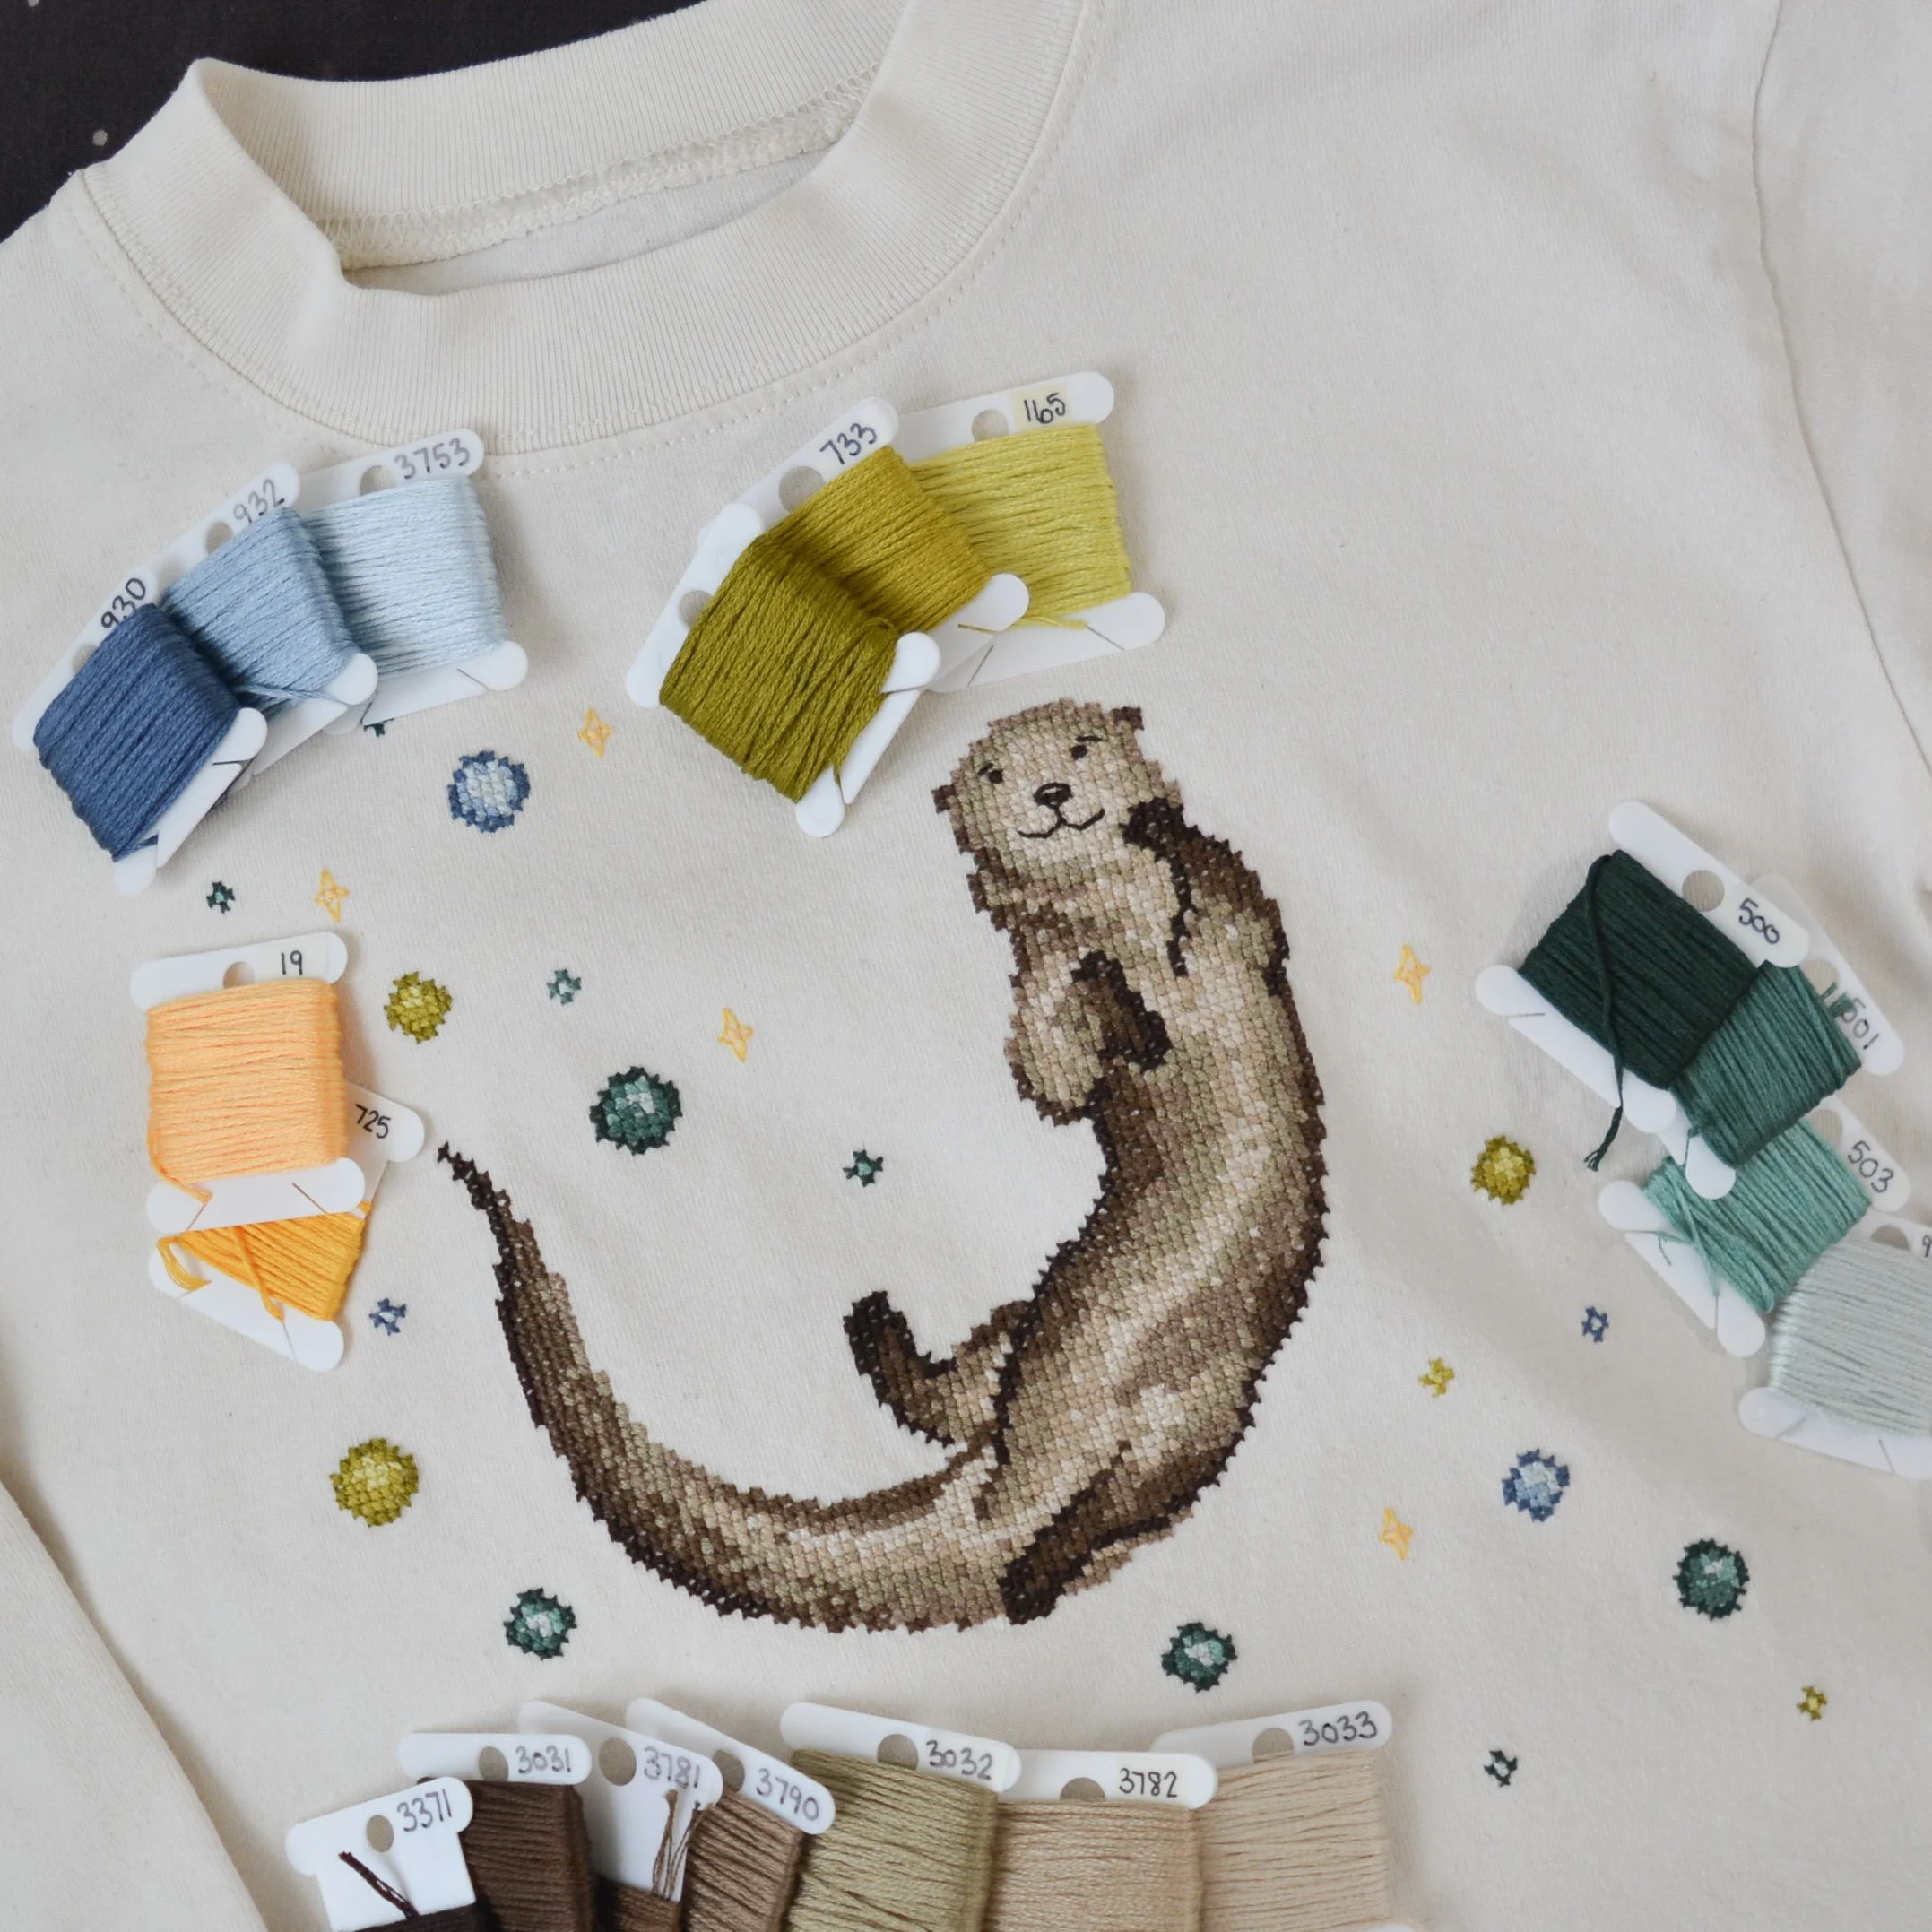
Here you can see that I used these grid stickers for the bubbles on my river otter. I used method #1 to stitch the actual otter, but then used method #2 to stitch the bubbles and stars.

Method 3 - Waste Canvas
The last method I will share with you is called waste canvas. You baste this canvas onto your project and cross stitch as usual. When you are done you need to soak your project in water (to loosen the glue), let it fully dry, and then use tweezers to pull the waste canvas out. This canvas is sold in many different sizes.


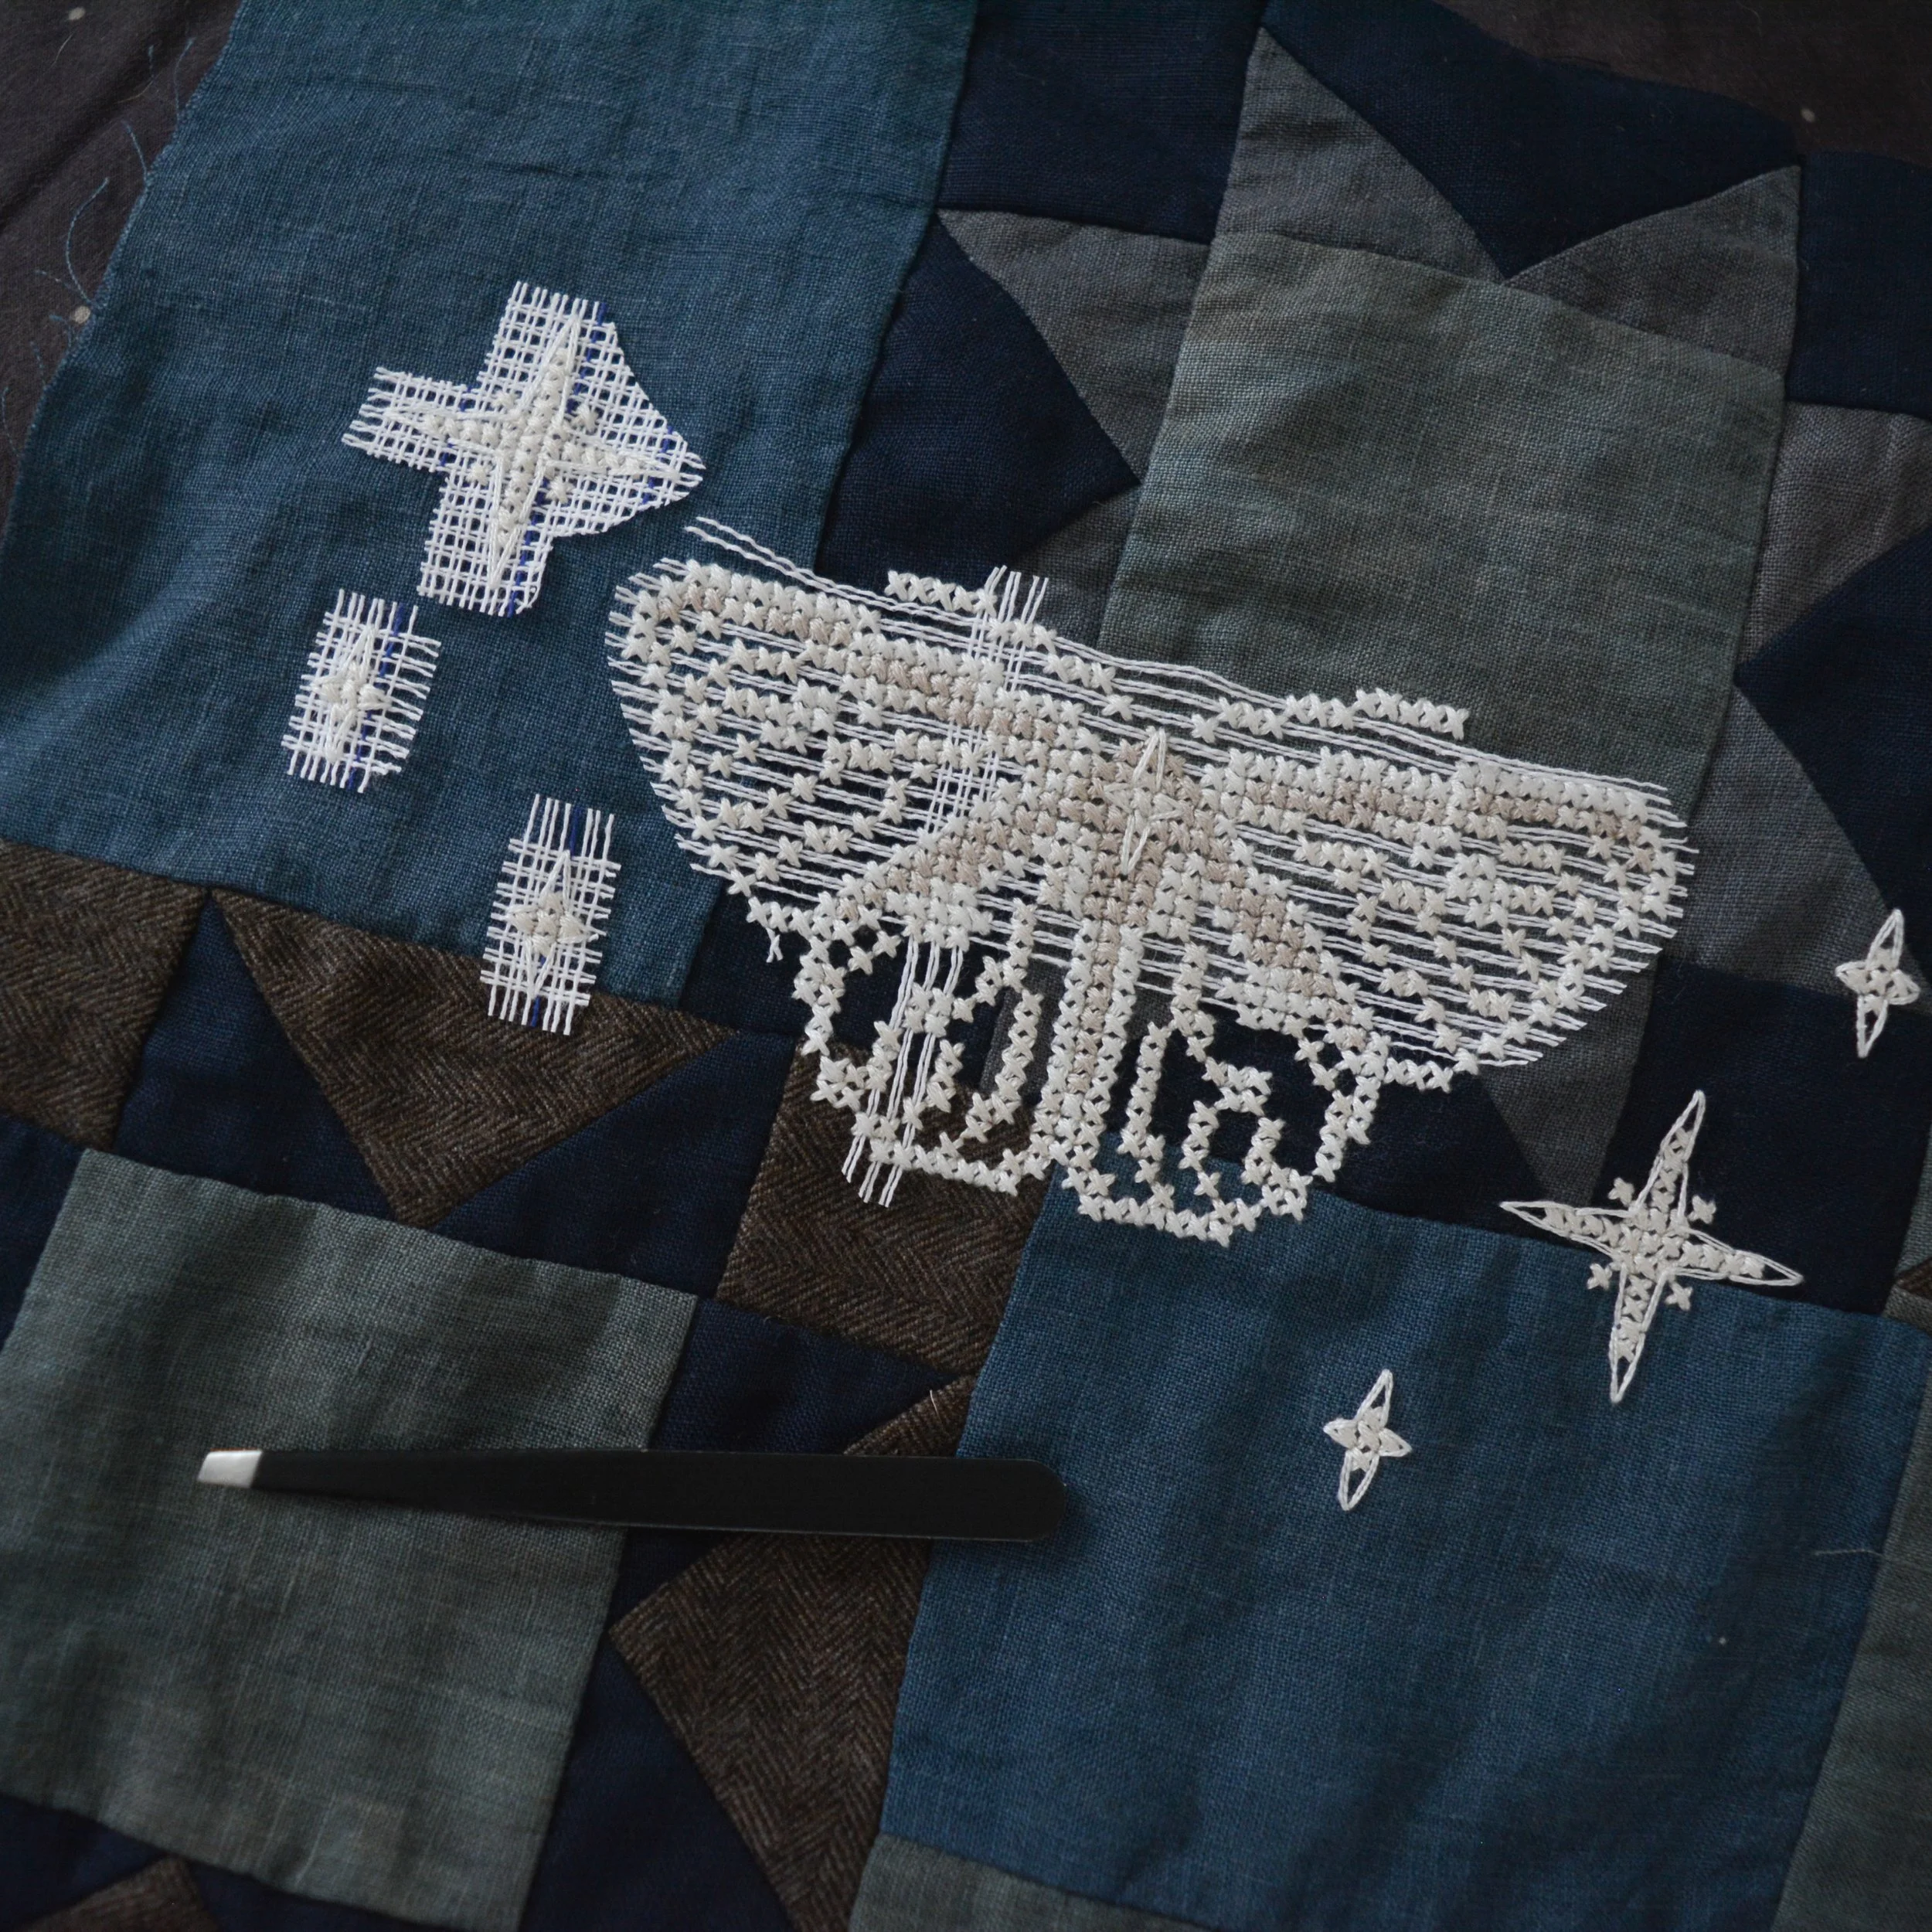

What I like about this method is that once you have it basted onto your project, it holds the fabric night and taut. I don’t need to use an embroidery hoop when I am using this waste canvas. I do find it hard to count stitches though, the sparseness of the grid seems to play tricks on my eyes. I also don’t like how there is the added step of pulling the threads out at the end. I used waste canvas to stitch a moth onto a drawstring bag and it worked well for this project.
I hope one of these methods end up working well for you!
