Hinterland Dress Pattern Review

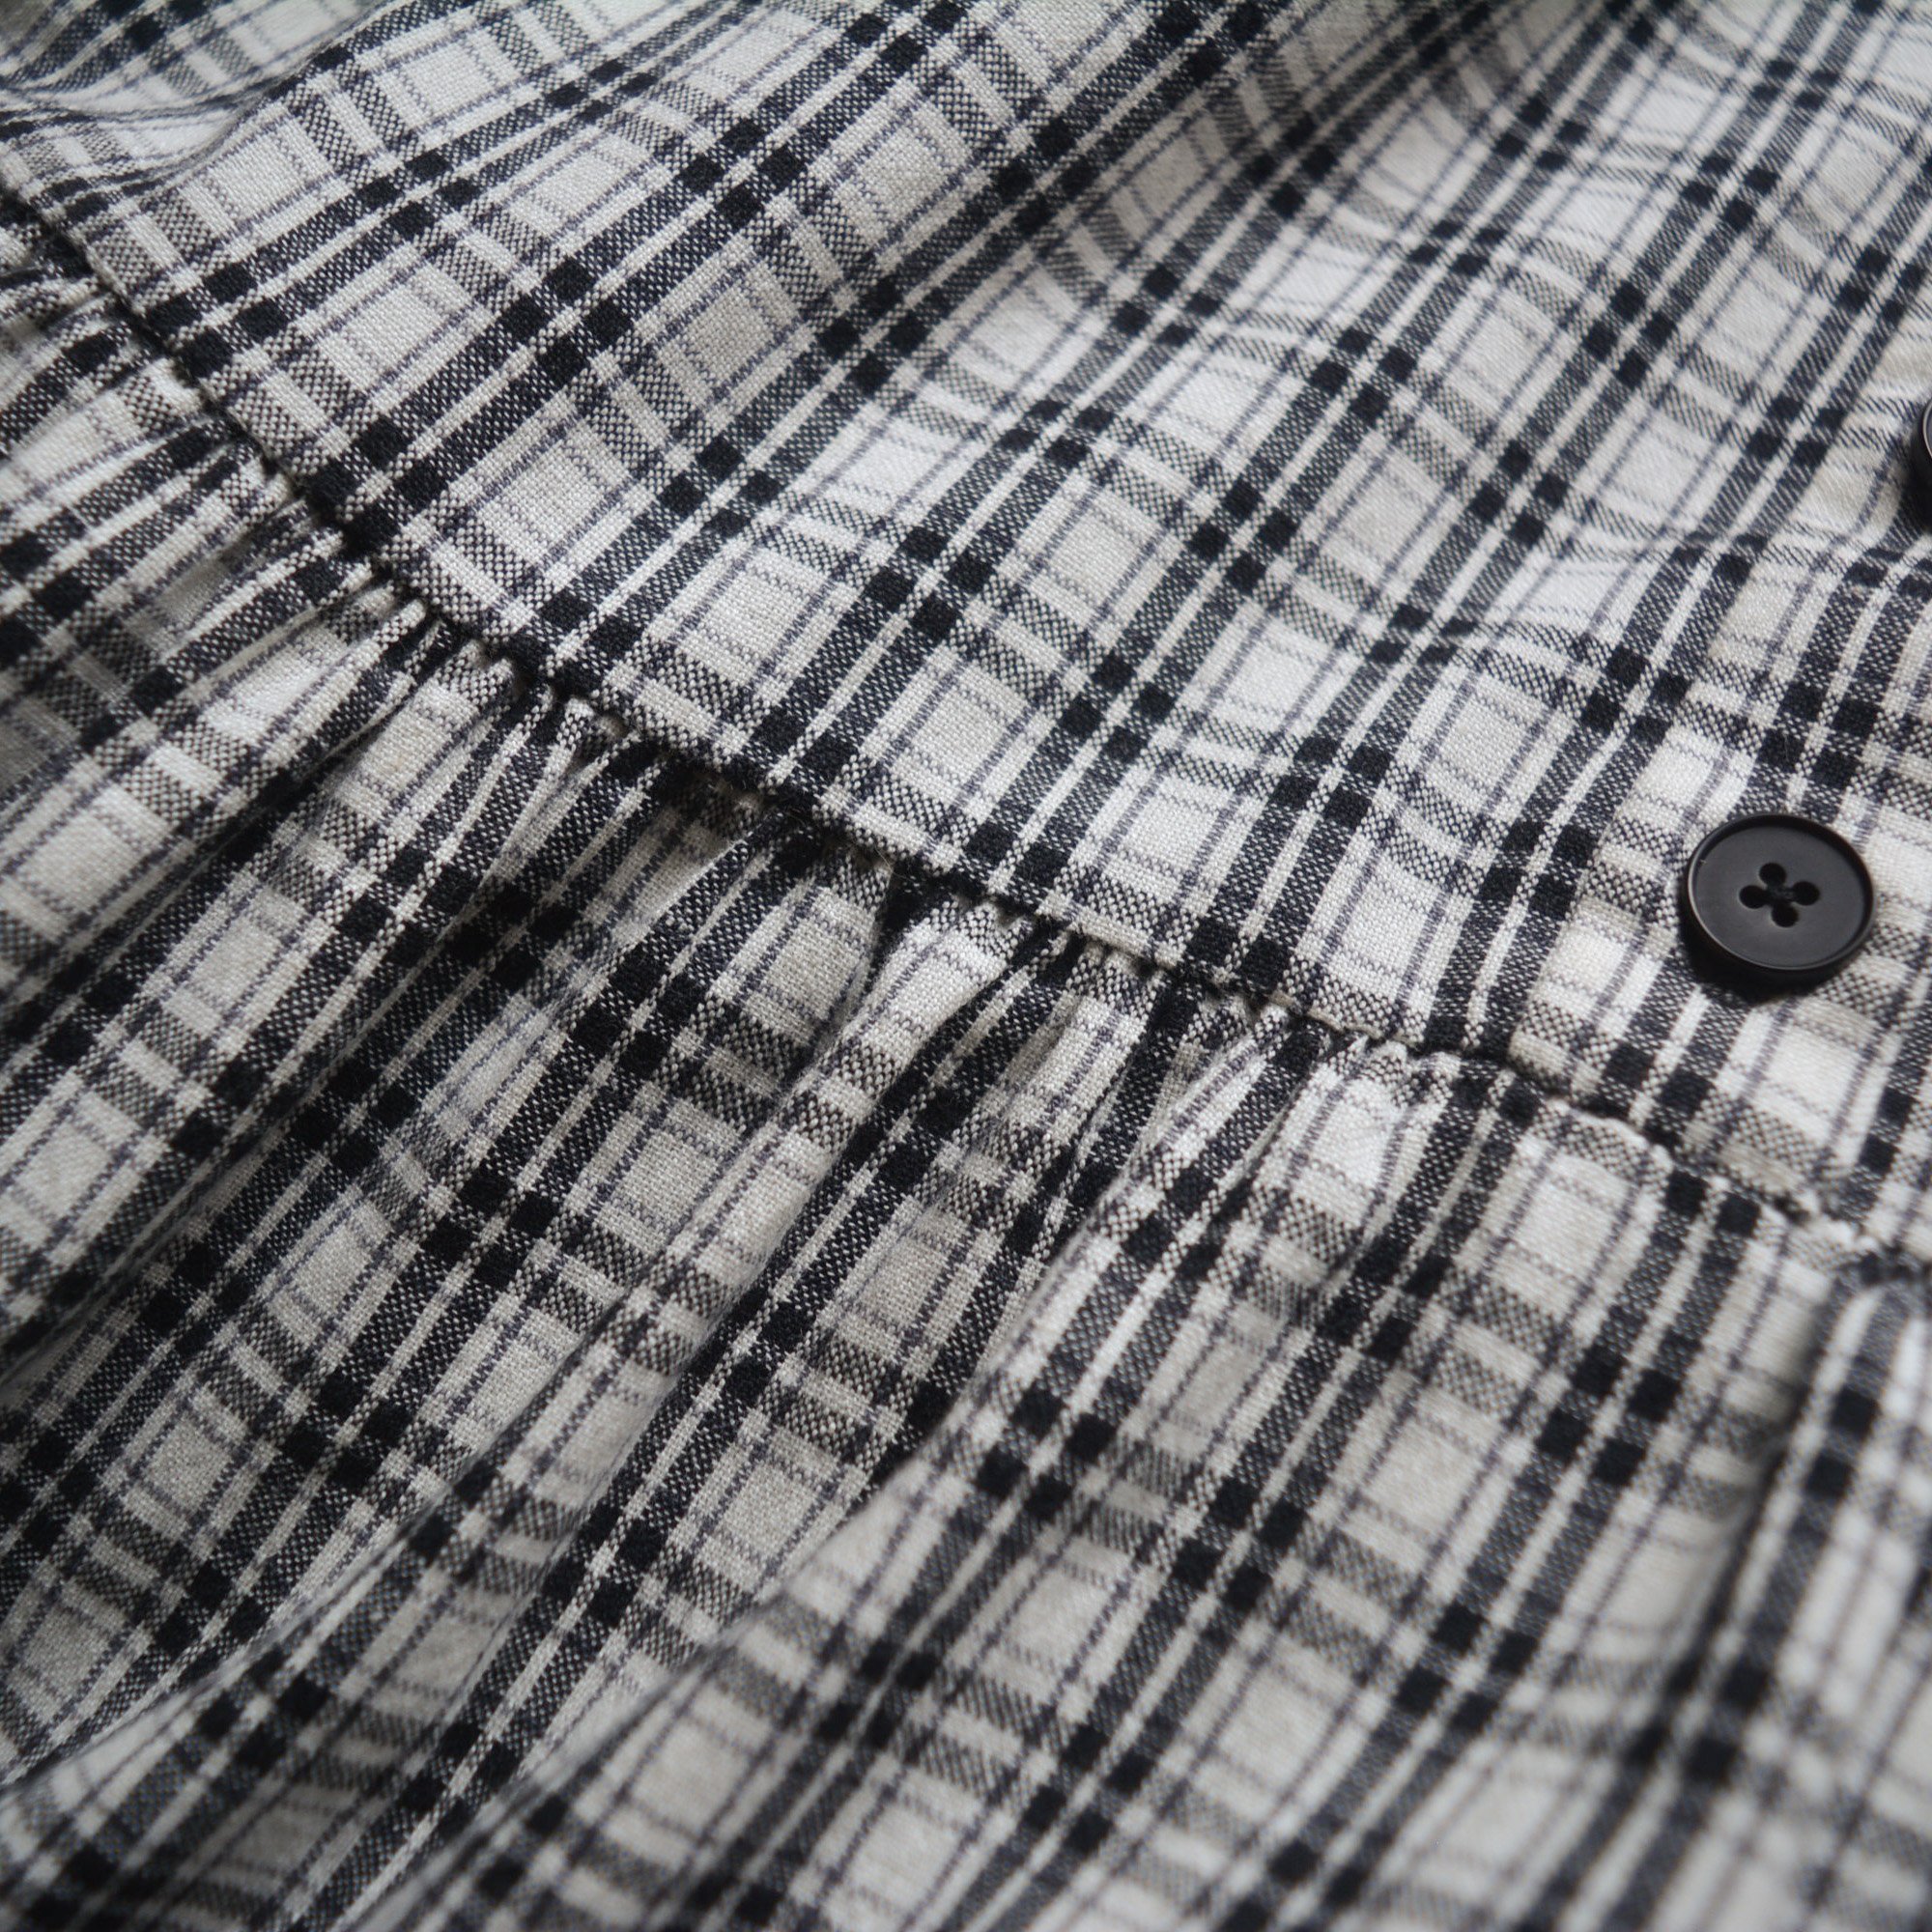
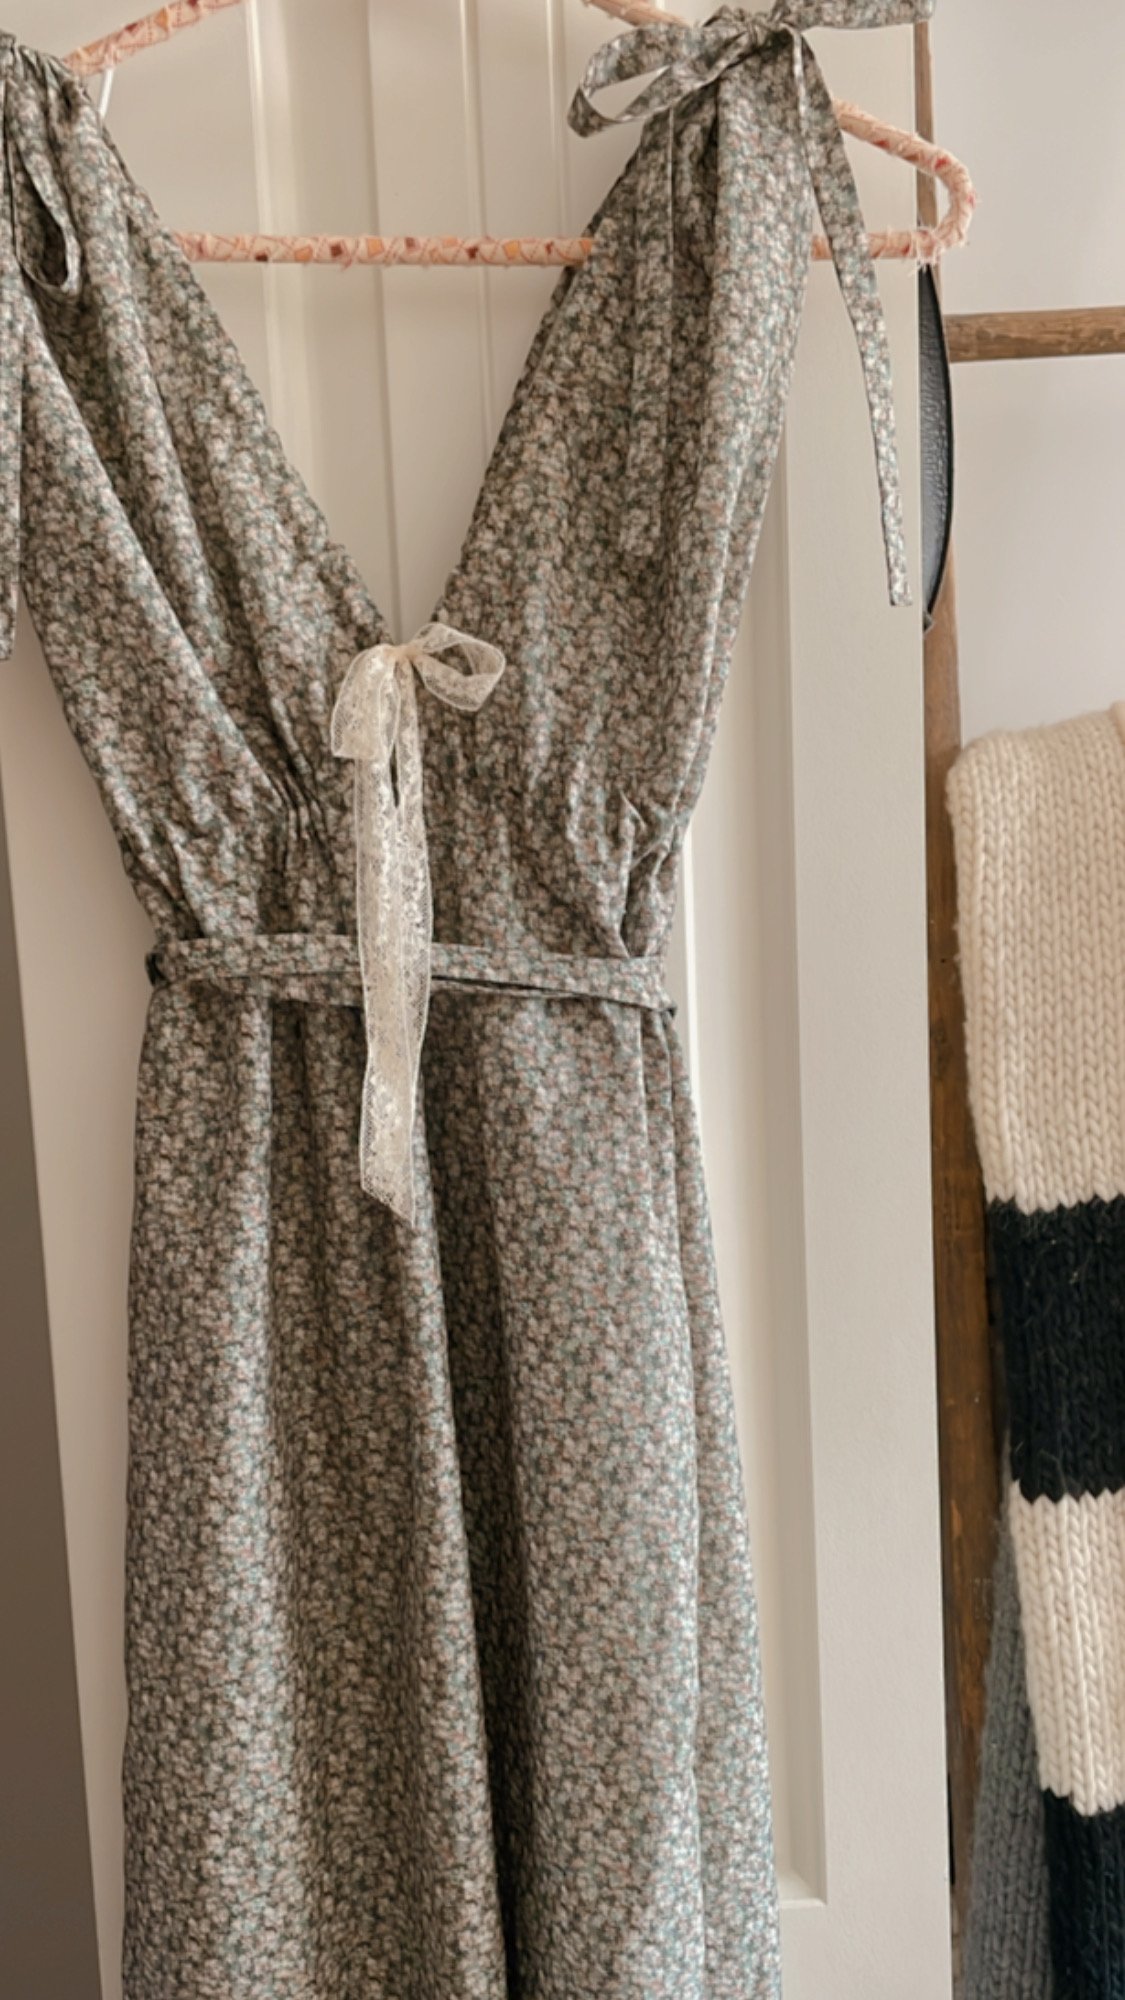
I just finished my winter black and white plaid Hinterland Dress. It’s machine sewn and hand finished, so it ended up taking me a couple months to make, although a large part of why is that I really slow down my crafting come winter, we will call it a form of hibernation! I do a lot more relaxing and I work at a slower pace. I also took a little break from it around Christmas to make a couple new ornaments for the tree. But with it being finished around half way through January that still gives me lots of time to wear it while the weather is still cold.

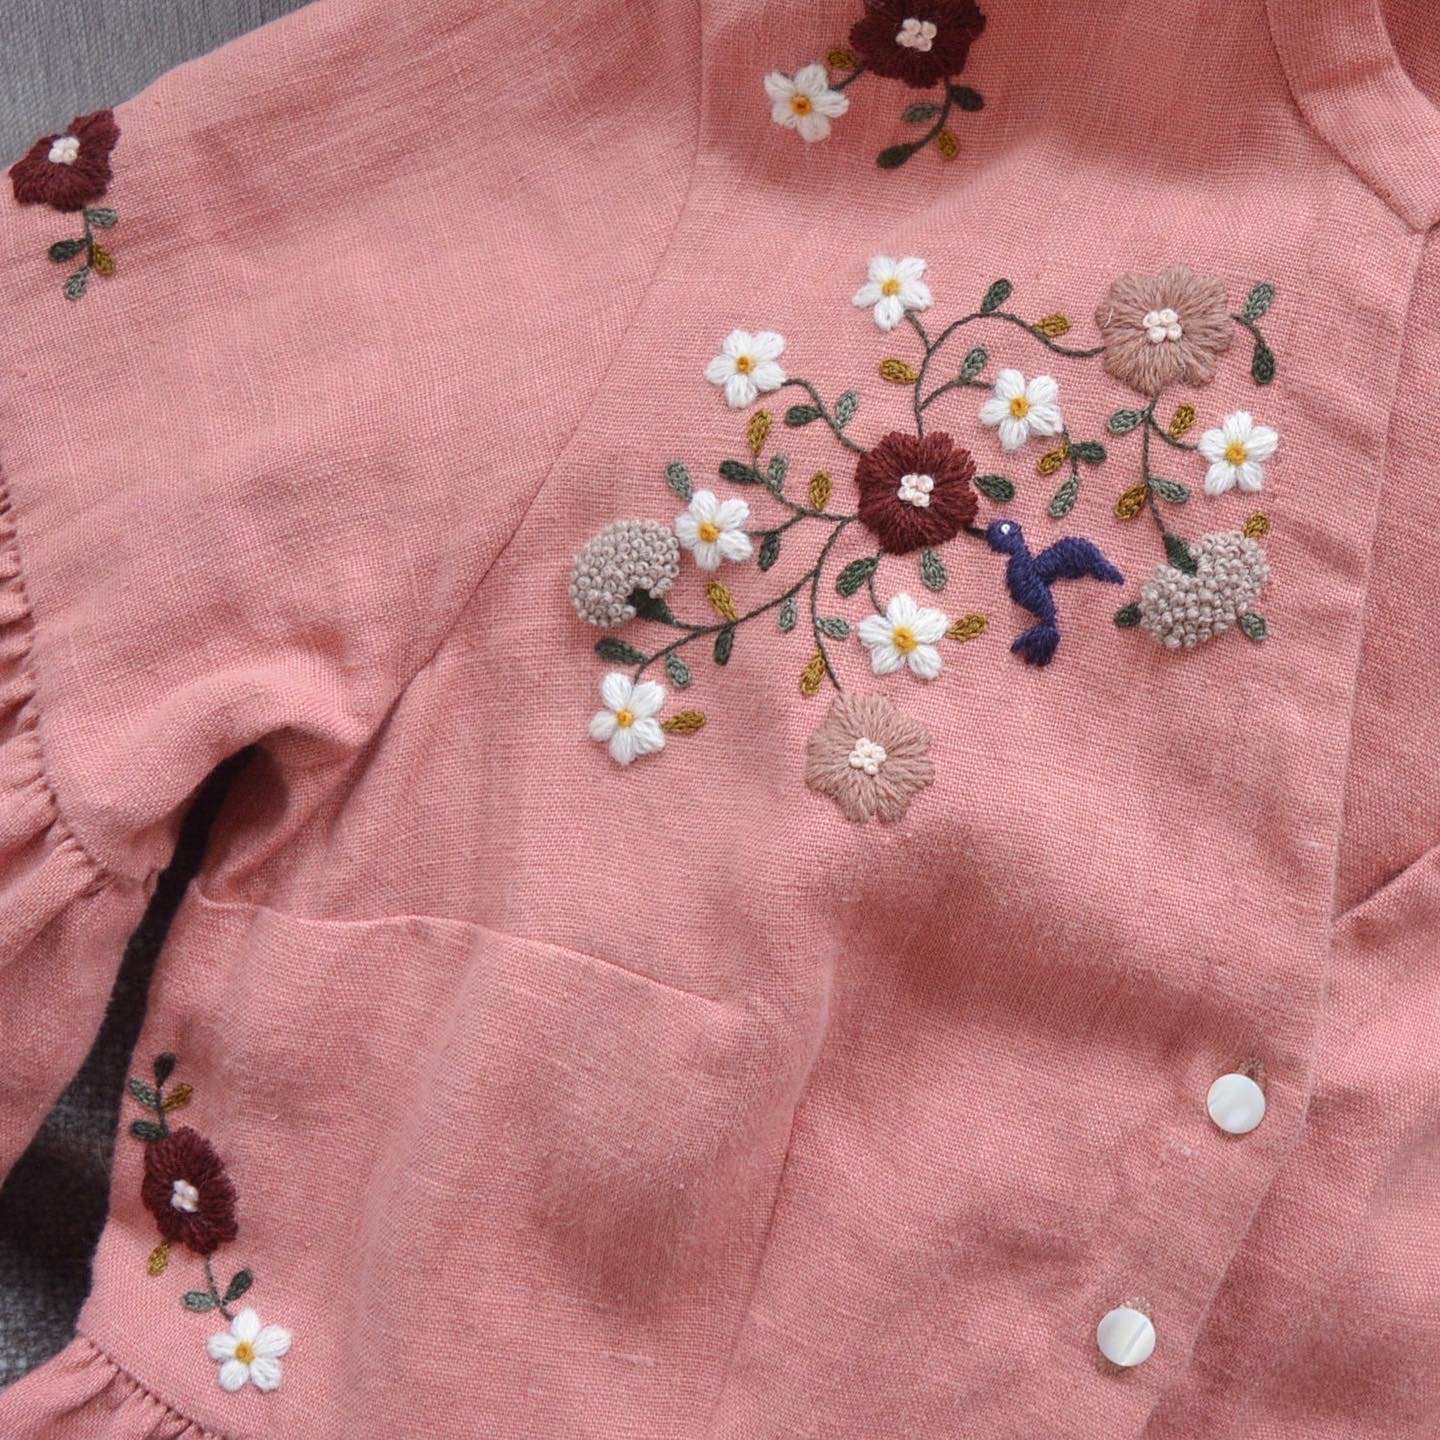
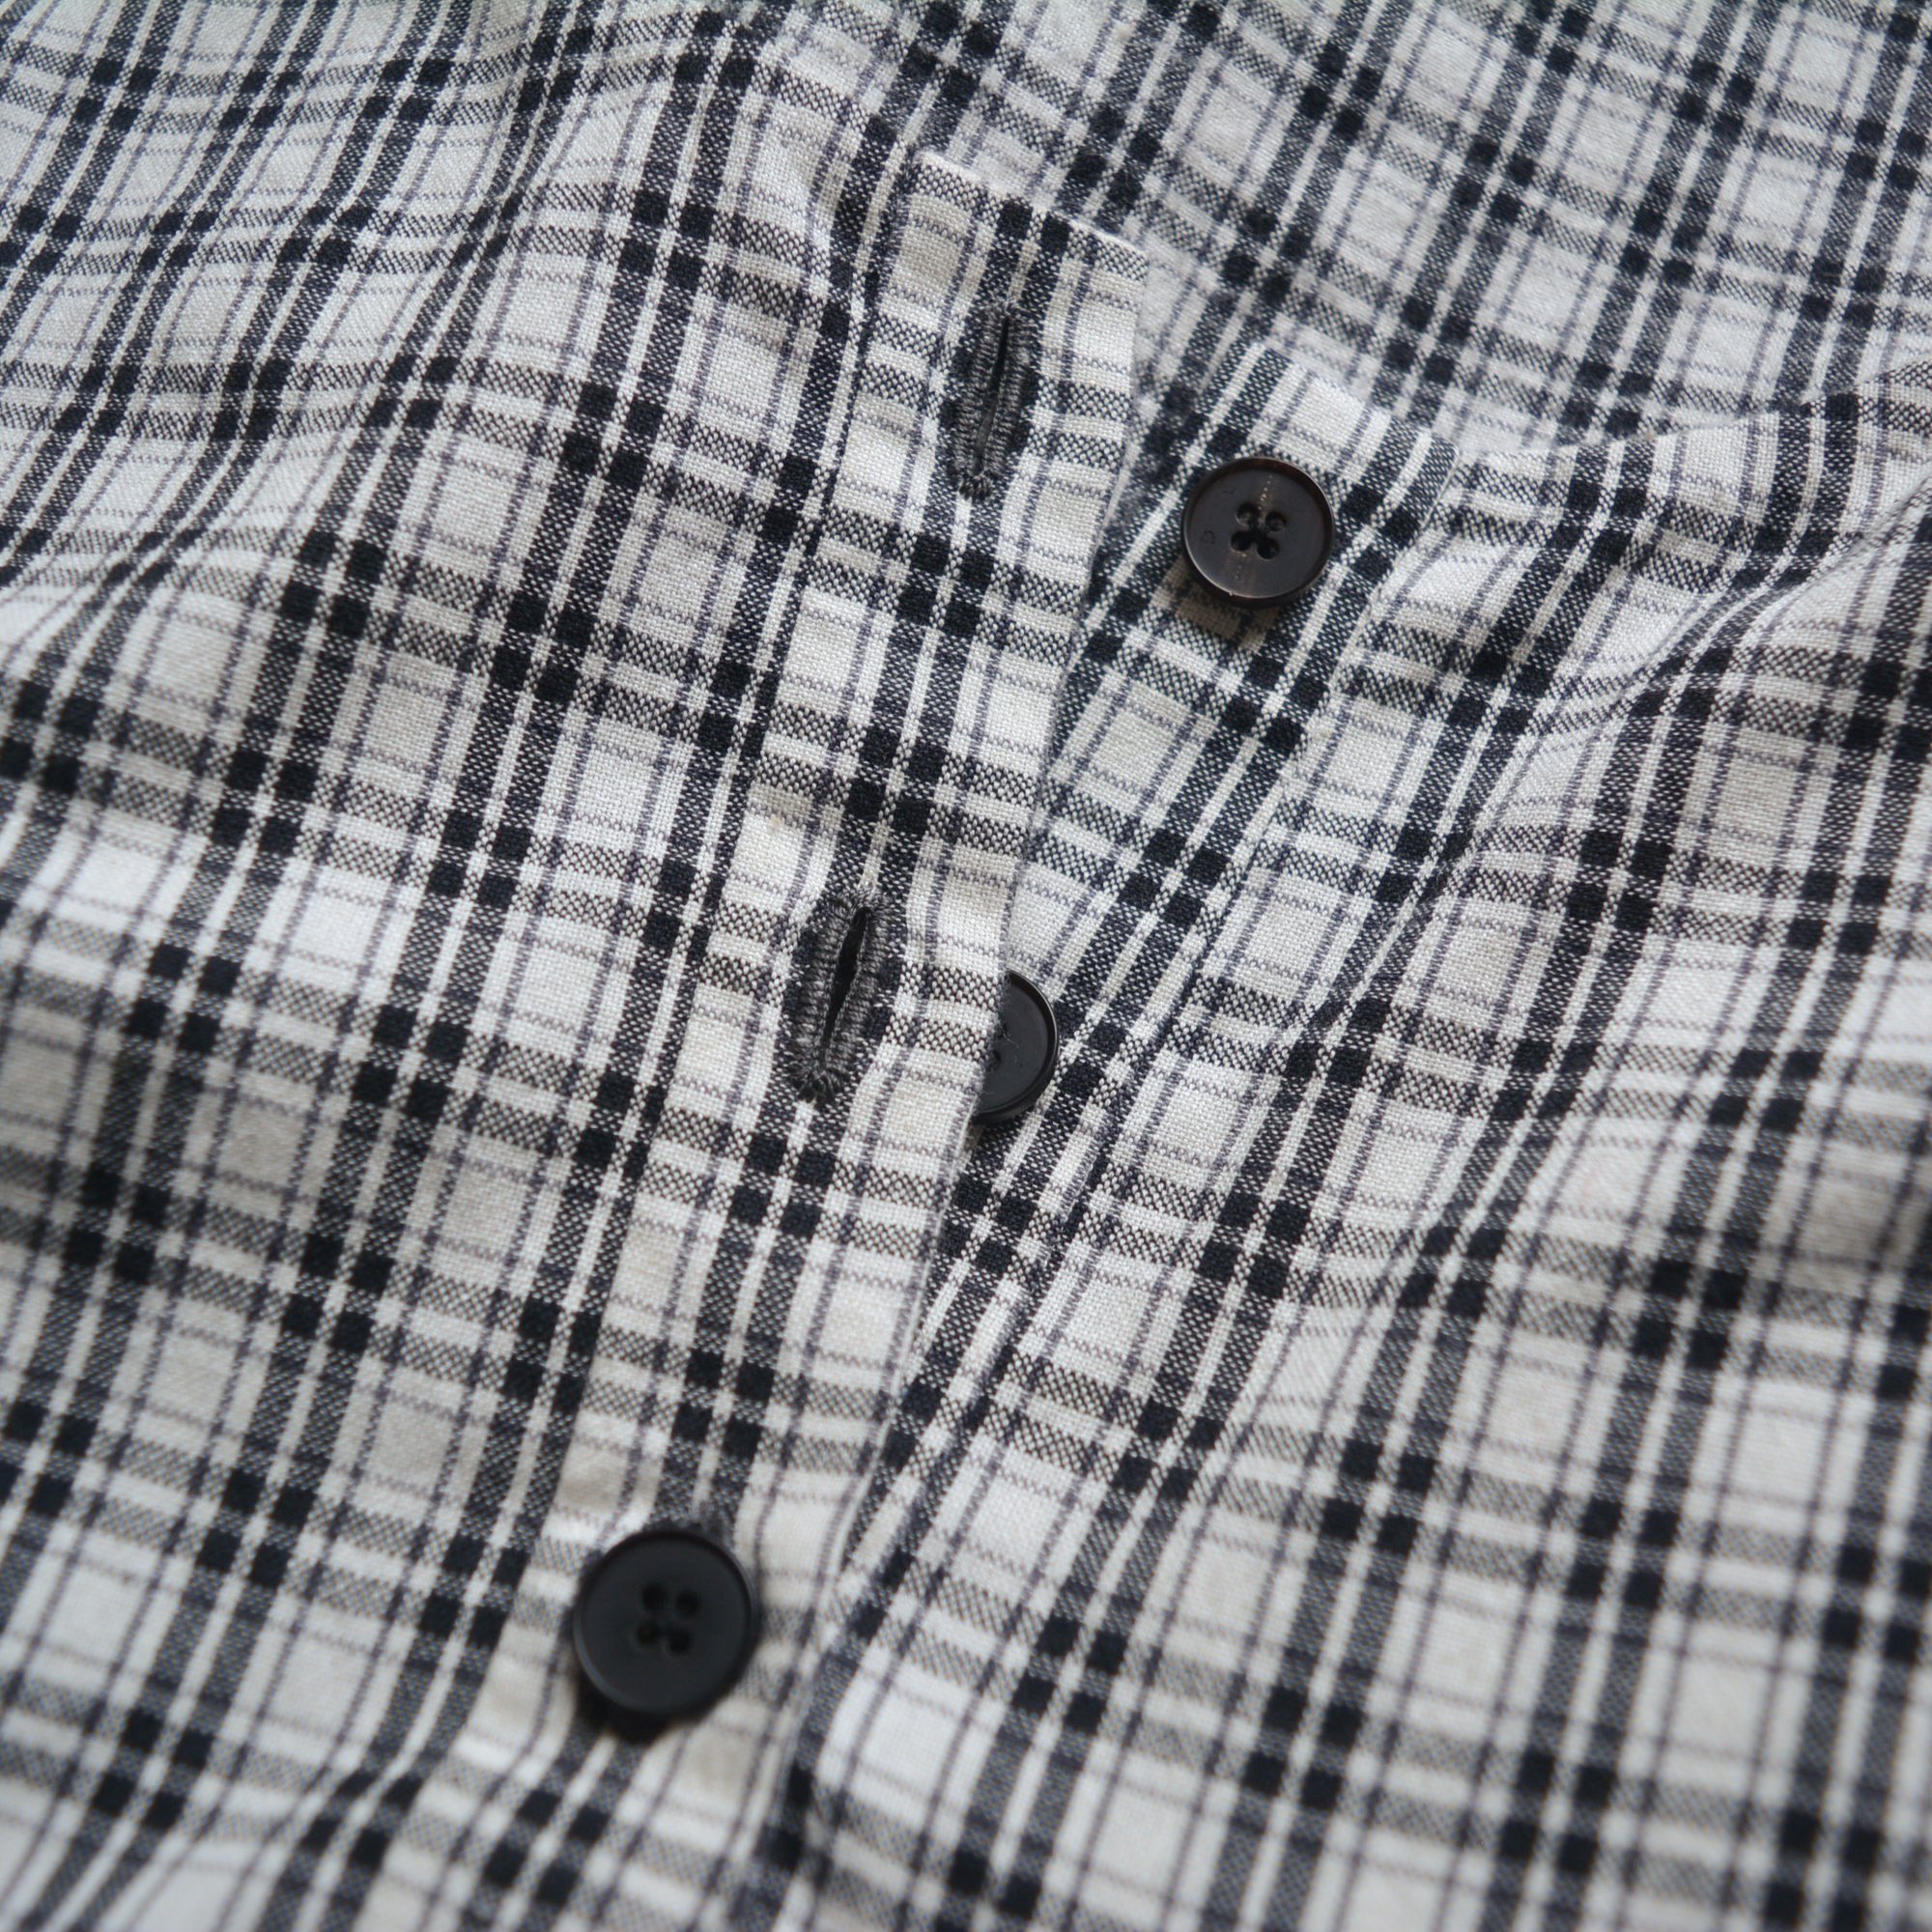
The fabric is a light to medium weight cotton plaid, with one side being a brushed cotton so the inside feels like a soft pair of pyjamas. I bought it at one of the fabric stores here in Vancouver, Dressew. It’s called Urban Homestead Gatherings Woven Plaid for Moda, and it looks like right now Dressew still has some available so I will link to that below. I chose some simple black horn buttons, and overall kept this one pretty simple as I didn’t really think embroidery would look good on top of the busy plaid print.

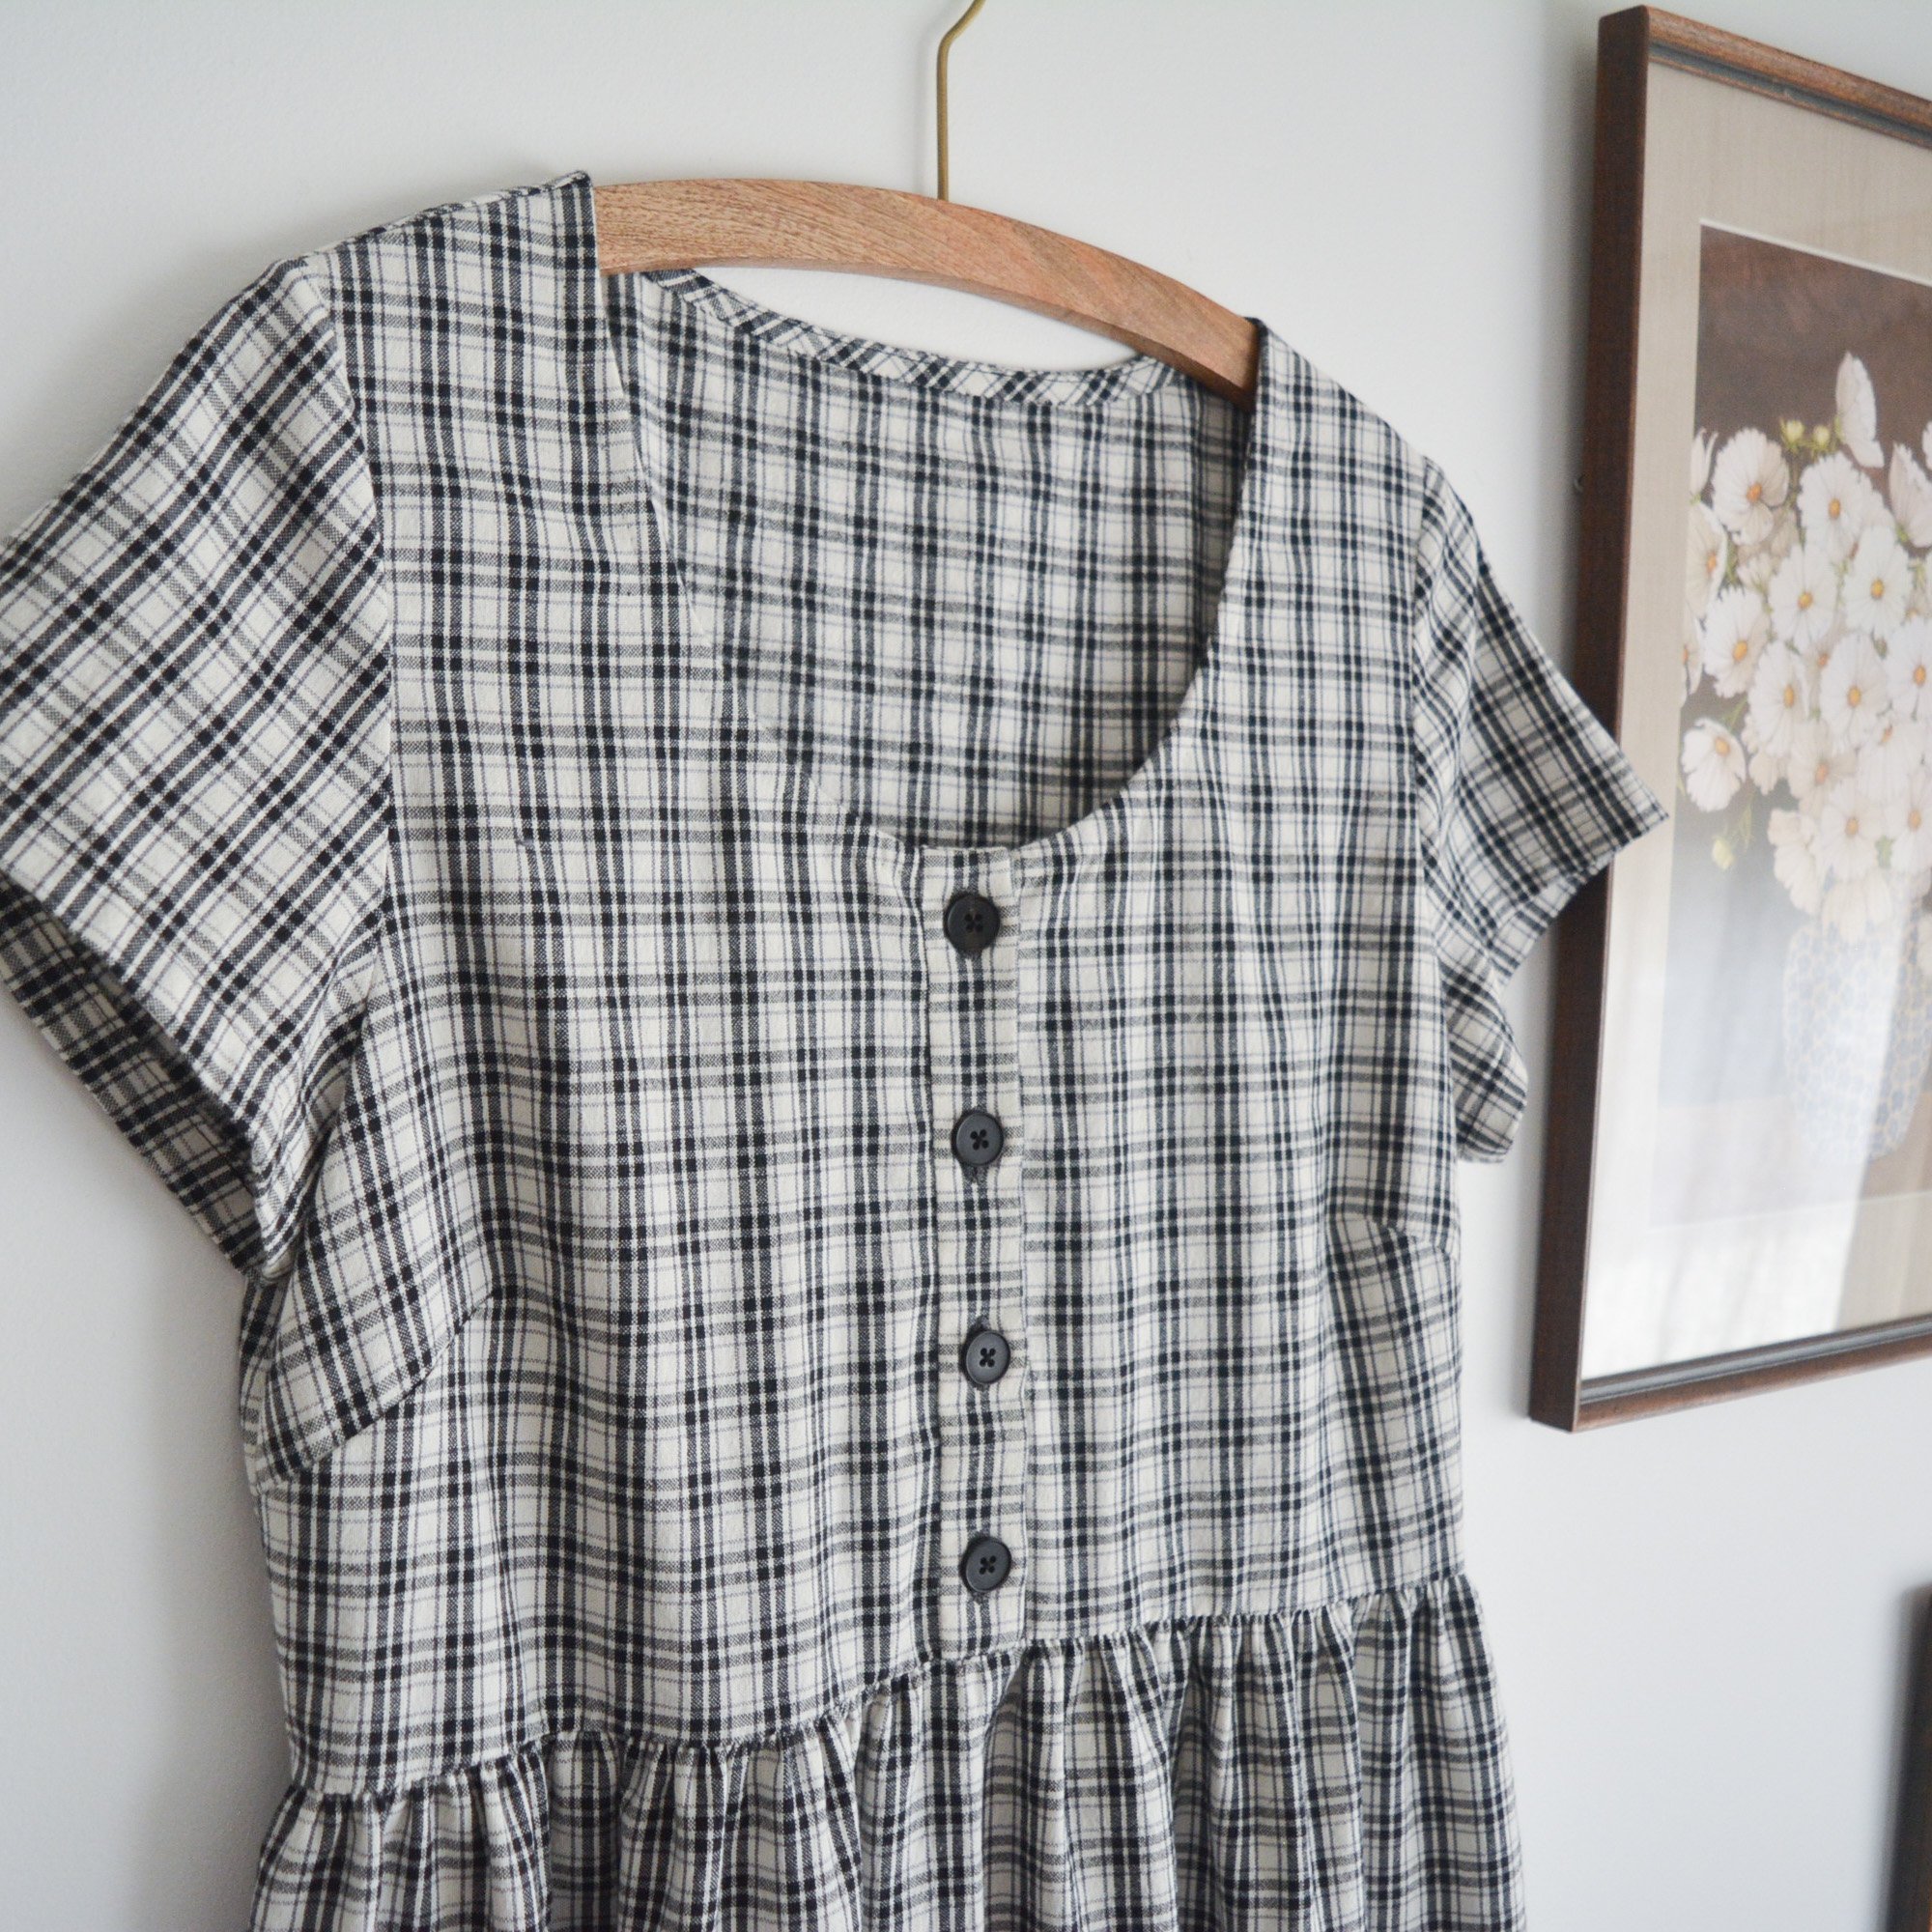
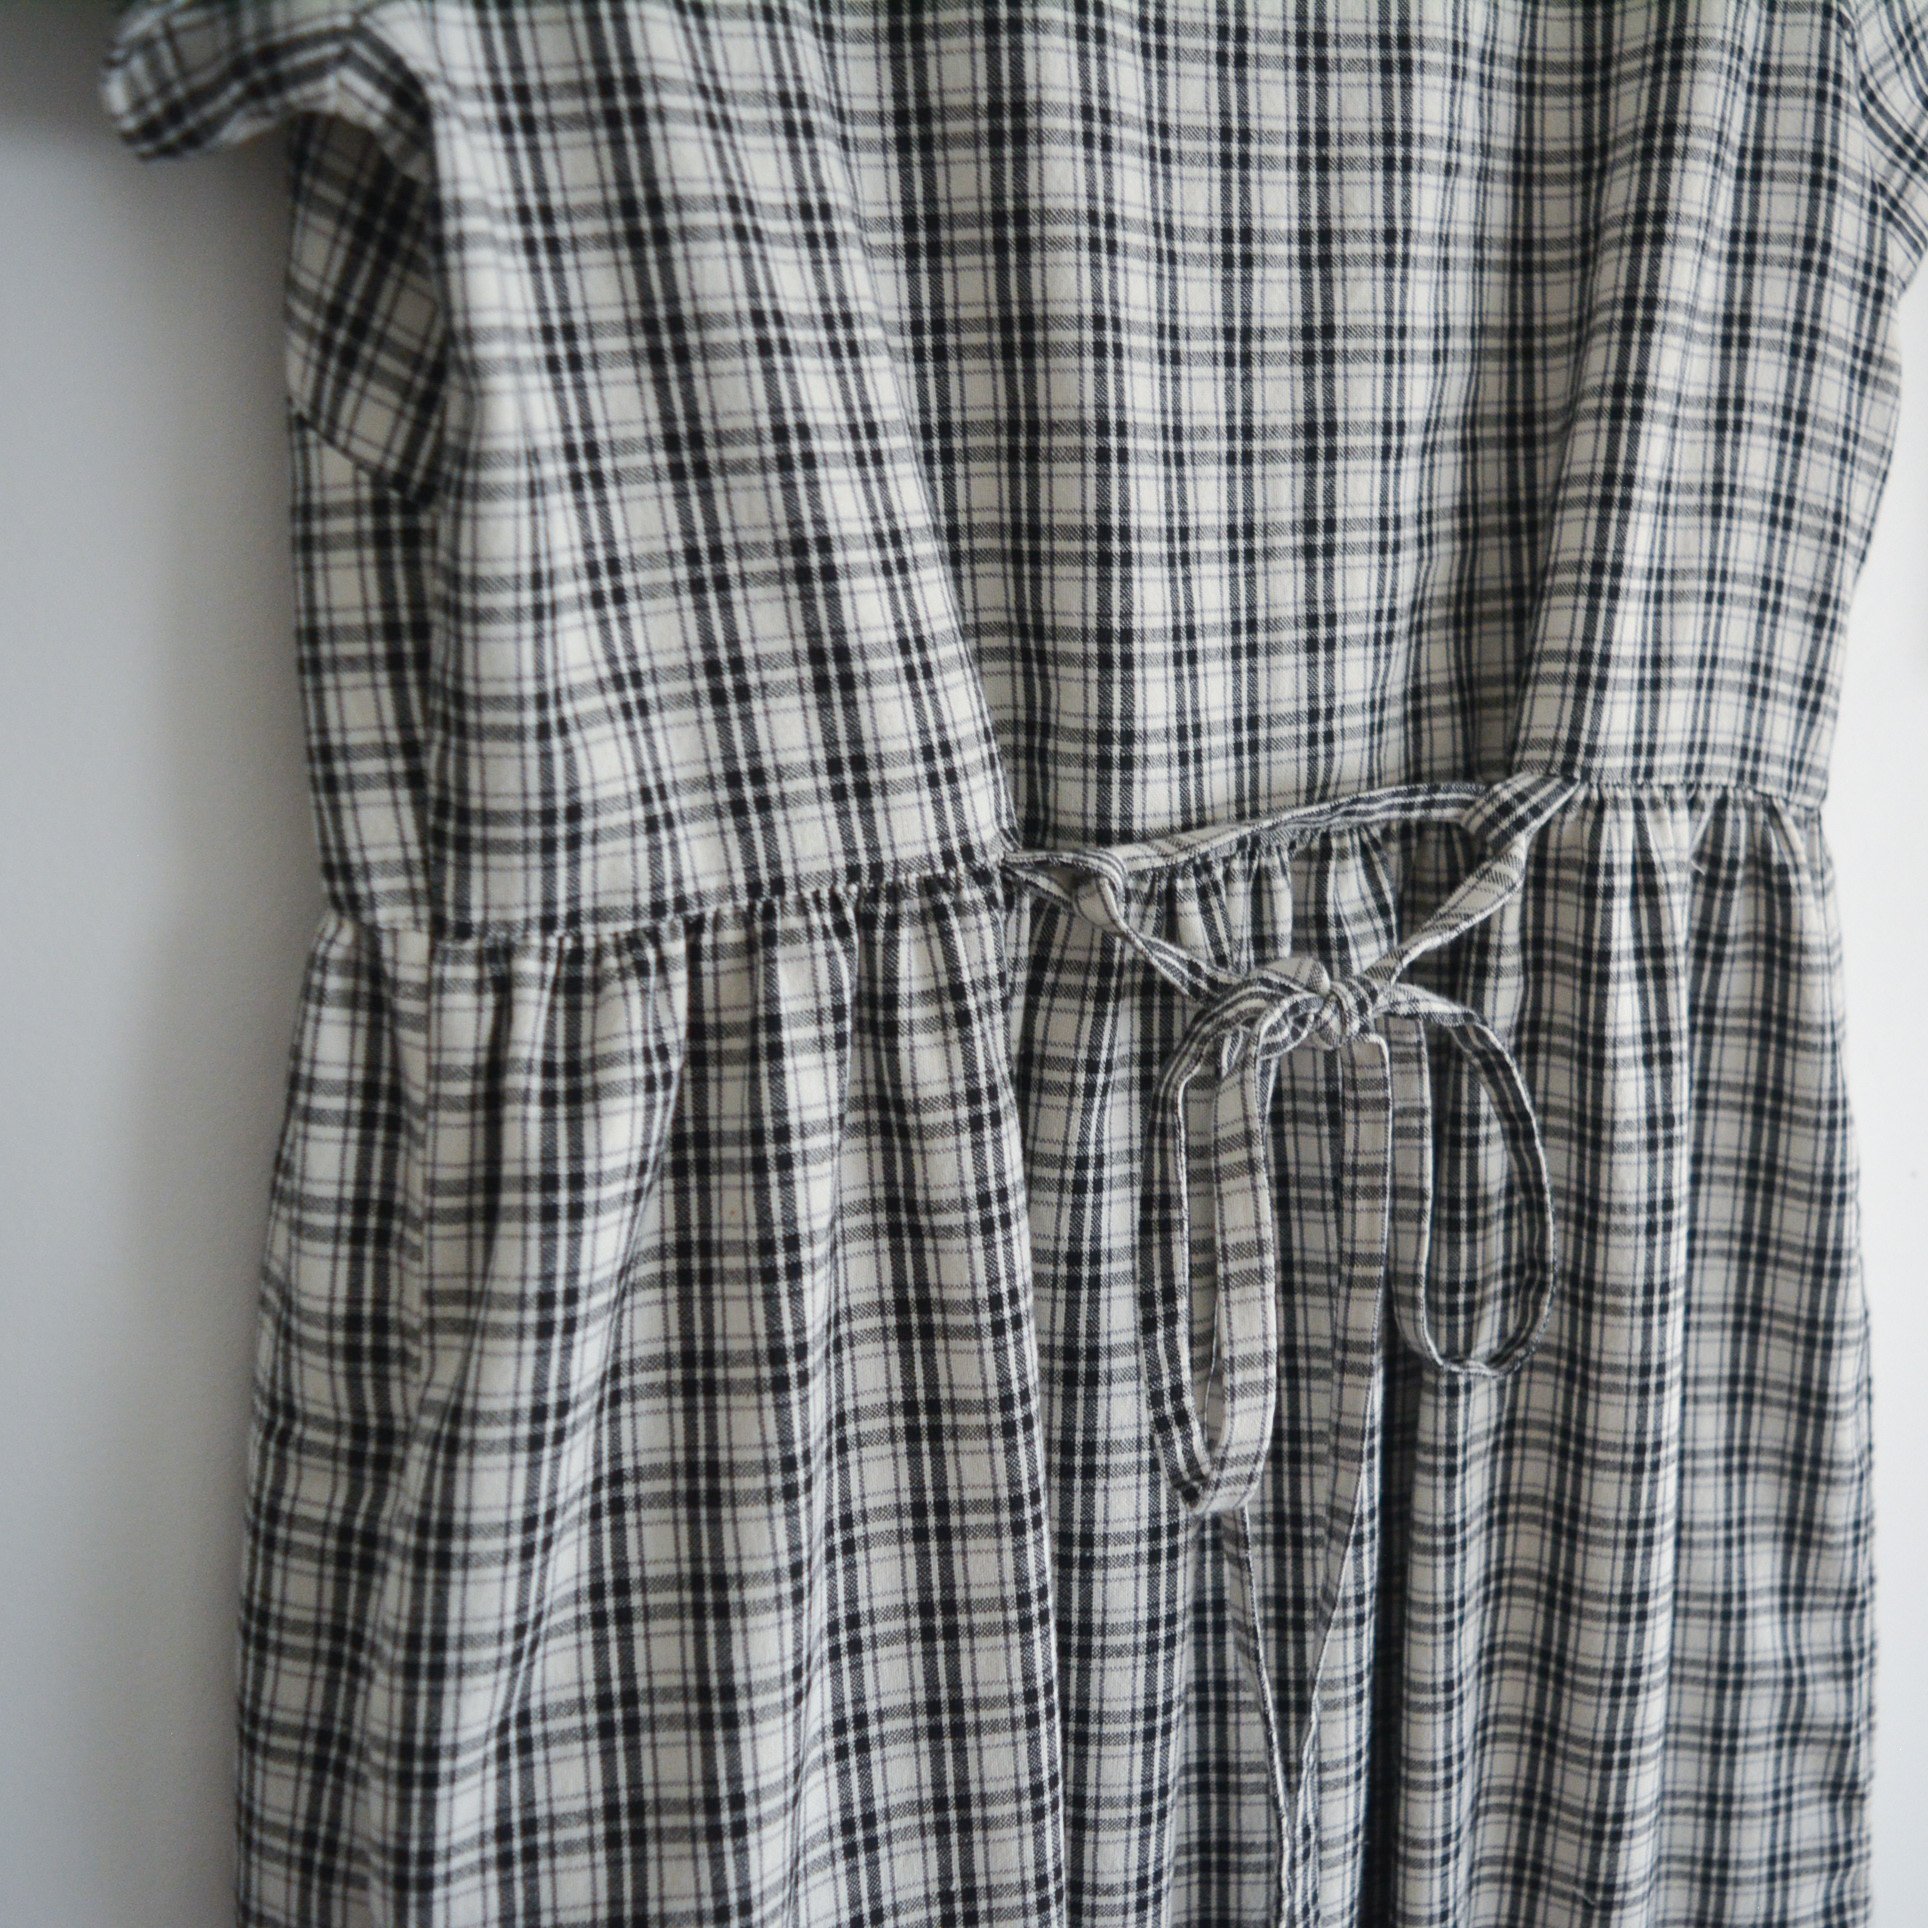
I didn’t change much about the pattern, just a couple elements from the machine method to the hand-sewing method (gathers, buttonholes, neckline binding, and the hem). I also changed the placement of the waist tie to be closer to the centre back. I have a couple dresses that use the waist tie method that the pattern uses (sewing the waist ties directly into the dresses side seams), and I find it pulls on those seams in an unflattering way. Also when you wash the dress with those long ties they can get tangled up with your other laundry. So adding some tie loops that you can thread a long waist tie through solves the laundry issue, and moving those tie loops in a little solves the pulling at the side seams.

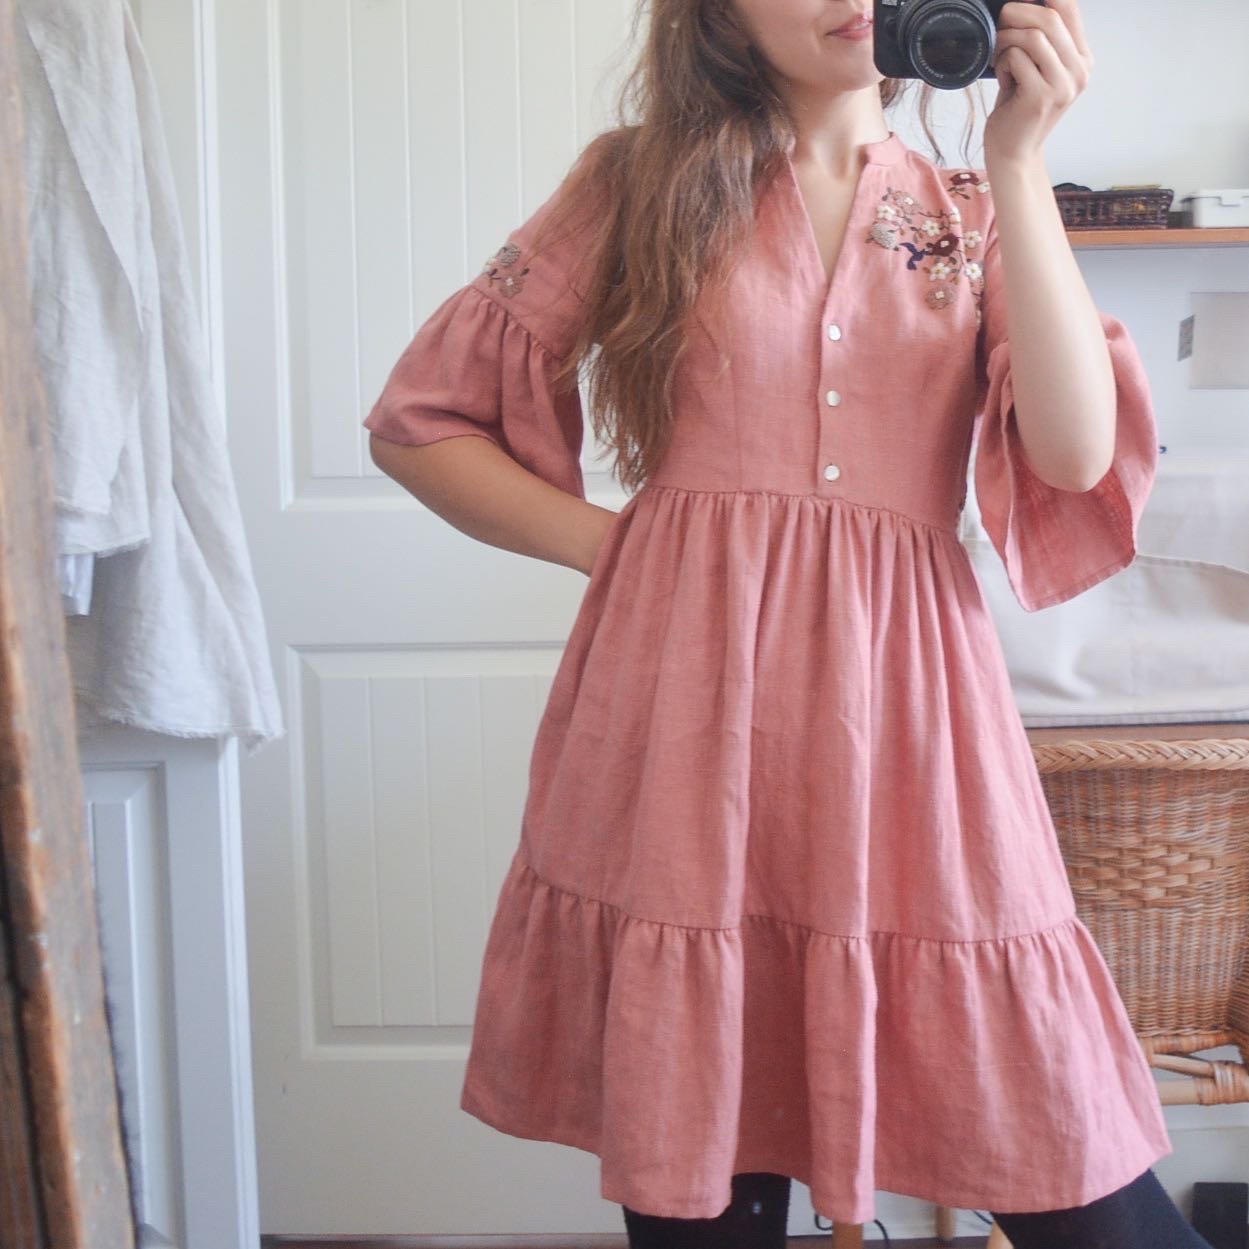
Sizing wise I went with a size 6 on top and a size 10 for the skirt which worked perfectly for my pear-shaped body. I also added 4 inches to the length of the dresses skirt piece. I absolutely love this pattern and all the different variations it includes and I’m excited to make a linen one next for summer.

Plaid Hinterland Dress

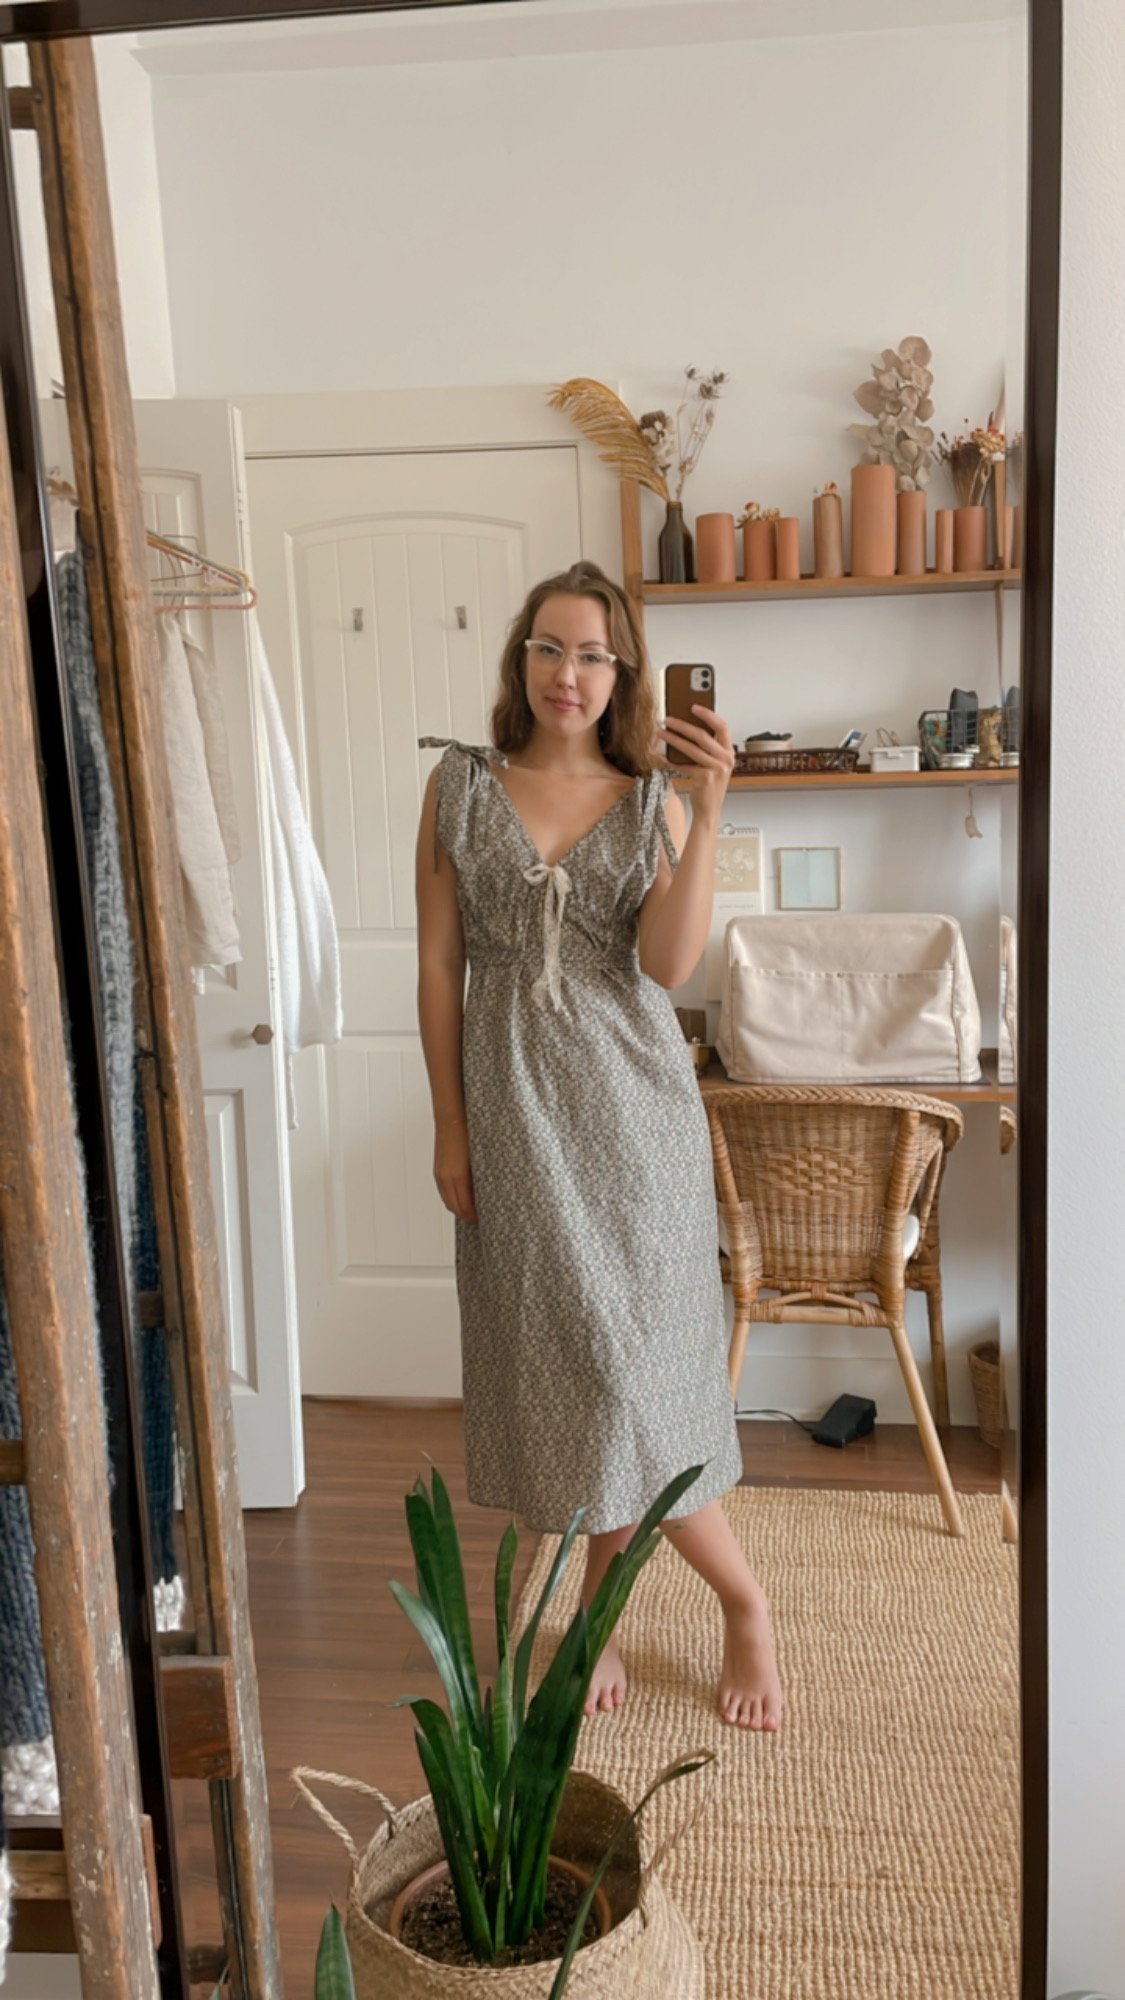
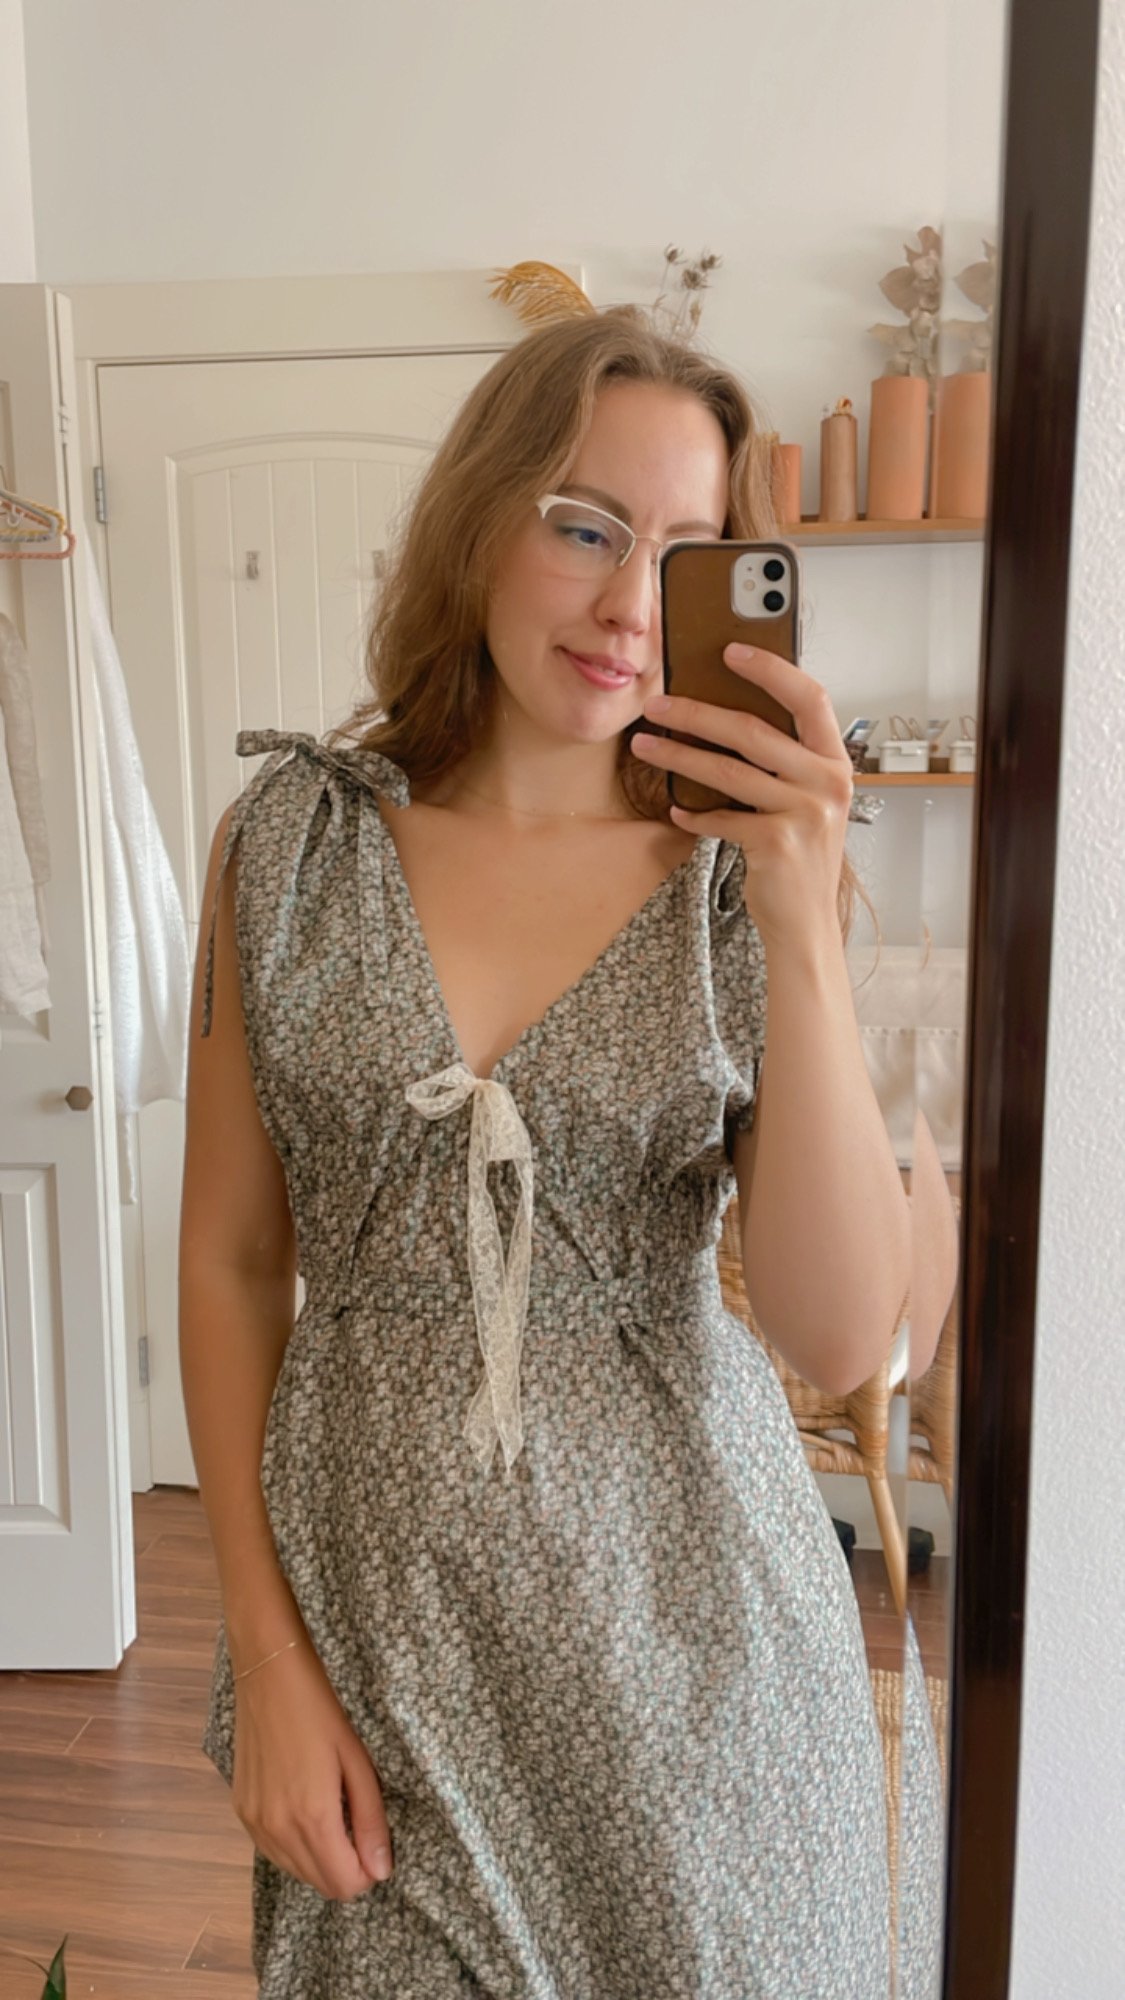
And this photo above pretty much shows how I’ve been styling the Hinterland Dress! With warm wool tights and my favourite vintage boots. I add a wool sweater and a winter coat before I head out and I am very warm all day!

Some links you might find helpful:

Using Liberty Tana Lawn to Sew a Vintage Dress Pattern

This is a quick make from a vintage pattern that has been in my stash for a couple years. I wanted something quick before I get into another long haul embroidery project, and this one seemed like a perfect quick sew. Not entirely sure if it is supposed to be a nightie or a dress pattern, and I was a little worried it would just end up looking like a potato sack tied up with ribbon, but in the end I am very happy with this. It is made from a vintage Anne Adams pattern that I found on Etsy. I made the ties out of the same fabric as the dress and then added a bow at the neckline to cinch it in for better coverage (it was gaping a little without this, as the neckline is cut on the bias). I used lace for the neckline tie and bow and even though it makes this lean more towards looking like pyjamas I still love the look! Lace gives such a romantic look. The fabric I used is a Tana Lawn from Liberty and the lace is from Fine French Laces. I haven’t really felt inspired to start making winter clothes yet, so I think I am just going to carry on with summer dresses and admire them in my closet until next summer comes.

The side seams are just straight french seams, and then pretty much everything else is just finished with a narrow hem. I chose to hand sew all the narrow hems and then I also hand stitched the casing for the lace bow around the neckline. The fabric is Liberty of London Tana Lawn, which is a very lightweight but still crisp cotton fabric, I used the Sufyan pattern in green. You can get the fabric here: Liberty London

The lace I used for the neckline is one I ordered online from a shop called Fine French Laces (www.cottonlace.com) and I think it suits the dress perfectly. I can’t seem to find the exact lace I used on the website but it was an ecru coloured lace under their rare lace category, and it is about 2 cm thick. They have lot’s of similar ones currently available though!

And of course the pattern is vintage so I don’t have an exact link to where you can buy it, but my favourite place to look for vintage sewing patterns is Etsy.

Wedding Dress Part 1: Planning, Mock-up, and Embroidery Samples

Sewing a wedding dress seems like it ought to be the culmination of my sewing career, although I do hope that’s not the case, I hope there’s some more fantastic projects in my future. The wedding dress just feels different because, when will I have a chance to wear something like this again? This is a big one, and it might be my most exciting make for the next little while.

There are a lot of reasons why I’m approaching this in a very thought-out and well-planned way. Mainly because that’s just me, I don’t tend to ‘wing it’. But also: because I don’t really feel confident sewing with such delicate (and expensive!) fabric, I’ve never actually made a full-length dress, and I really want this one to fit me well. For everyday wear I think a more casual fit is nice, but for my wedding dress? I want this one to fit me like a glove, perfectly tailored. So I’ve actually spent about a month now doing the set-up for this dress. I found a sewing pattern that I fell in love with, the Lune Dress from French Poetry. And you can probably tell from all my recent makes that I need to incorporate embroidery into this, so I decided to do a sheer embroidered overlay or overdress. A vision of this was starting to form in my head.

So a couple things to work out. Will this pattern sew up like I’m imagining? What fabrics am I going to use for the dress, and for the sheer overlay? And lastly, what am I going to embroider on it?

I started with a mock-up or a test run of the Lune Dress pattern. I sewed the mock-up in a lightweight cotton with a tulle overlay, because I already had the cotton in my stash and the tulle cost only a couple dollars a meter. The tulle actually was in the running for the final fabric, but more on that later. The pattern is just incredible, it was so easy to sew up, and not only are the instructions great but there is also a ‘sew-along’ video for it on the French Poetry website. I did have to make a couple changes to make the overlay work, and it was really helpful just to practice all the steps and make my own notes on what helped me. I feel really confident sewing the final dress now that I’ve already gone through the steps once. The fit was pretty good too. I forgot  to take a picture of the ‘before’ fit but basically I just had to take out the waist a little at the side seams, shorten the shoulders, make the dress longer, and then tweak a small fit issue at the centre front.  

As for my fabric choices, I chose an off-white silk charmeuse as the underdress. A silk habotai light weight (8mm) silk for the dress lining. And for the overdress I was torn between the tulle I used on the mock-up and a silk organza. I love how sheer the tulle is, but I honestly struggled a bit working with it on the mock-up. It was so slippery and so hard to see what I was cutting, and the one I was using was very weak! It even ripped a little when I was trying on the mock-up, which really wouldn’t work for hugging and dancing and just the general merriment one does on their wedding day. So I started considering a silk organza I had in my stash. It seemed like it might be too stiff, it just didn’t have the same drape as the tulle, but it is such a beautiful fabric, and it is very strong too. So I decided to do an embroidery swatch on both fabrics. 

These swatches gave me the chance to practice the type of embroidery I want to do on the dress, and I got to see how each embroidered sheer fabric would look overtop the silk charmeuse. This process sold me on the silk organza, it was just so much more enjoyable to work with, and I was more excited when I held it in my hands. As for the drape, I spent some time googling silk organza dresses and wedding dresses, and I found lots of beautiful examples. I think as long as the fabric is cut the right way then it will drape in a nice feminine way. There are of course a lot of seamstresses who make very boxy garments with organza, but I don’t think with the pattern I’m using it will be boxy at all.

And my embroidery turned out exactly as I hoped. Lots of floral and botanical elements and then the beaded starbursts just make me so happy. It’s all enjoyable to stitch and not too time consuming (which is very important, considering this dress has a deadline!).

So that’s pretty much where I am now. I feel really confident to power ahead on the final dress. I am going to be hand stitching the entire thing because the thought of putting these fabrics anywhere near my machine just stresses me out. I’ve never had luck sewing fabrics like this and I would just much rather turn on some music and stitch away by hand. In fact I’ve been following a couple hand sewing teachers lately and have really been preferring that process. I bought myself an instructional book called Hand Sewing Clothing: A Guide by Louisa Owen Sonstroem so that I would have as many tips and tricks before I really got started on this dress. So this week I will be working on thread tracing all my pattern pieces. This is essentially drawing the pattern pieces onto your fabric using basting stitches. I always do this anyways for embroidered panels but for this project I’m going to try it for all the pattern pieces. It will make for some very precise sewing. Then I need to plan all my embroidery pattern arrangements for each pattern piece, and then it’ll be onto the mammoth portion of this project: the embroidery! 

Supplies and resources I’m using so far:

100 Days of Stitching Birds

I just finished embroidering 100 birds onto a thrifted linen dress. Spread out over 100 days, this was my bird-a-day project. This project became a little more consuming than I anticipated, with each bird taking anywhere from 1-3 hours to stitch. You’d think doing this sort of practice each day might make me quicker, but I don’t think it did. Although I do think my decision making muscles have improved. In the beginning I would spend so much time deciding exactly where each bird should live, and next to whom, but in the last month I find I can decide what to work on each day in seconds. 

I found this linen shift dress at my local thrift store, and what a find! It’s really well made, the fabric is just perfect for embroidery, and it felt like a blank canvas just waiting to be decorated. I did of course have to do a little bit of work on the dress before I got started (I find that just about everything I thrift needs some love). I un-did the alterations that the previous owner had made to the dress (they took it in at the waist), and then I wore it a couple days to see what needed to be done. The buttons go all the way down the back of the dress, and I found when I walked they would pop open. This would not do! So I hand-stitched that seam closed so the buttons basically are just for looks now, which feels much more secure. I also shortened the dress an inch or two, replaced a couple missing buttons, and added a waist tie. I love adding waist ties to my thrift finds, it helps give me that hourglass shape without making any time-consuming and more permanent alterations to the clothes. Now that the dress was perfect for me in terms of structure, I could start to think about decoration.

The pattern book I used is a Japanese craft book I found on Etsy. I’ll link to the shop I ordered it from at the bottom of this post. I don’t read or speak Japanese, but the pictures are all I really need. And the odd time I needed a little more help I just used Google Translate, so handy!

I used my go-to thread (dmc cotton embroidery floss) and started stitching birds in no particular order. I do try to keep themed birds in roughly the same area on the dress. There is a scene of penguins hanging out near the hem and I just love how they look all together. But I try not to stress too much about getting them all in the perfect spot. I’m so happy with how it looks at this point, the birds are small enough that you can barely tell what they are unless you’re right next to me, which gives it a more delicate and whimsical feel. It’s not too flashy.

There are still a lot of empty spaces though! I could definitely see myself adding another 100 birds, maybe a sequel challenge for later in the year. For now I have an upcoming deadline for a very important project, my wedding dress! So I will take a step back from the birds for now, and see if I can whip up a wedding dress by April. Wish me luck!

Little Bird Embroidery: I bought my copy here

Botanical Embroidered Myosotis Dress

Just a quick post here to catalogue a make from last September, the Myosotis Dress from Deer and Doe Patterns. I’ll link to the supplies I used at the bottom of this post. I am so so happy with how this turned out (no mods were made to the pattern), it was made to be a fun party dress and that’s exactly what it feels like when I wear it. It is also nearly all hand finished, the inside is almost as beautiful as the outside. The gathers are even hand-sewn stroke gathers, which to me is a much more enjoyable process than machine sewn gathers, even though it does take longer. Enjoy these photos and then check out some of the linked resources!

Fabric: Laundered Linen in Vintage Rose colour from Maiwa

Pattern: Myosotis Dress from Deer and Doe Patterns

Embroidery Pattern: Embroidered Botanicals book by Yumiko Higuchi

Hand-sewn gathers: recently learned in a class from Sewn Stories

Wool thread: Crewel Wool Thread from Appleton’s Wool

Cotton thread: cotton 6-strand embroidery floss from dmc embroidery