Driftwood Weaving

At the beginning of the summer my family and I went camping at the campground we visit every year, and I spent a couple hours one day collecting treasures on the beach. There was a bunch of pieces of driftwood a couple meters back from the water, as well as a ton of pretty stones so I took a bunch home with me thinking about ways I could incorporate them into a craft. 

driftwood.jpg

A couple weeks ago I bought a starter loom at Value Village, which is a second hand store in Ontario if you’re unfamiliar. I wasn’t really sure what sorts of things I could make with a loom but it was a couple dollars and it was in the section with all the other fibre arts so of course I couldn’t help myself!

I’ve been seeing a lot of woven wall hangings on Pinterest lately so I thought it would be cool to follow one of those tutorials and use a piece of driftwood as the dowel to hold the hanging up. I ended up following a mixture of a couple tutorials. I chose to do simple stripes and I added on some fringe to the bottom which I cut into a pointed design. I found the whole process of weaving straightforward, the only problem was that the loom I picked up from the second hand store was broken! A couple of the screws had stripped the wood so I had to hold the two poles to keep my strings from falling off. I guess that’s what you get when you buy something used and you don’t check it properly!

weaving.jpg

All in all I’m really happy with how the wall hanging turned out. If I happen to see another inexpensive loom I’ll probably pick it up because I would love to do this again!

Learning to Crochet

My grandma taught me to knit when I was just a kid, but when I picked it up again in high school I didn’t adventure very far right away. I learned how to knit a simple scarf by one of my high school teachers, just row after row of knitting, and I didn’t think I had the skills for anything beyond that. I think I knit four scarves before I even learned how to purl, but once I started knitting things from patterns I realized I hadn’t given myself enough credit and I probably could have started knitting more complex things a lot sooner.

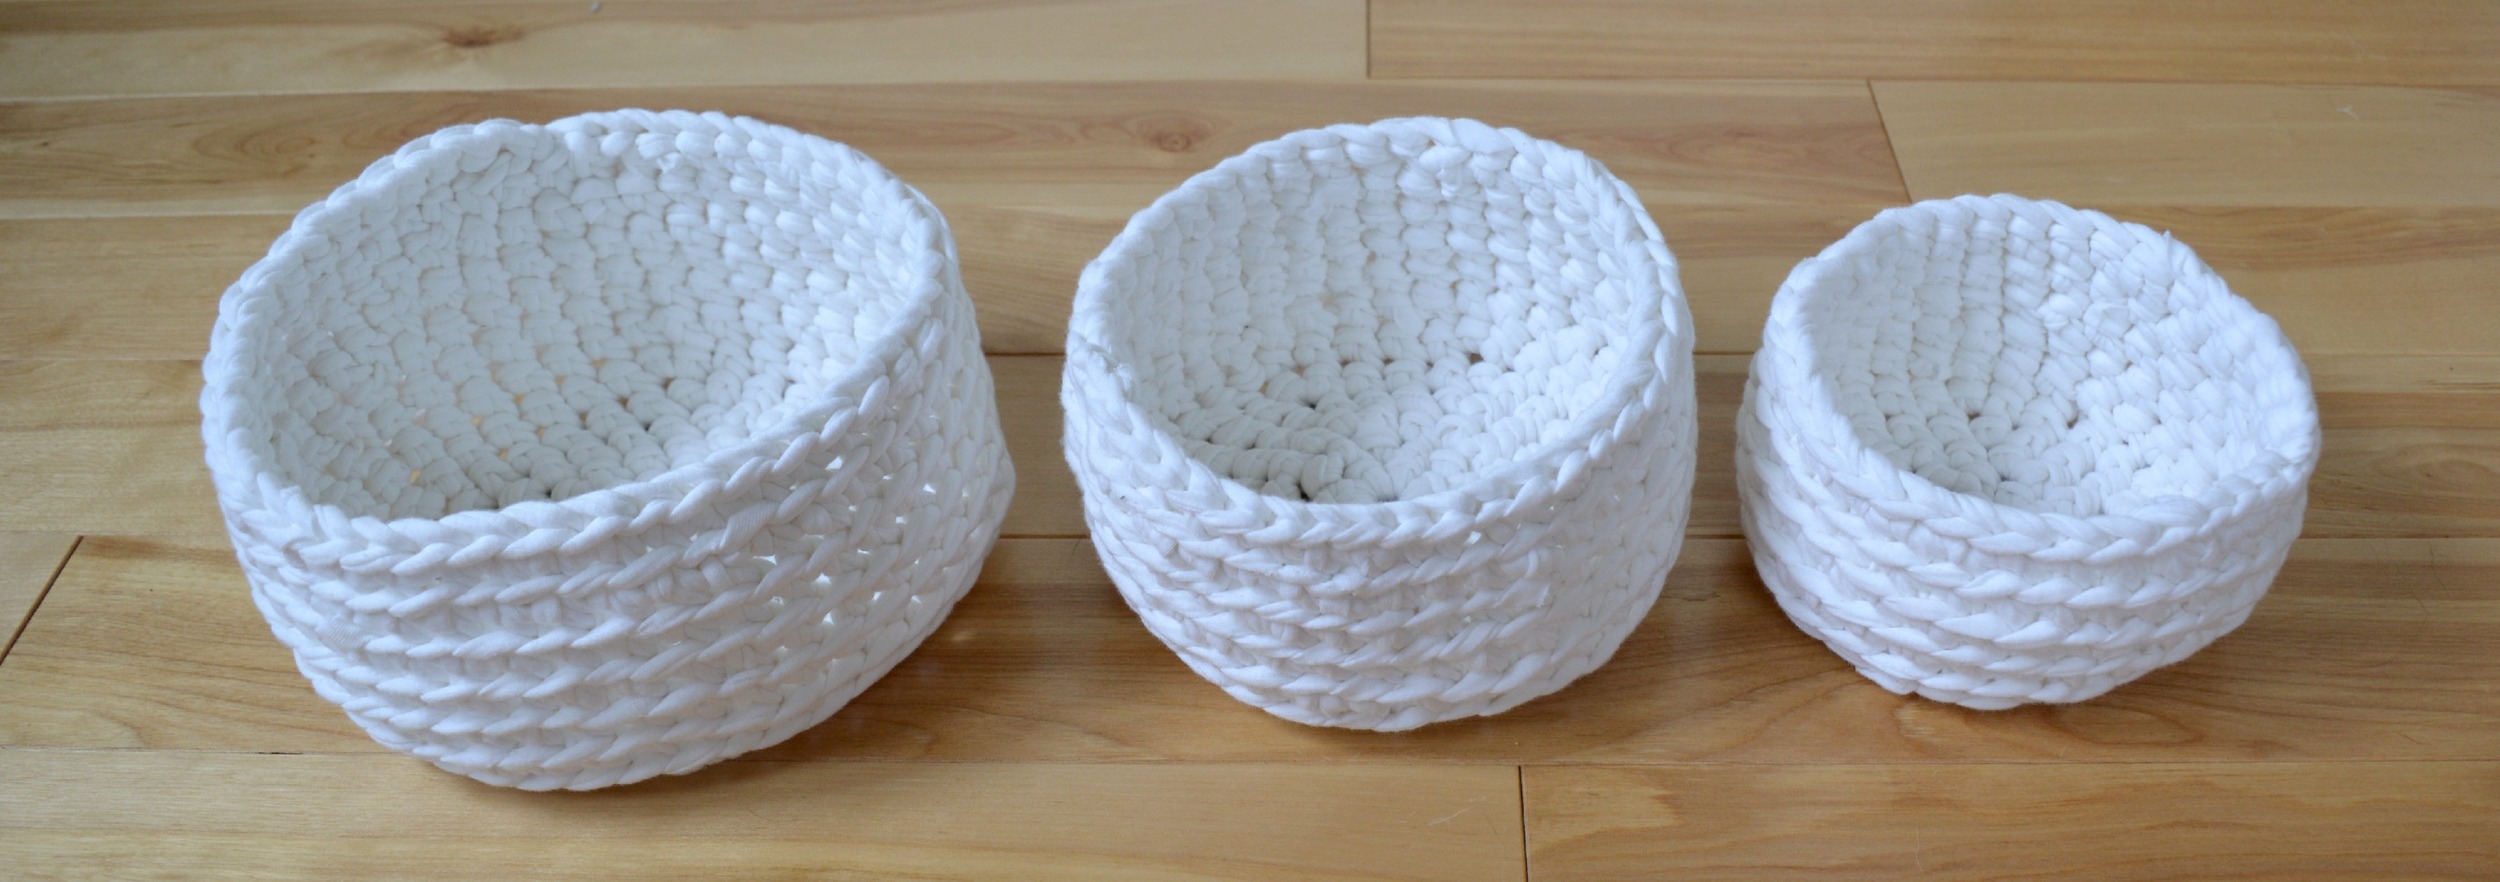
I’ve been wanting to learn how to crochet for a while now, so I decided that instead of spending a ton of time doing the basic stitches over and over again I would jump right into doing a pattern. Of course I needed to watch plenty of instructional videos, as well as get help from my friends on Instagram, but finding my way around my very first crochet pattern was easy enough and I ended up with a set of three nesting baskets that I’m pretty proud of.

nestingbowls.jpg

I crocheted the baskets using homemade fabric yarn, which I wrote a blog post about a couple months ago. I found the tutorial for making the yarn and the pattern for the nesting baskets on the same blog, Petals to Picots, by Kara. The links to her blog and the specific tutorials will be listed at the bottom of this post. I found the pattern pretty clear, considering it was the first thing I’ve ever made with crochet. One step at the beginning of the pattern confused me, which was starting a circle of stitches, but that was just due to my lack of crochet skills. As soon as I figured that step out the rest of the project came together very smoothly.

DSC_01202.jpg

I’ve been using my nesting baskets to hold gift wrapping supplies for the time being, but you could also use them to hold wrapped candies, knitting supplies, or have them sitting by the door to hold your keys and wallet. What was the first thing you ever crocheted? Did you jump right in to a pattern or did you perfect your skills first?

Making Fabric into Yarn: http://www.petalstopicots.com/2012/03/green-crocheting-making-fabric-into-yarn/

Fabric Nesting Baskets Pattern: http://www.petalstopicots.com/2012/03/green-crocheting-fabric-nesting-baskets-pattern/

Knit Necklace Tutorial

As I become more obsessed with knitting I’m always trying to think of new ways to incorporate it into my life, so I thought it would be fun to make a knitted necklace. I’ve included the instructions in this blog post, but the pattern will also be available on Ravelry. If you would prefer the pdf version follow the link under the patterns tab above.

KnitNecklace.jpg

What You'll Need:

  • Fingering weight yarn (I used Knit Picks Comfy Fingering in Ivory)
  • Size 2 mm needles (US 0)
  • Chain
  • Lobster clasp
  • 4 jump rings
  • Needle nose pliers (with wire cutters)

Gauge:

In my opinion gauge is not important for this project, because it isn’t something that needs to be sized correctly. Instead of knitting a swatch just knit the triangle for the necklace, and if you aren’t happy with the size adjust your tension. This is a quick project to knit, so knitting a swatch would take about the same time as knitting the triangle anyway.

Abbreviations:

  • sts - stitches
  • ssk - slip, slip, knit
  • k2tog - knit two together
CSC_0029.JPG

Directions:

  1. Cast on 13 sts
  2. Purl 1 row
  3. ssk, knit until there’s 2 sts left, k2tog
  4. Purl 1 row
  5. Repeat steps 3&4 until 3 sts remain (knit side facing you)
  6. ssk, knit 1
  7. Pass 1 stitch over the other, and sew in all loose ends
  8. Sew a length of chain around the three edges of the triangle
  9. Attach jump rings to the top two corners of the triangle
  10. Attach a length of chain to each jump ring (cut chain so it’s the length of necklace you want)
  11. Attach a jump ring and a lobster clasp to the end of one chain
  12. Attach a jump ring to the end of the other chain

You’re done! Now you can wear a knitted piece with every outfit, even though it’s the middle of the summer and too hot for most knitted accessories like scarves and hats. I hope you enjoyed this tutorial!

Planning a Yarn Bomb

A couple years ago I saw an ad in a magazine that featured a knitter and a bike she had yarn bombed. I didn't know at the time what it was even called or that yarn bombing was a popular form of street art but I thought that the bike was so cool. I wanted to do my own bike but I definitely didn't have the skills to do that at the time and I'm not so sure my parents would have approved anyway, but the idea stuck with me and every so often I would come across pictures on the internet of trees, fence posts and signs all covered in cozy getups. I think yarn bombing is the most fun form of street art I’ve seen and I know I’m not the only one who thinks this because it’s only getting more common.

A yarn bomb project has been something that I've wanted to do for a while so I decided to make it one of my summer goals. By the end of the summer I will have created and installed my very own yarn bomb piece. I'm not really sure if this is a big goal or not, I guess it depends on what I plan on yarn bombing, but my hope is that my first yarn bomb is a big one, and something that I'm really proud of. I'm not really a very fast knitter so doing something like this on my own would take ages, which is why I've been trying to enlist my friends to help me out. I think a project like this is the perfect one to do as a group, because everyone gets to help out and it doesn't matter if pieces aren't perfect  or if the styles of different pieces don't match up. I think that's part of what makes some yarn bombs so beautiful.

The yarn bowl I set out in the living room.

I put this basket on the table in my house in the hope that some of the girls I live with would be tempted to knit something to contribute. The only downside is that I'm sure I'll have tons of little squares to sew together, but I'm okay with that. I'm hoping this yarn bomb ends up looking like a big quilt, with lots of different things to look at on it. 

I've also been way to obsessed with knitting flowers lately so I think some of those will make it on the yarn bomb. I think learning to crotchet is in my near future because so many of the patterns I’ve seen for flowers are crochet patterns. I’ve been having a hard time finding many knitted ones. My favourite so far have been sunflowers (which also happen to be my favourite flowers in real life). One of our ideas for the yarn bomb was to do a swing set. Each of the seats could be covered, and then the chains of the swing would have a garland of flowers wrapped around it. Maybe that's too complicated, I just really want these flowers to make it onto whatever we decide to do.

So keep an eye out for a blog post that will be out by the end of the summer about how this project turned out. Have you ever contributed to a yarn bomb? I'd love to hear about it below!

The pattern I used is available here: http://yok2tog.tumblr.com/post/18680929985/sunflowerbabyhat1

The pattern I used is available here: http://yok2tog.tumblr.com/post/18680929985/sunflowerbabyhat1